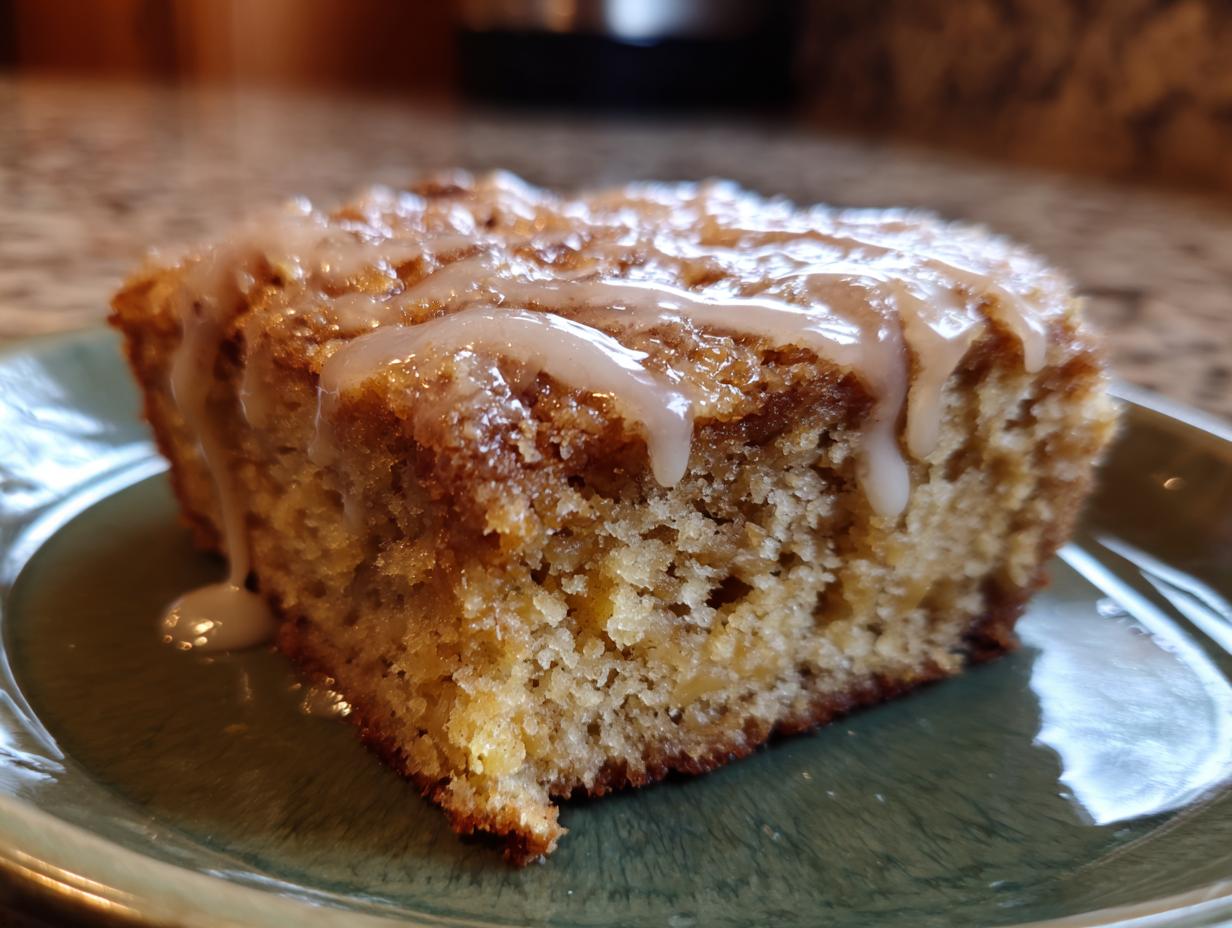

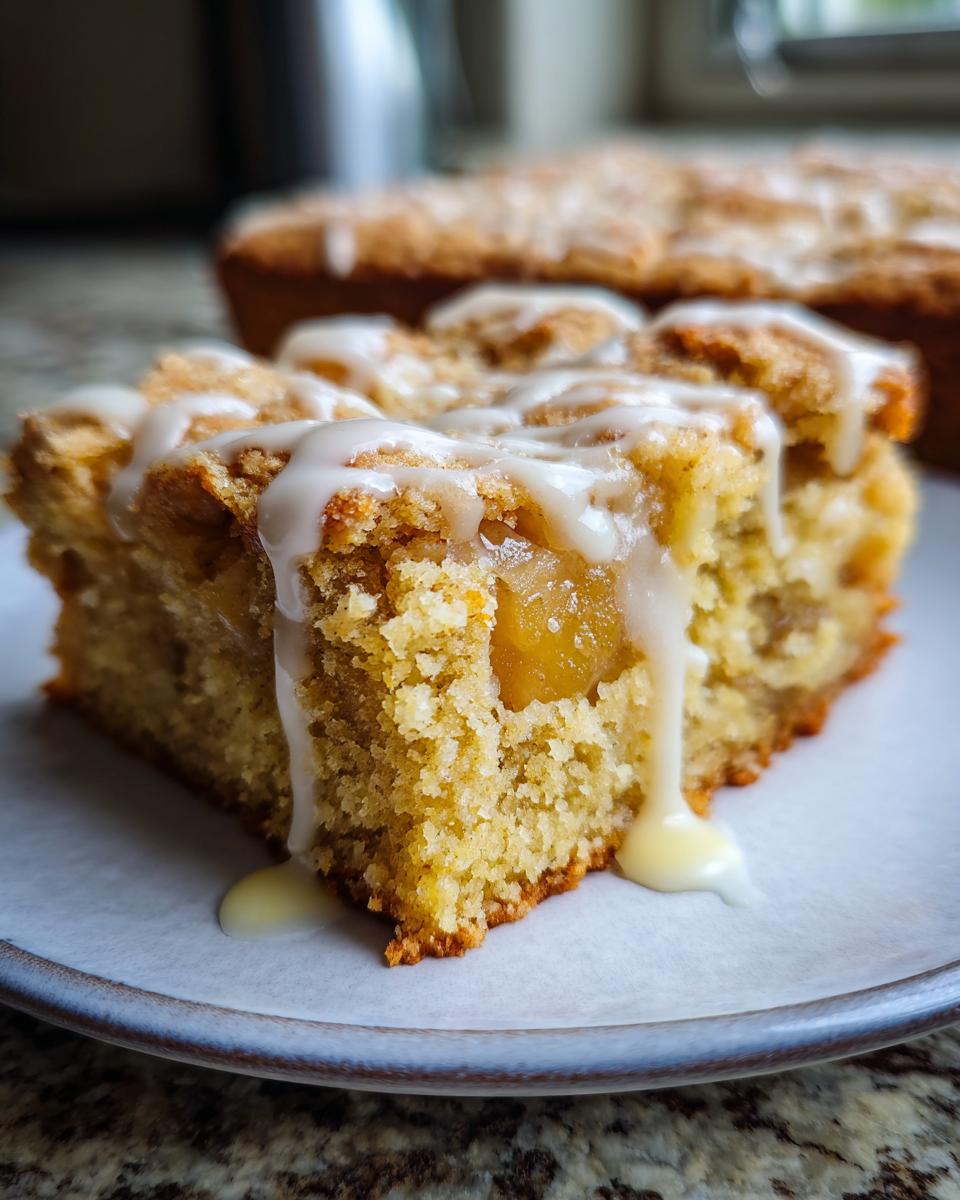
Oh, is there anything better than that cozy feeling of fall baking? For me, it’s all about that moment the oven door opens and this incredible scent of nutty brown butter and sweet apples fills the kitchen. That’s exactly what happens with these brown butter apple blondies! They’re honestly my ultimate treat when the leaves start to turn. Forget cakey – these bars are perfectly chewy, packed with chunks of tender apple, and just kissed with that amazing brown butter flavor. And the simple glaze? Chef’s kiss! My grandma used to make something similar, and baking these always brings back those sweet autumn memories. As a home cook who’s tested countless recipes, I can tell you this one is a winner – a true keeper! You can read more about my kitchen philosophy and follow along on Facebook for even more homey goodness!
- Why You'll Love These Chewy Brown Butter Apple Blondies
- Ingredients for Perfect Brown Butter Apple Blondies
- How to Brown Butter Safely for Nutty Flavor
- Step-by-Step Guide to Making Brown Butter Apple Blondies
- Tips for Preventing Soggy Apple Bars
- Pan Size Conversion for Blondies
- Ingredient Notes and Substitutions for Apple Blondies
- FAQ: Your Brown Butter Apple Blondies Questions Answered
- Nutritional Information for Brown Butter Apple Blondies
- Serving and Storage Suggestions
- Share Your Brown Butter Apple Blondies Creations!
Why You’ll Love These Chewy Brown Butter Apple Blondies
Honestly, what’s not to love here? These brown butter apple blondies are just pure autumn magic. If you’re looking for that perfect chewy texture, you’ve found it! The secret weapon is definitely the browned butter – it adds this incredible nutty depth that you just can’t get any other way. Plus, you get sweet chunks of apple in every bite, all tied together with a simple, sweet glaze. They’re super easy to whip up, making them perfect for a bake sale or just a cozy afternoon treat. You can find more of my favorite dessert recipes right here!
Ingredients for Perfect Brown Butter Apple Blondies
Alright, let’s get down to business! Having the right ingredients is super important for these brown butter apple blondies. You want that perfect chewy texture and all those amazing fall flavors to really shine through. Trust me, using good quality ingredients makes all the difference. Here’s what you’ll need:
- 1 cup (that’s two sticks, folks!) unsalted butter – this is for browning, so don’t skimp!
- 1 ½ cups packed light brown sugar – makes them so wonderfully chewy and sweet.
- 2 big, beautiful large eggs – they bind everything together.
- 1 teaspoon vanilla extract – just for that extra little flavor boost.
- 1 ½ cups all-purpose flour – our base!
- 1 teaspoon baking soda – helps with that chewiness.
- ½ teaspoon salt – balances all that sweetness.
- 1 ½ cups chopped apples – about 2 medium ones. I’ll tell you my favorite kind to use later!
- ½ cup chopped pecans – totally optional, but oh-so-good if you like a little crunch.
- For the Glaze:
- 1 cup powdered sugar – for that sweet drizzle.
- 2-3 tablespoons milk – just enough to make it pourable.
- ½ teaspoon vanilla extract – for a little extra zing in the glaze!
And hey, if you’re looking for other amazing fall-flavored recipes, you should check out my homemade peach jam – it’s a keeper!
How to Brown Butter Safely for Nutty Flavor
Okay, listen up, because this is where the magic *really* happens for our brown butter apple blondies! Browning butter sounds fancy, but it’s actually super simple, and it gives us this fabulous nutty, toasty flavor that’s just irresistible. It’s one of my favorite little tricks, kind of like how I use it in my cowboy butter or my famous brown butter chocolate chip cookies! First things first, grab a light-colored saucepan. Why light-colored? Because you need to SEE what’s going on in there! You want to melt your butter over medium heat. Once it’s all liquid and bubbly, just keep watching it. Swirl the pan every so often – this helps it cook evenly. You’ll see little milk solids start to form at the bottom and turn golden. Don’t panic! That’s exactly what we want. Keep going until those solids turn a lovely amber color and you get this amazing, toasty, nutty smell. Seriously, it’s the best aroma. But – and this is key – watch it like a hawk! It goes from perfectly browned to burnt in about thirty seconds. I once totally burned a whole stick, thinking I had more time – oops! Once it’s that perfect nutty brown, pour it into a heatproof bowl right away to stop the cooking process. It’s that easy!
Step-by-Step Guide to Making Brown Butter Apple Blondies
Alright, let’s get these amazing brown butter apple blondies into the oven! I promise, the steps are totally doable, and the payoff is SO worth it. Remember how we browned the butter? That’s the first real flavor bomb! Now, we’ll take that treasure and build on it. It’s all about not overworking things, especially after adding the flour, to keep them perfectly chewy. Think of it like mixing a cake – you want it just combined, not beaten to death! Don’t worry if the batter seems a little thick or chunky with the apples; that’s exactly what we’re going for. It’s a bit different from my apple cinnamon overnight oats, but just as delicious in its own way!
Preparing Your Baking Pan and Oven
First things first, let’s get our oven preheated. We want it nice and toasty at 350°F (175°C). While that’s happening, grab your 9×13 inch baking pan. You can either grease and flour it really well to make sure nothing sticks, or my favorite trick is to line it with parchment paper. Just let the paper hang over the sides like little handles – it makes lifting the blondies out so much easier later! Trust me, this step saves so much hassle when it’s time to cut them.
Mixing the Blondie Batter
Okay, grab a big bowl! Pour in that gorgeous, nutty browned butter you made. Now, dump in all that lovely packed light brown sugar and give it a good whisk until it’s all combined and looks nice and creamy. Next, we’ll add the eggs, one at a time, beating them in after each addition. Then, stir in that splash of vanilla extract. In a separate little bowl, take a moment to whisk together your flour, baking soda, and salt. Now, here’s the important part: gradually add the dry ingredients to your wet ingredients. Mix until they’re *just* combined. Seriously, don’t go crazy with the mixing here! Overmixing is the enemy of chewy blondies. Once it’s *barely* mixed, gently fold in your chopped apples and the pecans, if you’re using them. You just want to distribute them evenly, not mash everything up.
Baking and Cooling Your Brown Butter Apple Blondies
Carefully spread that glorious batter evenly into your prepared pan. Now, pop it into that preheated oven for about 25 to 30 minutes. How do you know when they’re ready? I always use the toothpick test. Stick a toothpick right into the center. If it comes out with some moist crumbs attached – not wet batter, but not totally clean either – they’re perfect! The edges should be a nice golden brown. Once they’re out, please, *please* resist the urge to cut into them right away! Let them cool in the pan for at least 15 minutes. This is crucial for them to set up properly and prevents them from becoming a crumbly mess when you slice them. I learned this the hard way a few times!

Creating and Applying the Drizzle Glaze
While those lovely blondies are cooling down, let’s whip up a super simple glaze. Grab a small bowl and whisk that powdered sugar, add your milk (start with 2 tablespoons and add a tiny bit more if needed), and that little bit of vanilla extract. Whisk it all together until it’s smooth and pourable. You want it thin enough to drizzle, but not so thin that it just runs right off. Once the blondies have cooled for a bit – and by bit, I mean at least 30 minutes, or even completely if you can wait! – grab a spoon or a fork and drizzle that beautiful glaze all over the top. Let the glaze set up for another 10-15 minutes before you slice into them. That little bit of sweet, vanilla-y topping just takes them over the top!
Tips for Preventing Soggy Apple Bars
Oh, soggy apple bars are the absolute worst, aren’t they? We’ve all been there – you bite into a bar that’s just… wet. It’s a total bummer! But don’t you worry, I’ve figured out a few tricks to make sure our brown butter apple blondies are perfectly chewy and never soggy. For starters, make sure those apples are chopped into nice, uniform pieces, about the size of a small grape. If you have big chunks, they release TOO much moisture. Also, pack the batter into that pan, but don’t like, slam it down. We want it even, but not squished too much. The biggest thing, though? Don’t overbake them! Seriously. When that toothpick comes out with moist crumbs, that’s your cue. Remember my apple cider donuts? It’s a similar idea – you want that tender interior. And like I said before, letting them cool properly is key. That little bit of patience makes all the difference!
Pan Size Conversion for Blondies
So, what if you don’t have a 9×13 inch pan handy? Don’t fret! You can totally make these brown butter apple blondies in different sizes. If you use a smaller 9×9 inch pan, your bars will be thicker, which is awesome, but they’ll need a bit more time in the oven – maybe an extra 5-10 minutes. Keep an eye on them! If you opt for a larger, shallower pan, they might bake a little faster and be a bit thinner. The key is always that toothpick test – looking for those moist crumbs! It’s a similar idea to adapting recipes for different pans when I make my gooey blondies. Just watch your little flavor bombs closely!
Ingredient Notes and Substitutions for Apple Blondies
Okay, let’s chat a little more about the ingredients for these glorious brown butter apple blondies! Sometimes a little tweak can make all the difference, right? Like, when I’m making my gluten-free brownies, I’m always thinking about the best flour substitutes. For these blondies, the type of apple you use really matters. My personal faves are Honeycrisp or Fuji apples because they’re a little tart and hold their shape perfectly when baked. Granny Smith is also great if you like a bit more tang! Just make sure they’re chopped up nicely so they bake evenly through the bars. Pecans are lovely for a little crunch, but if nuts aren’t your thing, or you have allergies, just leave them out! They’re still fantastic without them. You could also try walnuts if you have them on hand, maybe chopped a bit smaller. I haven’t personally tried dairy-free substitutes with this recipe, but you might be able to experiment with a good quality vegan butter, just be sure it’s meant for baking! It’s kind of like how I always adjust my chicken tortilla soup based on what I have in the fridge.
FAQ: Your Brown Butter Apple Blondies Questions Answered
Got questions about these amazing brown butter apple blondies? I totally get it! You want them to be just right – chewy, packed with flavor, and not a soggy mess. Let’s dive into some common things people ask, like how to get that perfect texture or why we’re so fussy about cooling. It’s like when I’m figuring out the best way to get my pumpkin bread just right!
How do I ensure my apple blondies are chewy and not cakey?
This is probably my most asked question! The secret to chewy blondies is all about two things: not overmixing the batter once you add the flour, and not overbaking them. When you do the toothpick test, you want to see a few moist crumbs clinging to it, not a completely clean toothpick. A slightly underbaked center is actually what you’re aiming for to get that perfect chewy texture!
What’s the best way to prevent soggy apple bars?
Nobody wants a soggy bar! A few little things help here. First, make sure your apples are chopped into small, even pieces – no giant chunks releasing tons of juice. Also, resist the urge to bake them too long! That slight underbaking I mentioned is key. Apples naturally release moisture as they bake, so getting that timing just right is super important. And, as always, letting them cool completely before slicing helps the structure set up, avoiding any gooiness.
Can I use a different pan size for these brown butter apple blondies?
Totally! If you use a smaller pan, like a 9×9 inch square, your blondies will be thicker, which is pretty awesome. Just know they’ll probably need a bit longer in the oven, maybe an extra 5 to 10 minutes. Keep an eye on them and use that toothpick test! If you use a larger or shallower pan, they might bake faster and be a little thinner, but the flavor will still be there. It’s all about watching for those visual cues!
How long should I cool the blondies before slicing?
This is critical for clean cuts! You really need to let them cool in the baking pan for at least 15 to 30 minutes after they come out of the oven. This gives them time to firm up. Then, transfer them to a wire rack to cool completely. Trying to slice hot blondies is a recipe for disaster – they’ll just fall apart. Patience, my friends!
Nutritional Information for Brown Butter Apple Blondies
Now, I always like to be upfront – all the amazing flavors in these brown butter apple blondies do come with a little something for the calorie counter! Based on my best estimates for a 16-serving batch, each bar has about 350 calories. You’ll also find around 18g of fat (with 10g of that being saturated), 3g of protein, 45g of carbohydrates, and a good chunk of sugar at about 30g. Remember, these numbers are just an estimate, and they can change depending on the exact apples you use or if you add different nuts! I always say, it’s better to think of them as a delicious treat that’s worth every bite, kind of like my famous keto cheesecake. Enjoy them!
Serving and Storage Suggestions
These brown butter apple blondies are just divine on their own, maybe with a nice hot mug of pumpkin spice latte or a cup of cozy tea. They’re seriously perfect for a fall bake sale, or just to have on hand when that afternoon craving hits. If you happen to have any leftovers (which is rare in my house!), just pop them into an airtight container. They’ll keep beautifully at room temperature for about 3-4 days. If it’s really warm where you are, the fridge is a good option too, but let them warm up a bit before you eat them. Honestly, they’re still pretty darn tasty even a few days later, kind of like my apple pie dump cake!
Share Your Brown Butter Apple Blondies Creations!
Now that you’ve hopefully whipped up a batch of these incredible brown butter apple blondies, I’d absolutely LOVE to hear all about it! Did they turn out perfectly chewy? Did the brown butter flavor blow you away? Please, spill the beans in the comments below! You can also rate the recipe right under that. And if you snap a picture (which I bet you did!), tag me on social media – I can’t wait to see your beautiful baking creations! If you ever need to get in touch, feel free to use my contact page!
PrintBrown Butter Apple Blondies
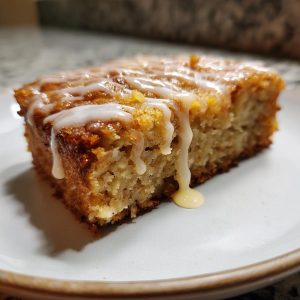
Chewy apple blondies made with browned butter and a simple glaze. These bars are perfect for fall baking.
- Prep Time: 20 min
- Cook Time: 30 min
- Total Time: 50 min
- Yield: 16 servings 1x
- Category: Dessert
- Method: Baking
- Cuisine: American
- Diet: Vegetarian
Ingredients
- 1 cup (2 sticks) unsalted butter
- 1 ½ cups packed light brown sugar
- 2 large eggs
- 1 teaspoon vanilla extract
- 1 ½ cups all-purpose flour
- 1 teaspoon baking soda
- ½ teaspoon salt
- 1 ½ cups chopped apples (about 2 medium)
- ½ cup chopped pecans (optional)
- For the Glaze:
- 1 cup powdered sugar
- 2–3 tablespoons milk
- ½ teaspoon vanilla extract
Instructions
- Preheat your oven to 350°F (175°C). Grease and flour a 9×13 inch baking pan, or line with parchment paper.
- Melt the butter in a light-colored saucepan over medium heat. Continue cooking, swirling the pan occasionally, until the butter turns a nutty brown color and smells fragrant. Watch carefully to prevent burning. Pour the browned butter into a heatproof bowl to stop the cooking.
- In a large bowl, whisk together the browned butter and brown sugar until well combined.
- Beat in the eggs one at a time, then stir in the vanilla extract.
- In a separate medium bowl, whisk together the flour, baking soda, and salt.
- Gradually add the dry ingredients to the wet ingredients, mixing until just combined. Do not overmix.
- Fold in the chopped apples and pecans (if using).
- Spread the batter evenly into the prepared baking pan.
- Bake for 25-30 minutes, or until a toothpick inserted into the center comes out with moist crumbs attached. The edges should be golden brown.
- Let the blondies cool in the pan for at least 15 minutes before removing or cutting.
- While the blondies cool, prepare the glaze. In a small bowl, whisk together the powdered sugar, milk, and vanilla extract until smooth. Add more milk if needed to reach your desired drizzling consistency.
- Drizzle the glaze over the cooled blondies. Let the glaze set before slicing and serving.
Notes
- To properly brown butter, use a light-colored pan so you can easily see the color change.
- Ensure your apples are chopped into small, uniform pieces for even baking.
- For a chewier blondie, do not overbake. The center should still be slightly soft when you remove them from the oven.
- Allow the blondies to cool completely before slicing for clean cuts.
- You can substitute other nuts like walnuts or omit them entirely.
Nutrition
- Serving Size: 1 bar
- Calories: 350
- Sugar: 30g
- Sodium: 150mg
- Fat: 18g
- Saturated Fat: 10g
- Unsaturated Fat: 8g
- Trans Fat: 0g
- Carbohydrates: 45g
- Fiber: 2g
- Protein: 3g
- Cholesterol: 70mg