
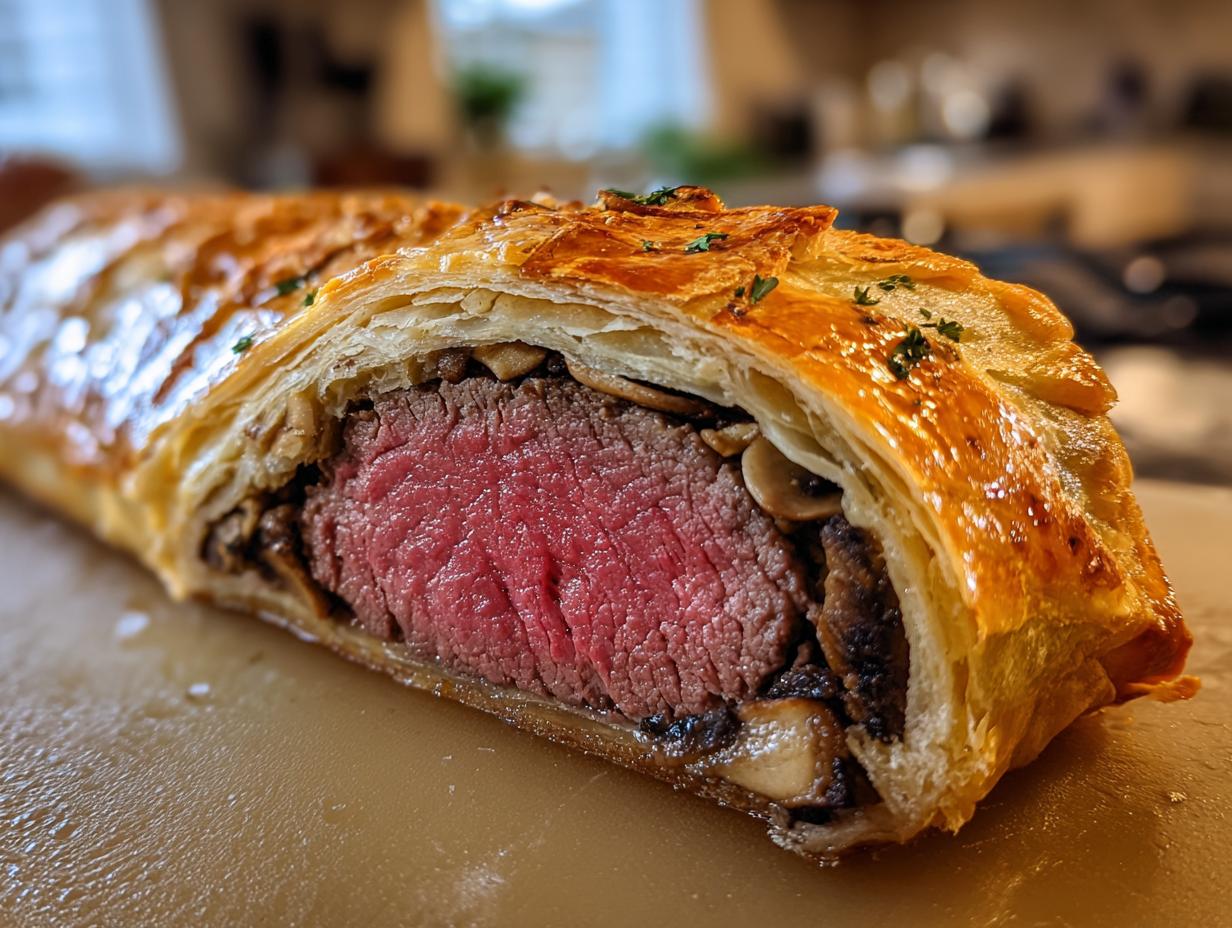

Okay, gather ’round, because we’re about to tackle a dish that just *screams* celebration: the legendary Beef Wellington! Seriously, is there anything more impressive for a holiday feast or a milestone anniversary than a perfectly cooked beef tenderloin wrapped in golden, flaky puff pastry? It’s the kind of meal that makes your guests’ eyes go wide and your heart sing. I remember the first time I made it for my family – I was a nervous wreck, convinced I’d mess it up, but seeing their faces light up when they took that first bite? Pure magic! This isn’t just a recipe; it’s your roadmap to creating that show-stopping moment. You can learn more about my cooking philosophy and why these recipes are so special to me. Trust me, with this guide, you’ll nail your very own spectacular Beef Wellington, and you’ll wonder why you ever thought it was too intimidating to try. It’s all about a few key steps, and we’ll go through them together! Don’t forget to follow along on Facebook for more kitchen fun!
- Why This Beef Wellington Recipe is a Keeper
- Essential Ingredients for Your Beef Wellington
- Expert Tips for Making Perfect Beef Wellington
- Step-by-Step Instructions: How to Make Beef Wellington
- Equipment Needed for Your Beef Wellington
- Serving and Storing Your Beef Wellington
- Frequently Asked Questions About Beef Wellington
- Estimated Nutritional Information
Why This Beef Wellington Recipe is a Keeper
So, why this Beef Wellington recipe? Well, let me tell you, it’s got all the good stuff. You’ll love that it breaks down a fancy-pants meal into totally doable steps—no need to feel intimidated anymore!
- Super reliable instructions that actually work.
- You’ll get that gorgeous, golden puff pastry you dream about.
- The flavors? Oh my goodness, they’re so incredibly rich and satisfying.
- It’s practically guaranteed to impress everyone at your table!
This recipe is all about making you feel like a culinary rockstar, with a delicious reward at the end.
Essential Ingredients for Your Beef Wellington
Alright, let’s talk about what you’ll need to make this showstopper! For a truly spectacular Beef Wellington, you really can’t skimp on quality. It makes all the difference, trust me. You’ll want to grab a beautiful, center-cut beef tenderloin – about 2 pounds should do it. Make sure it’s nice and trimmed!
Then comes the magic filling. We’re talking 1 pound of cremini mushrooms, chopped up super fine, along with 2 finely chopped shallots and a couple of minced garlic cloves. A splash of dry white wine and some fresh thyme leaves are key for that earthy, savory punch. Don’t forget salt and freshly ground black pepper – they’re essential for everything!
For that perfect wrapper, you’ll need about 4 ounces of thinly sliced prosciutto. This adds an amazing layer of flavor and helps keep everything together. And of course, the star of the show besides the beef: a sheet of thawed puff pastry. I like the really good store-bought kind; it saves so much hassle! Lastly, you’ll need one large egg for the wash and a tablespoon of Dijon mustard to brush on the beef before it goes into its pastry hug. Simple ingredients, really, but they come together to make something truly incredible!
Expert Tips for Making Perfect Beef Wellington
Alright, let’s get serious for a moment because making an absolutely killer Beef Wellington isn’t just throwing stuff in a pan! It’s about a few super important steps that make all the difference between “meh” and “WOWZA!” These are the little secrets that elevate your dish from good to, well, a definite keeper. Follow these, and you’ll be looking like a pro. You can find more of my culinary adventures and tips over on the blog!
Achieving the Perfect Sear for Beef Wellington
First things first: that beef tenderloin needs a gorgeous, deep sear. Don’t skip this! Get your skillet screaming hot with a little olive oil. Seriously, you want it *hot*. Then, sear that beautiful piece of meat on all sides until it’s got a rich, brown crust. We’re not cooking it through here, just building amazing flavor and color. This step is absolutely crucial for the final taste of your Beef Wellington, giving it that depth you just can’t get any other way. Let it cool completely afterward – patience is key!

Mastering the Mushroom Duxelles for Beef Wellington
Now, for the duxelles – that finely chopped mushroom mixture. The absolute *most* important thing here is to cook out all the moisture. And I mean ALL of it! You want those mushrooms to release their liquid, and then for that liquid to completely evaporate. Cook them down until they’re almost dry, adding your shallots, garlic, wine, and thyme. This isn’t just for flavor, though it adds tons! It also creates a barrier between the pastry and the meat, helping to prevent any dreaded soggy bottom on your Beef Wellington. Nobody wants a soggy bottom, right?
The Art of Wrapping Your Beef Wellington
This is where things get really fun – and a little bit like wrapping a present for royalty! You’ll lay out your prosciutto, spread that glorious mushroom duxelles evenly over it, and then carefully place your cooled beef tenderloin on top. Now, grab your plastic wrap! Use it to help you roll everything up super tightly into a compact log. Twist those ends like a peppermint stick and chill it. This tight wrap is what gives your Beef Wellington its gorgeous, uniform shape and ensures everything stays put when it’s time to wrap it in pastry. It really is an art!

Step-by-Step Instructions: How to Make Beef Wellington
Alright, let’s get down to business and build this magnificent Beef Wellington! It might seem fancy, but I promise, if you follow these steps, you’ll be golden. Remember, patience is your friend here, especially with cooling times!
- First things first, get that oven preheating to 400°F (200°C). You want it nice and hot when your Wellington is ready to go in.
- Grab your beautiful beef tenderloin and season it generously all over with salt and pepper. Don’t be shy!
- Heat up a large, oven-safe skillet with about 2 tablespoons of olive oil over high heat. Sear that tenderloin on every single side until it’s got a deep, gorgeous brown crust. We’re talking about 2 minutes per side, tops. Then, take it out and let it cool completely. This is important!
- While the beef is cooling, let’s make your mushroom duxelles. In the same skillet (no need to clean it!), add your finely chopped mushrooms, shallots, and garlic. Cook this over medium-high heat, stirring now and then, until all the liquid from the mushrooms has cooked off and evaporated. It takes about 10-15 minutes, so keep an eye on it!
- Now, add that quarter cup of dry white wine and your fresh thyme leaves to the mushroom mix. Cook it down until all the wine is gone. Season this with salt and pepper to your liking. Let this cool completely too.
- Time for wrapping magic! Lay out a big piece of plastic wrap on your counter. Arrange your prosciutto slices on it, overlapping them slightly to make a rectangle that’s big enough to completely cover your beef tenderloin.
- Spread that cooled mushroom duxelles mixture evenly all over the prosciutto layer. You want a nice, even blanket.
- Place your cooled beef tenderloin right there at one end of that prosciutto-duxelles rectangle.
- Now, using the plastic wrap to help you, tightly roll the prosciutto and duxelles around the beef. Really cinch it up to make a nice, compact log. Twist the ends of the plastic wrap really tight, like you’re closing a candy wrapper, and pop this log in the fridge for at least 30 minutes. This helps it firm up and hold its shape beautifully.
- Okay, on a lightly floured surface, roll out your thawed puff pastry just a little bit – you want it to be big enough to wrap that beef log. Carefully unwrap the chilled beef. Brush the entire surface of the beef with that Dijon mustard.
- Place the mustard-coated beef log, seam-side down, onto the puff pastry. Trim off any excess pastry that you don’t need around the sides.
- Now, carefully wrap the puff pastry all around the beef, making sure to seal those seams tightly. You can use a little egg wash on the edges to help things stick. Trim off any extra pastry. If you want to get fancy, you can use the leftover pastry scraps to decorate the top!
- Place your beautiful, pastry-wrapped Beef Wellington, seam-side down, onto a baking sheet lined with parchment paper. Give the whole thing a nice, even coating with your beaten egg wash.
- This is the finishing touch: use a sharp knife to lightly score the top of the pastry. Just gentle lines, don’t cut all the way through! This helps it vent and looks pretty.
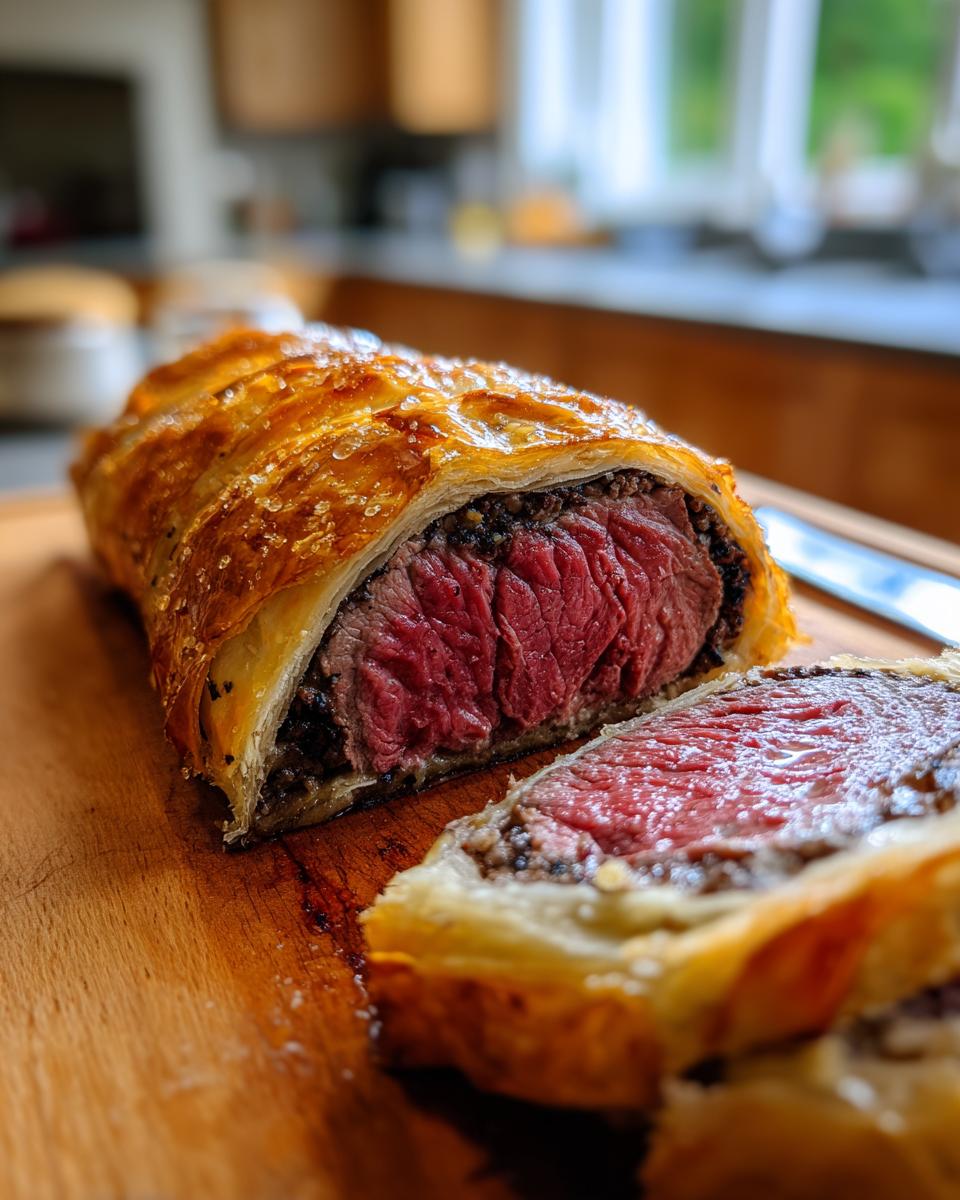
- Bake in your preheated oven for about 35-45 minutes, or until the pastry is a beautiful golden brown and your meat thermometer reads 125°F (52°C) in the thickest part of the beef for a perfect medium-rare.
- Once it’s out of the oven, THIS IS CRUCIAL: let your Beef Wellington rest for a good 10 minutes before you even think about slicing it. This lets the juices redistribute, making it super tender and moist. Then, slice it up and wow your guests! You can find more amazing main dishes here.
Equipment Needed for Your Beef Wellington
To make this impressive Beef Wellington, you’ll want a few key players in your kitchen. First, a good, sturdy oven-safe skillet is a must for searing that beef perfectly. You’ll also need a sharp knife for slicing and scoring – precision is key here! A baking sheet lined with parchment paper will be your best friend for easy cleanup and preventing sticking. Oh, and don’t forget a meat thermometer; it’s your secret weapon for knowing when that beef is just right inside!
Serving and Storing Your Beef Wellington
Okay, you’ve done it! Your Beef Wellington is baked to golden perfection. Now, the absolute *most* important thing before you slice into this masterpiece is letting it rest. Seriously, give it at least 10 minutes! This lets all those delicious juices settle back into the meat, ensuring every bite is tender and moist. Cut it into thick slices and serve it with your favorite sides – maybe some creamy mashed potatoes or roasted veggies? You can find more ideas for side dishes here.

Got leftovers? Lucky you! Just wrap the slices tightly in plastic wrap and then stash them in an airtight container in the fridge for up to 2 days. To reheat, we want to be gentle. Pop them in a moderate oven (around 300°F or 150°C) for about 10-15 minutes, just until warmed through. Avoid the microwave if you can; it can make the pastry a bit sad.
Frequently Asked Questions About Beef Wellington
Making a show-stopping Beef Wellington can feel like a big undertaking, so it’s totally normal to have questions! Here are a few I get asked a lot, and hopefully, they’ll help you feel super confident about tackling this classic. Can I make Beef Wellington ahead of time? Yes, you absolutely can! You can wrap the beef in the prosciutto and duxelles and chill it for up to a day. You can even wrap it in the puff pastry and keep it chilled for a few hours before baking. Just be sure to let it sit out for about 20 minutes before baking.
What’s the best cut of beef for Beef Wellington? You really want a beef tenderloin, also known as filet mignon. It’s super tender and cooks evenly, which is exactly what you need for this dish. Make sure you get the center cut for the best shape and quality!
How do I prevent soggy pastry on my Beef Wellington? This is probably the most common worry! My biggest tip is to make sure your mushroom duxelles are cooked down until they’re really dry – no excess moisture allowed! Also, chilling the beef log after wrapping it in prosciutto and duxelles helps firm everything up. And for good measure, a good layer of prosciutto and a nice, even puff pastry wrap act as barriers. It’s all about managing moisture!
Estimated Nutritional Information
Okay, so let’s talk numbers! Keep in mind these are just *estimates*, and they can swing a bit depending on the exact ingredients you use, like the brand of puff pastry or how lean your beef tenderloin is. This Beef Wellington is definitely a treat, packed with protein and rich flavors. But that’s okay, because we’re talking about a special occasion dish here, right? Enjoy every bite!
PrintSpectacular Beef Wellington: 1 Perfect Recipe
A detailed guide to making a showpiece Beef Wellington, perfect for holidays and celebrations. This recipe ensures a tender beef tenderloin encased in mushroom duxelles, prosciutto, and flaky puff pastry, baked to a perfect medium-rare.
- Prep Time: 45 min
- Cook Time: 45 min
- Total Time: 90 min
- Yield: 6 servings 1x
- Category: Main Course
- Method: Baking
- Cuisine: American
- Diet: Vegetarian
Ingredients
- 1 (2-pound) beef tenderloin, center cut
- 2 tablespoons olive oil
- 1 pound cremini mushrooms, finely chopped
- 2 shallots, finely chopped
- 2 cloves garlic, minced
- 1/4 cup dry white wine
- 2 tablespoons fresh thyme leaves
- Salt and freshly ground black pepper
- 4 ounces prosciutto, thinly sliced
- 1 sheet (17.3 ounces) puff pastry, thawed
- 1 large egg, beaten
- 1 tablespoon Dijon mustard
Instructions
- Preheat your oven to 400°F (200°C).
- Season the beef tenderloin generously with salt and pepper.
- Heat olive oil in a large oven-safe skillet over high heat. Sear the tenderloin on all sides until deeply browned, about 2 minutes per side. Remove from skillet and let cool completely.
- While the beef cools, prepare the duxelles. In the same skillet, add the chopped mushrooms, shallots, and garlic. Cook over medium-high heat, stirring occasionally, until the mushrooms release their liquid and it evaporates, about 10-15 minutes.
- Add the white wine and thyme to the mushroom mixture. Cook until the wine has evaporated. Season with salt and pepper. Let cool completely.
- Lay a large piece of plastic wrap on your work surface. Arrange the prosciutto slices in an overlapping pattern to form a rectangle large enough to wrap the tenderloin.
- Spread the cooled mushroom duxelles evenly over the prosciutto.
- Place the cooled beef tenderloin at one end of the prosciutto and duxelles.
- Using the plastic wrap to help, tightly roll the prosciutto and duxelles around the beef, creating a compact log. Twist the ends of the plastic wrap to secure and refrigerate for at least 30 minutes to firm up.
- On a lightly floured surface, roll out the puff pastry sheet slightly. Remove the plastic wrap from the beef log. Brush the beef with Dijon mustard.
- Place the beef log, seam-side down, onto the puff pastry. Trim any excess pastry.
- Wrap the puff pastry around the beef, sealing the seams tightly. Trim any excess pastry. You can decorate the top with pastry scraps if desired.
- Place the wellington, seam-side down, on a baking sheet lined with parchment paper. Brush the entire surface with the beaten egg.
- Score the top of the pastry lightly with a sharp knife, being careful not to cut all the way through.
- Bake for 35-45 minutes, or until the pastry is golden brown and the internal temperature of the beef reaches 125°F (52°C) for medium-rare.
- Let the Beef Wellington rest for 10 minutes before slicing and serving.
Notes
- For a richer flavor, you can use foie gras pâté instead of mushroom duxelles.
- Ensure your puff pastry is very cold when you work with it to prevent it from becoming sticky.
- Chilling the wrapped beef before encasing it in pastry helps maintain its shape and prevents the pastry from becoming soggy.
- Use a meat thermometer to accurately check the internal temperature of the beef for perfect doneness.
Nutrition
- Serving Size: 1 slice
- Calories: 750
- Sugar: 3
- Sodium: 600
- Fat: 45
- Saturated Fat: 18
- Unsaturated Fat: 27
- Trans Fat: 0
- Carbohydrates: 30
- Fiber: 2
- Protein: 55
- Cholesterol: 180