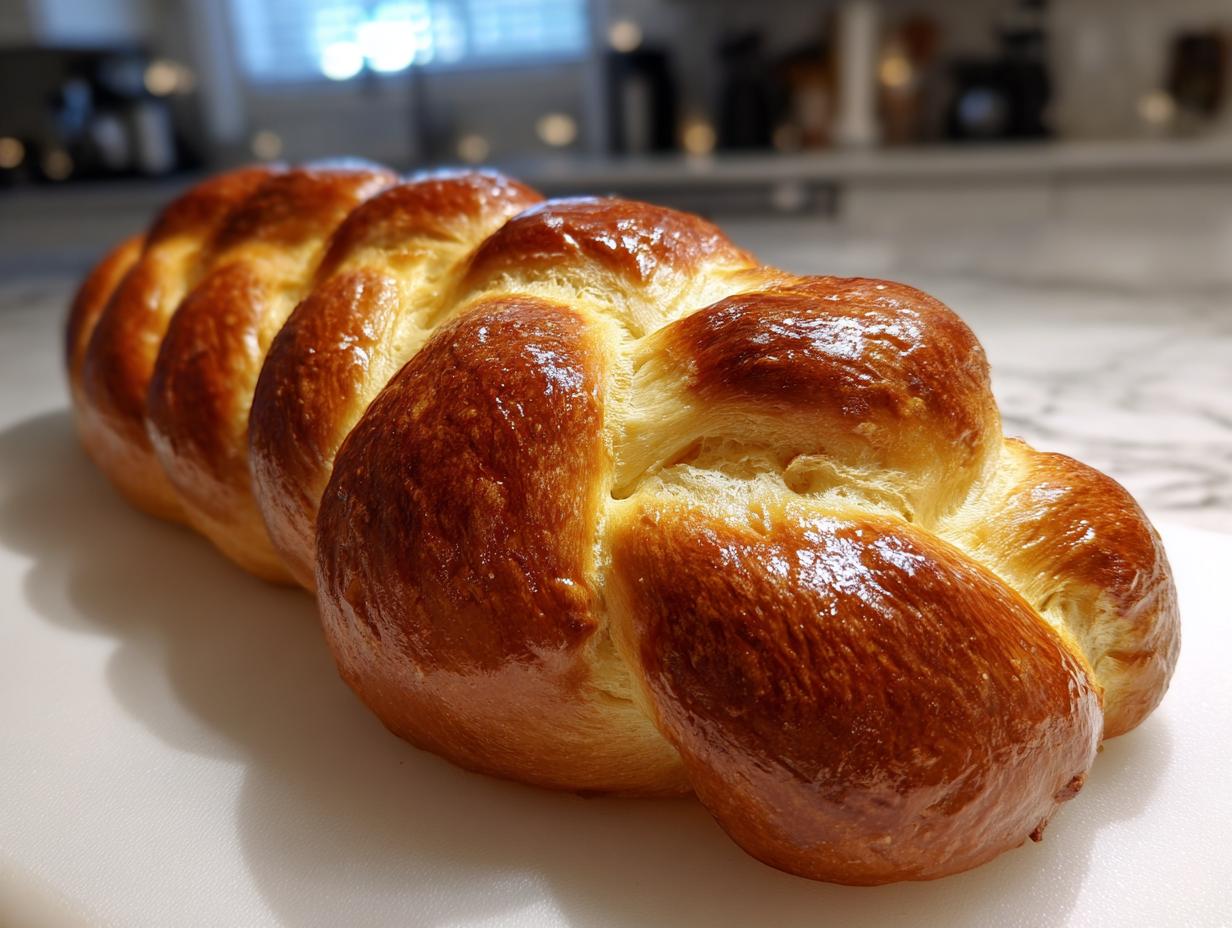

Oh, homemade bread! There’s just something about that warm, comforting aroma filling your kitchen, isn’t there? It feels like pure magic, like a cozy hug in edible form. And for me, there’s no bread that says “special occasion” or “pure comfort” quite like challah bread. This recipe is my go-to for a reason – it’s that classic, wonderfully soft, slightly sweet, and beautifully braided loaf that just makes any table feel festive. I remember making it for the first time during Rosh Hashanah, and seeing the family’s eyes light up when they saw the braided golden strands… well, that feeling has stuck with me ever since!
- Why You'll Love This Classic Challah Bread
- Ingredients for the Perfect Challah Bread
- How to Make Challah Bread Step by Step
- Tips for the Best Challah Bread
- Ingredient Notes and Substitutions for Challah Bread
- Serving Suggestions for Your Challah Bread
- Storage and Reheating Instructions for Challah Bread
- Challah Bread Nutrition Information
- Frequently Asked Questions About Challah Bread
- Share Your Challah Bread Creations!
Why You’ll Love This Classic Challah Bread
Seriously, you’re going to adore this challah bread recipe. Here’s why:
- So easy to make! Even if you’re new to bread baking, these step-by-step instructions make it totally foolproof.
- Incredible texture: It’s wonderfully soft and fluffy with just the right amount of gentle sweetness.
- So versatile: Perfect for holidays, brunch, or just a really delicious slice of bread with your dinner.
- Beautiful presentation: That signature braid looks *gorgeous* on any table, don’t you think?
- Amazing flavor: The eggs and honey give it a rich, comforting taste that’s simply irresistible.
- The aroma alone! Your whole house will smell amazing while it’s baking.
Ingredients for the Perfect Challah Bread
Okay, so to get that gorgeous, soft challah bread, you’ll want to gather a few things. I always make sure my ingredients are right there on the counter before I even think about starting. Precision is key with bread, but don’t stress too much – the magic happens when you just get going!
- 1 cup warm water (make sure it’s not too hot, like a comfy bath, around 105-115°F), plus a little extra if needed.
- 2 ¼ teaspoons active dry yeast – this is what makes our bread rise and get all fluffy!
- 1 teaspoon granulated sugar, just to wake up that yeast.
- 4 cups all-purpose flour, plus that little extra bit for dusting your counter when you knead. All-purpose works beautifully here!
- 1 teaspoon salt, to balance out all that sweetness.
- ½ cup granulated sugar, this gives our challah that lovely subtle sweetness.
- 4 large eggs, but we’ll use them in a couple of ways – some go right in, and one is for that beautiful shiny wash.
- ½ cup vegetable oil, for that tender, soft crumb we all love.
- 2 tablespoons honey, for a touch of richness and that classic challah flavor.
- 1 tablespoon white vinegar – this sounds quirky, but it actually helps the dough stay soft!
- 1 egg yolk, beaten with 1 tablespoon of water. This is our golden ticket for that super shiny, gorgeous finish on top!
How to Make Challah Bread Step by Step
Alright, let’s get our hands deliciously doughy! Making challah bread from scratch is such a rewarding process, and honestly, super fun. We’re going to break it all down, step-by-step, so you end up with this perfect, golden loaf. Trust me, it’s easier than you think!
Activating the Yeast for Your Challah Bread
First things first, let’s wake up our yeast! Grab a little bowl, pour in that warm water – think cozy bathwater temperature, not too hot, not too cold. Sprinkle in the yeast and that teaspoon of sugar. Give it a gentle stir and then just let it chill for about 5 to 10 minutes. You’ll know it’s happy and ready when it gets all foamy on top. This is super important because we need that yeast to be alive and kicking to make our challah bread nice and fluffy.
Mixing and Kneading the Challah Dough
Now for the main event! In a big bowl, whisk together your flour and salt. In another bowl, we’ll mix up the wet ingredients: the sugar, three of those large eggs, your oil, honey, and that little splash of vinegar. Once the yeast is foamy, pour that into the flour mixture, then add the egg mixture too. It’ll be a bit shaggy at first, which is totally fine! Turn this glorious mess out onto a lightly floured counter. Now, the fun part – kneading! Push, fold, and turn that dough for about 8 to 10 minutes until it’s smooth, soft, and elastic. This kneading is what develops the gluten, giving you that lovely structure. Honestly, using a good quality all-purpose flour really makes a difference here, and active dry yeast is truly the best for this classic loaf! If you need a refresher on bread basics, our blog has tons of great tips!
The First Rise: Proofing Your Challah Bread
Once your dough is nice and smooth, pop it into a lightly oiled bowl. Give it a little turn so the whole ball is coated in oil – this stops it from drying out. Cover it up with plastic wrap, and find a warm, cozy spot for it to do its magic for about an hour to an hour and a half. You’ll know it’s ready when it’s pretty much doubled in size. This first rise is where all that amazing flavor starts to develop, so don’t rush it!
How to Braid 3-Strand and 6-Strand Challah
Okay, time for the showstopper! Gently punch down the risen dough to release the air. Divide it into three equal pieces. Now, just roll each piece into a long rope, like you’re making a snake, about 18 inches long. Lay them side-by-side on your baking sheet lined with parchment paper and pinch all three tops together really well. This is where the braiding magic happens! For a classic 3-strand braid: take the left rope and cross it over the middle one, then take the right rope and cross it over the *new* middle one. Keep repeating this pattern, left over middle, right over middle, until you reach the ends. Pinch those ends together tightly to seal. My little trick: make sure your strands are roughly the same thickness, and don’t pull too tight on the ends as you braid, or they’ll stretch out too much when they rise. It helps create that beautiful, ‘glossy braided challah loaf’ look we’re after!
The Second Rise and Egg Wash for a Shiny Finish
After your beautiful braid is all shaped, we need to let it have its second, smaller rise. Cover it loosely with plastic wrap again and let it hang out in a warm place for about 30 to 45 minutes. While it’s puffing up, get your oven preheating to 375°F (190°C). Now for that gorgeous, shiny finish that makes it look so professional! In a small bowl, whisk up that egg yolk with the tablespoon of water. Gently brush this egg wash all over the top of your braided challah. This is what gives it that irresistible golden-brown, shiny egg-wash bread aesthetic.

Baking Your Beautiful Challah Bread
Pop that beautifully brushed challah into your preheated oven. Bake it for about 30 to 35 minutes. You’ll know it’s ready when it’s a gorgeous deep golden brown all over and sounds nice and hollow when you gently tap the bottom. If it starts getting too dark too quickly, you can always loosely tent it with foil. Let it cool completely on a wire rack – it’s so hard to wait, I know!
Tips for the Best Challah Bread
You know, the real secret to amazing challah bread isn’t just the recipe itself, but a few little tricks I’ve picked up over the years from Grandma Eleanor and my own kitchen adventures. It makes all the difference!
Always make sure your water is just right for the yeast – not too hot, or it’ll kill it, and not too cold, or it won’t get going. For that super tender crumb, some bakers love using a tangzhong, but honestly, the oil and eggs in this recipe do a fantastic job on their own. For me, it’s all about proper kneading and giving the dough enough time to rise. Don’t be afraid to really work that dough until it’s smooth and springs back when you poke it – that’s how you get that perfect texture. And when braiding? Take your time; a little patience there rewards you with a truly stunning loaf! You can learn more about my kitchen philosophy over on my about page!
Ingredient Notes and Substitutions for Challah Bread
Let’s talk ingredients for a sec! You’ll notice I call for all-purpose flour, and it really does a wonderful job here, giving us that lovely soft crumb without being too heavy. If you’re eyeing bread flour, it’ll work too, but it might give you a slightly chewier challah, which isn’t bad, just different! As for yeast, active dry is what I use, but instant yeast works just fine, you can toss it right in with the dry ingredients. And that little bit of vinegar? Don’t skip it! It sounds odd, but it really helps keep the challah wonderfully tender. You won’t taste it at all, I promise!
Serving Suggestions for Your Challah Bread
This challah bread is so much more than just a loaf; it’s practically a celebration! Of course, it’s a star during holidays like Rosh Hashanah, where its round shape can symbolize the year ahead, but honestly, it’s fantastic any time. It’s the ultimate breakfast or brunch bread. I mean, have you ever had French toast made with challah? It’s life-changing! The eggy, slightly sweet bread soaks up the custard beautifully. It’s also wonderful served warm alongside dinner or even just toasted with a smear of butter. It really is that perfect ‘classic Jewish holiday bread’ that also brightens up any regular day.
Storage and Reheating Instructions for Challah Bread
Got leftover challah bread? Lucky you! To keep it fresh, store it in an airtight container or bag at room temperature for up to 3 days. It’s pretty forgiving! If you want to enjoy that heavenly warmth again, a quick zap in the microwave or a few minutes in a low oven (around 300°F) will bring back its soft, delicious texture beautifully. You can also freeze slices for longer storage!
Challah Bread Nutrition Information
Alright, let’s get down to the details! While I’m all about the joy of baking, sometimes it’s nice to have a general idea of what’s in that delicious slice. This is just an estimate, of course, because every kitchen can be a little different! Based on the ingredients in this classic challah bread recipe, one slice (and honestly, who stops at just one?) is roughly around 250 calories. You’re looking at about 8g of fat, with 2g being saturated, 38g of carbohydrates, and about 6g of protein. It also has about 10g of sugar and 200mg of sodium. It’s always good to remember that using different oils or adding extra sweetness can shift these numbers a bit!
Frequently Asked Questions About Challah Bread
Have a question about making your challah bread? I’ve tried to cover the most common things that pop up, but if you’re wondering about something else, just ask in the comments! It’s all part of the learning process, and we all want that perfect, gorgeous loaf.
Can I use bread flour instead of all-purpose flour for my challah bread?
Oh, that’s a great question! You absolutely *can* use bread flour. It has a higher protein content, which means it will develop gluten more strongly. This usually results in a slightly chewier challah bread, which some people really love! All-purpose flour is what I suggest because it gives you that classic soft and tender crumb that’s just perfect, but bread flour is a totally valid swap if you’re looking for a bit more chew.
Why is my challah dough so sticky?
Don’t panic if your challah dough feels sticky! It’s actually pretty common, especially when you’re first starting out. It often means the flour hasn’t fully absorbed all the liquid yet. My best advice? Keep kneading! As you work the dough, it usually becomes less sticky and more elastic. If it’s still unmanageably sticky after a good 5-8 minutes of kneading, just add a tiny bit more flour, about a tablespoon at a time, until it’s manageable on your lightly floured surface. The trick is not to add too much, or your challah could become dry.
How do I get a darker, glossier crust on my challah bread?
For that beautiful, deep golden color and that amazing ‘shiny egg-wash bread aesthetic’ everyone raves about, the egg wash is key! Make sure your egg wash is well-mixed – usually one egg yolk with a tablespoon of water or milk is perfect. Brush it on evenly right before baking. If you want it *extra* shiny and brown, you can add a second egg wash halfway through baking. Some folks also like to add poppy seeds or sesame seeds to the wash for extra flavor and a lovely look!
Can I freeze challah bread?
Yes, you absolutely can freeze your beautiful challah bread! Once it’s completely cooled, wrap it tightly in plastic wrap, and then pop it into a freezer-safe bag or container. It should stay fresh and delicious for about 2-3 months. When you’re ready to enjoy it, just let it thaw at room temperature. If you want it warm, you can pop slices in the toaster or a low oven for a few minutes.
Share Your Challah Bread Creations!
I just LOVE seeing what you all create in your kitchens with my recipes! Did you make this challah bread? Were there any fun twists you added? Snap a picture and share it with me on Facebook, or leave a comment letting me know how it turned out – I’d love to hear all about it! And if you feel so inclined, a quick rating helps others find their way to this delicious bread too. Happy baking! If you have any questions, feel free to get in touch.
PrintClassic Challah Bread
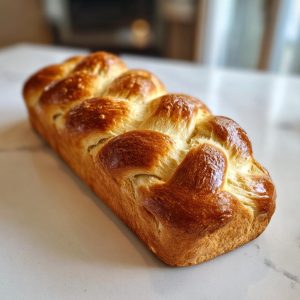
A soft, slightly sweet, and beautifully braided egg bread, perfect for holidays or any occasion.
- Prep Time: 25 min
- Cook Time: 35 min
- Total Time: 2 hr 45 min
- Yield: 1 loaf 1x
- Category: Bread
- Method: Baking
- Cuisine: Jewish
- Diet: Vegetarian
Ingredients
- 1 cup warm water (105-115°F)
- 2 ¼ teaspoons active dry yeast
- 1 teaspoon granulated sugar
- 4 cups all-purpose flour, plus more for dusting
- 1 teaspoon salt
- ½ cup granulated sugar
- 4 large eggs, divided
- ½ cup vegetable oil
- 2 tablespoons honey
- 1 tablespoon white vinegar
- 1 egg yolk, beaten with 1 tablespoon water (for egg wash)
Instructions
- In a small bowl, combine warm water, yeast, and 1 teaspoon sugar. Let stand for 5-10 minutes until foamy.
- In a large bowl, whisk together flour and salt.
- In a separate bowl, whisk together ½ cup sugar, 3 large eggs, vegetable oil, honey, and vinegar.
- Add the yeast mixture and the egg mixture to the flour mixture. Mix until a shaggy dough forms.
- Turn the dough out onto a lightly floured surface and knead for 8-10 minutes until smooth and elastic.
- Place the dough in a lightly oiled bowl, turning to coat. Cover with plastic wrap and let rise in a warm place for 1-1.5 hours, or until doubled in size.
- Punch down the dough and divide it into 3 equal pieces.
- Roll each piece into a rope about 18 inches long.
- Place the ropes side-by-side on a baking sheet lined with parchment paper. Pinch the tops together.
- Braid the ropes: cross the left rope over the middle rope, then cross the right rope over the new middle rope. Repeat until you reach the end. Pinch the bottom ends together.
- Cover the braided loaf loosely with plastic wrap and let rise for another 30-45 minutes.
- Preheat your oven to 375°F (190°C).
- Brush the top of the loaf with the egg wash.
- Bake for 30-35 minutes, or until golden brown and sounds hollow when tapped.
- Let cool on a wire rack before slicing.
Notes
- For a glossier finish, you can add a second egg wash before baking.
- You can add poppy seeds or sesame seeds to the egg wash for extra flavor and visual appeal.
- This bread is excellent for French toast the next day.
Nutrition
- Serving Size: 1 slice
- Calories: 250
- Sugar: 10g
- Sodium: 200mg
- Fat: 8g
- Saturated Fat: 2g
- Unsaturated Fat: 6g
- Trans Fat: 0g
- Carbohydrates: 38g
- Fiber: 1g
- Protein: 6g
- Cholesterol: 50mg