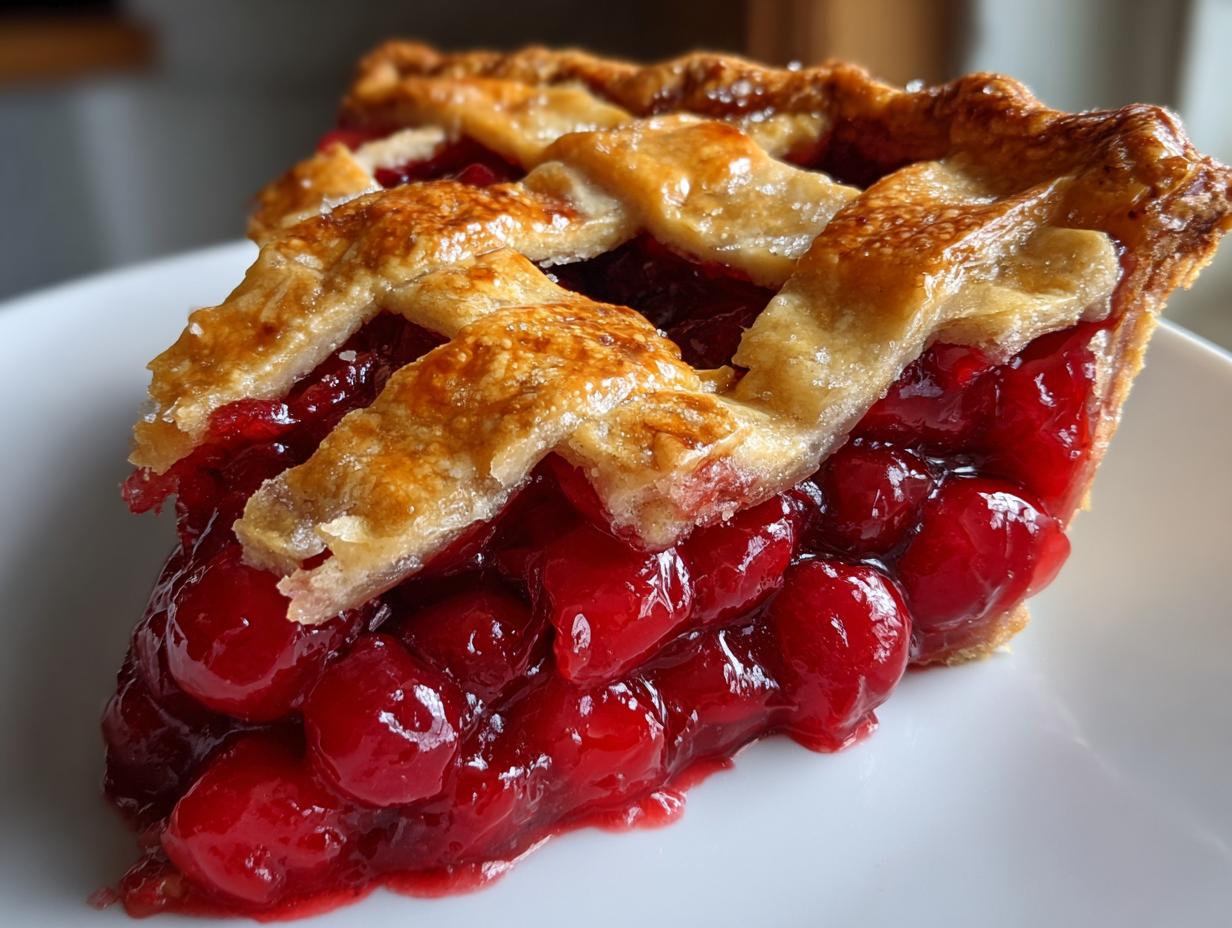

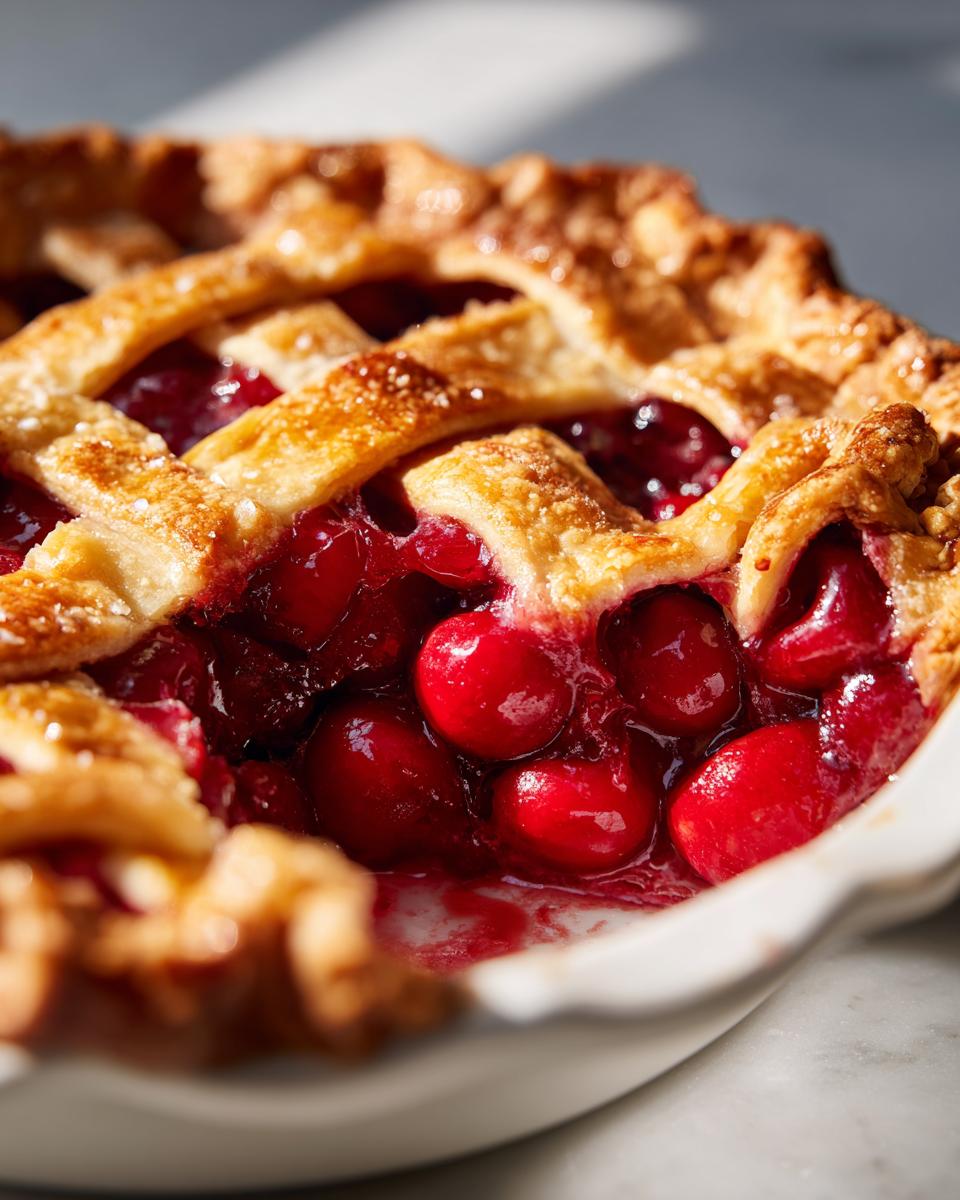
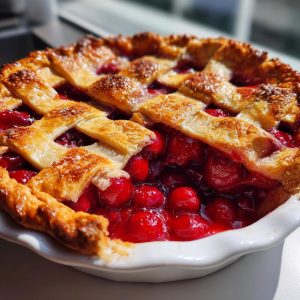
I’ll never forget the summer I turned twelve, standing on tiptoes at my grandmother’s kitchen counter, pitting cherries for our annual Fourth of July cherry pie. The juice stained my fingers pink as we laughed about who could pit the fastest (she always won). That first slice – with its thick, glistening filling holding perfect shape and that impossibly flaky crust crumbling at the touch – sealed my love affair with homemade cherry pie. Now, decades later, I still chase that magic with every pie I bake. The secret? Fresh cherries, a generous hand with butter, and that whisper of almond extract that makes taste buds do a little happy dance. This is the kind of pie that cuts clean but begs to be eaten warm, the kind that turns any Tuesday into a celebration.
Why You’ll Love This Cherry Pie
This isn’t just any cherry pie—it’s the one you’ll dream about between summer harvests and holiday feasts. Here’s why:
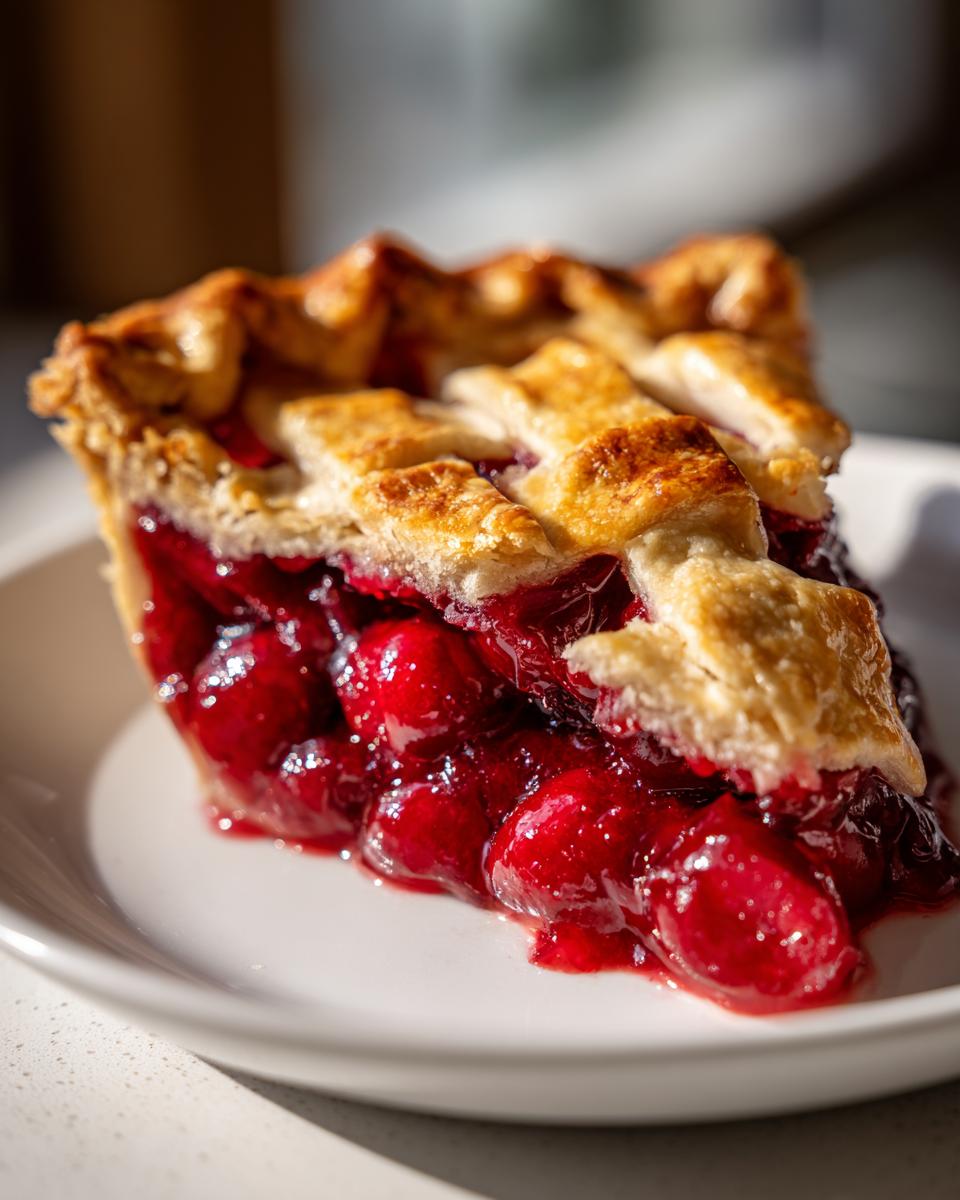
- Thick, sliceable filling that holds its shape (no soupy mess!) thanks to the perfect cornstarch balance
- Buttery lattice crust so flaky you’ll hear the crunch from across the room
- Bright cherry flavor with that sneaky hint of almond extract making every bite sing
- Fresh cherries that taste like sunshine, not tin (though I’ll tell you the canned trick in a pinch)
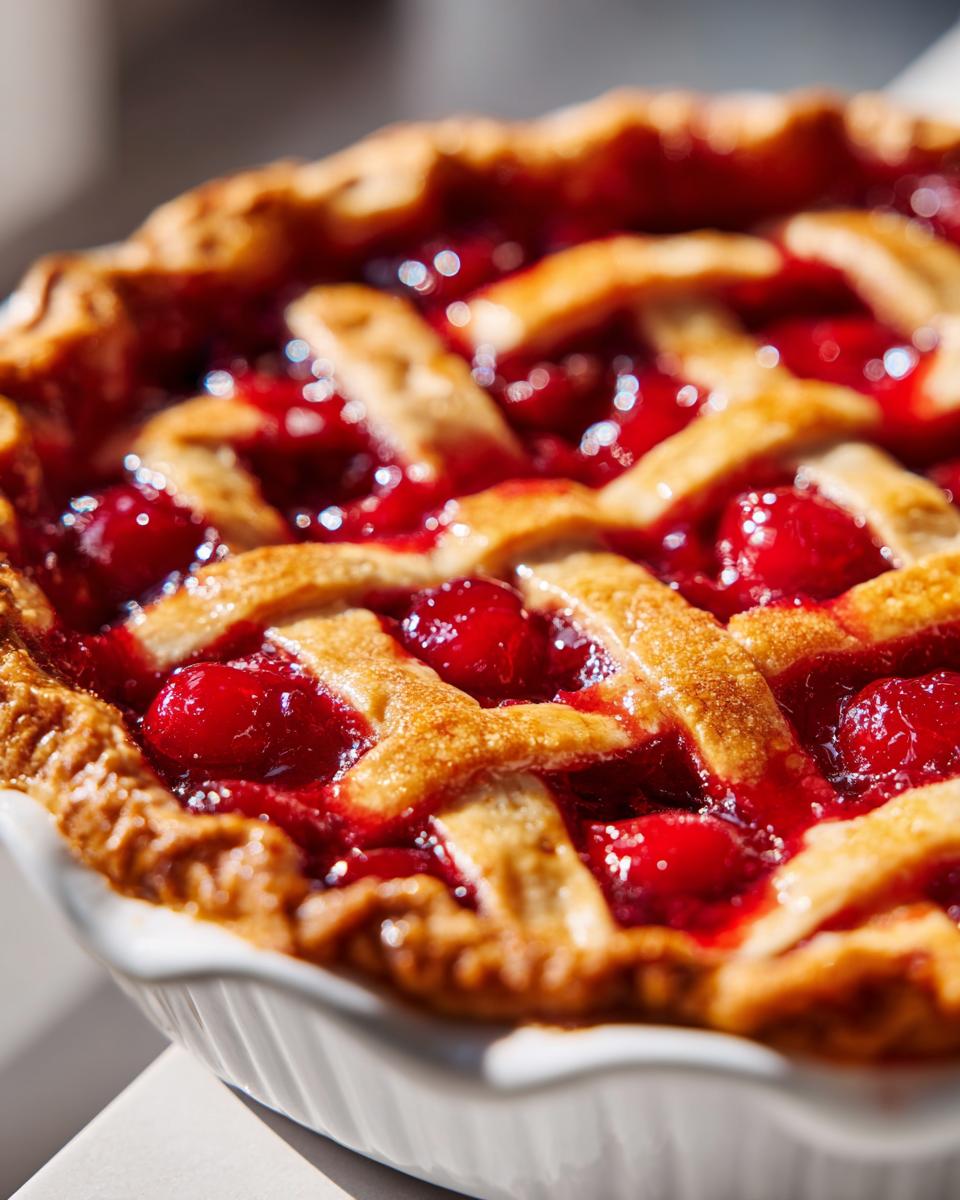
- Holiday-showstopper looks with minimal effort—that golden lattice does all the talking
Trust me, this is the pie that’ll have friends begging for the recipe and family declaring it “your signature dessert.”
Ingredients for the Perfect Cherry Pie
You won’t need anything fancy here – just good quality ingredients that let those cherries shine. I’m a stickler for fresh, but I’ll give you some shortcuts too (because even grandmas have lazy days!).
- For the filling:
- 4 cups fresh cherries, pitted (look for Bing or sweet-tart Montmorency)
- 1 cup granulated sugar (I use Domino for consistency)
- 3 tbsp cornstarch (no lumps!)
- 1 tbsp lemon juice, freshly squeezed
- ½ tsp almond extract (the good stuff, not imitation)
- ¼ tsp fine sea salt
- For the crust:
- 2 pie crusts (homemade or my secret weapon: Pillsbury refrigerated crust)
- 1 tbsp cold unsalted butter, cubed
- 1 egg, beaten (for that golden sheen)
- 1 tbsp coarse sugar (Sugar In The Raw is perfect for crunch)
Need a gluten-free version? Simply swap in your favorite gluten-free pie crust – King Arthur’s measure-for-measure flour works wonders if you’re making from scratch. And yes, I’ve tested this with coconut sugar for a lower-glycemic option (just note the filling will be darker).
Step-by-Step Cherry Pie Instructions
Now comes the fun part – turning those beautiful ingredients into the cherry pie of your dreams! Don’t let the lattice crust intimidate you – I’ll walk you through each step like I’m right there in your kitchen (with flour on my apron and probably a smear of cherry juice on my cheek).
- Preheat your oven to 375°F (190°C) – this gives it time to stabilize while we prep. Position a rack in the lower third to prevent over-browning.
- Prepare the filling (details below) – don’t skip resting time! Those cherries need 10 minutes to release their magic juices.
- Roll out the bottom crust to about 12 inches, then gently transfer it to your 9-inch pie plate. I like to drape it over my rolling pin like a pro. Press it in lightly, leaving a 1-inch overhang.
- Pour in the filling, then dot with cold butter cubes – these will melt into little flavor pockets between the cherries.
- Weave that showstopping lattice (easy steps coming) – just remember: imperfections add homemade charm!
- Brush with egg wash and sprinkle generously with coarse sugar – this gives that irresistible bakery-style crunch.
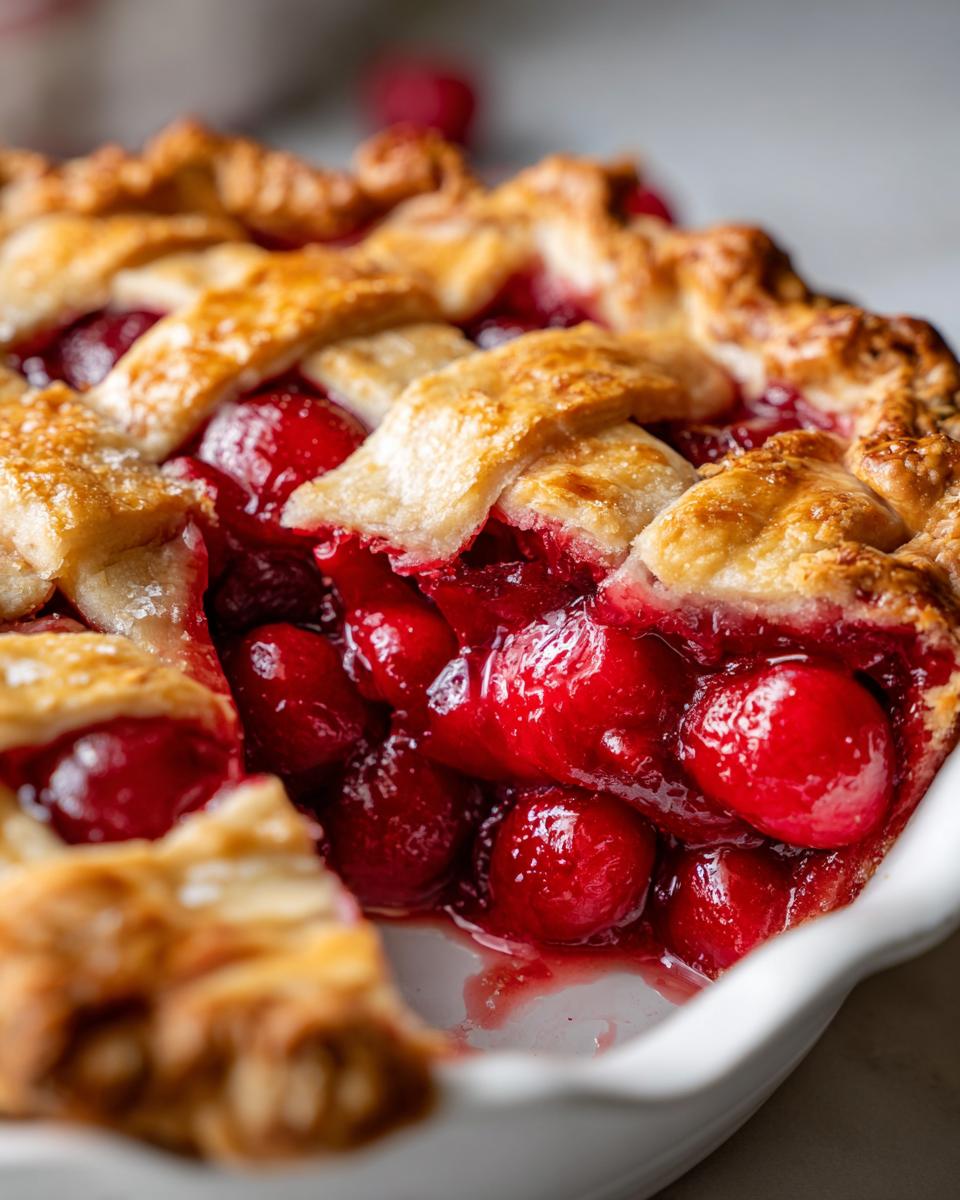
- Bake 45-50 minutes until the crust is deep golden and filling bubbles thickly in the center. If edges darken too fast, tent with foil.
- Cool completely – I know it’s tempting, but resist cutting for at least 2 hours! This patience lets the filling set perfectly.
How to Make the Cherry Filling
Here’s where the magic starts! Toss pitted cherries (fresh works best, but see my canned trick in FAQs) with sugar and cornstarch in a large bowl. The cornstarch will seem like a lot, but trust me – it’s what gives you that perfect sliceable texture. Sprinkle in lemon juice, almond extract (“the secret weapon!” my grandma would say), and salt. Gently fold with a rubber spatula just until combined – overmixing leads to mushy cherries. Let the mixture sit 10 minutes while you roll out the crust; you’ll see glossy juices form.
Assembling the Lattice Crust
Roll out your top crust to 12 inches, then cut into 1-inch strips using a pizza cutter or knife. Lay half the strips vertically over the filled pie, spacing them evenly. Fold back every other strip, then place a horizontal strip across. Unfold the vertical strips, fold back the others, and add another horizontal strip. Repeat until your lattice looks like a beautiful edible basket! Crimp the edges with your fingers or press with a fork. Chill the assembled pie 15 minutes before baking – this prevents shrinkage and keeps those crisp layers intact.
Pro Tips for the Best Cherry Pie
After baking more cherry pies than I can count, here are my hard-won secrets for guaranteed success:
- Cherry pitter magic: Save your fingers and sanity—invest in a $10 cherry pitter. The kind that pits six cherries at once makes quick work of 4 cups (though my grandma still insists her single-pin method builds character!).
- Chill like you mean it: Cold is your friend! Keep butter ice-cold for flaky layers, and always chill the assembled pie 15 minutes before baking to prevent shrinking.
- Taste your cherries: Sweet Bing cherries usually need the full cup of sugar, but tart Montmorency types may require 1 ¼ cups. Tweak to your preference—baking is personal!
- Banish soggy bottoms: Brush the bottom crust with egg wash before adding filling—it creates a moisture barrier. Or, for extra insurance, sprinkle with crushed graham crackers or almond flour first.
- The foil trick: If your lattice browns too fast, make a “crust shield” by cutting the center from a foil square and draping the ring over the edges at 30 minutes.
Remember—a perfect pie is less about perfection and more about the love (and butter) you pour into it. Now go make some memories!
Make-Ahead and Storage Tips
Oh, the joy of a cherry pie ready to pop in the oven when surprise guests arrive! Here’s how to keep your pie perfect from prep to last crumb:
- Freeze like a pro: Assemble your pie completely (lattice and all!), then freeze it unbaked for up to 3 months. No thawing needed – just add 15-20 minutes to the bake time straight from the freezer. I always keep one in my deep freeze during holidays!
- Leftover love: Room temperature is fine for day-of serving, but stash any leftovers in the fridge after that. The filling stays sliceable for 3-4 days when covered tightly with plastic wrap.
- Reheat magic: 10 minutes in a 350°F oven brings back that just-baked warmth and crispness. Microwave works in a pinch (20 seconds per slice), but the crust won’t stay crunchy.
- Pro tip: Freeze individual slices on a baking sheet before transferring to bags. That way you can reheat one perfect portion whenever the craving hits!
P.S. If your household is anything like mine, “leftovers” might be wishful thinking – this pie tends to vanish fast!
Cherry Pie Variations
Sometimes you need to mix things up—whether it’s using what’s in the pantry or catering to different tastes. Here are my favorite ways to tweak this classic without losing that signature cherry pie magic:
- Canned cherries hack: Fresh not an option? No shame! Just drain two 14.5-oz cans of tart cherries (reserve ¼ cup juice) and toss with 1 extra tablespoon of cornstarch. The key? Pat those cherries super dry with paper towels first.
- Spice it up: Add ½ teaspoon cinnamon to the filling for a cozy twist—it’s especially good for winter holiday pies. A pinch of cardamom works wonders too!
- Vanilla instead of almond: Not an almond fan? Swap in 1 teaspoon pure vanilla extract. It’s subtler but still delicious.
- Crust adventures: Try a gluten-free pie crust (I love the texture of King Arthur’s mix) or go graham cracker crust for a fun change. If you’re serious about gluten-free baking, some fantastic gluten-free meal delivery services offer pre-made crusts that save time without sacrificing taste.
- Berry buddies: Short on cherries? Mix in 1 cup of raspberries or blackberries—just add an extra ½ tablespoon cornstarch since they’re juicier.
Every kitchen has its own personality—make this pie yours!
Cherry Pie FAQs
Even the most seasoned bakers have questions sometimes! Here are answers to the cherry pie dilemmas I hear most often in my kitchen (and my grandma’s before me):
Can I use frozen cherries instead of fresh?
Absolutely! Thaw them completely in a colander first—let them drain for at least 30 minutes to avoid a watery filling. Some liquid is okay since we’re using cornstarch, but you might need an extra teaspoon if the cherries seem particularly dry after thawing. Pro tip: Toss frozen cherries with the sugar mixture while still slightly icy—it helps draw out just the right amount of juice.
Help! My filling is runny after baking. Can I fix it?
Don’t panic! If your classic cherry pie filling didn’t set, spoon it back into a saucepan with 1-2 teaspoons more cornstarch mixed with 1 tbsp cold water. Cook over medium until thickened, about 3 minutes, then return to the crust. For next time: measure your cornstarch carefully, and make sure the center bubbles thickly before pulling the pie from the oven—that bubbling is your visual cue that the thickener has activated.
What’s the best way to reheat leftover cherry pie?
For that just-baked crispness, reheat slices at 350°F for 8-10 minutes on a parchment-lined sheet. The oven method works way better than microwaving (which turns the crust rubbery). Need speed? Pop a slice in the air fryer at 325°F for 4 minutes—it’s my secret for perfect single servings! Either way, a quick drizzle of warmed cherry jam over the top makes it look bakery-fresh again.
Do I really need to let the pie cool 2 hours before slicing?
I know it’s torture with that delicious smell filling your kitchen, but yes—waiting is key for that beautiful lattice cherry pie presentation! The filling continues thickening as it cools. Cut too soon, and you’ll have cherry soup (though still a tasty cherry soup!). For impatient souls: stick it in the fridge 30 minutes to speed things up. That first clean slice sliding onto the plate? Worth every minute.
Nutritional Information
Just between us – this pie isn’t diet food, but oh, it’s worth every delicious bite! Nutrition varies based on your exact ingredients, but here’s the general scoop per slice: about 320 calories, 12g fat (mostly from that glorious butter), and 52g carbs. Remember, natural sugars from those beautiful sweet cherries make it better than processed desserts. For precise counts, I love using the MyFitnessPal recipe calculator with your specific brands. Now go enjoy a slice – life’s too short to skip pie!
PrintClassic Cherry Pie
A sliceable, café-style pie with thick cherry filling and buttery lattice crust, made with fresh cherries and a hint of almond extract.
- Prep Time: 30 min
- Cook Time: 50 min
- Total Time: 3 hours 20 min
- Yield: 8 servings 1x
- Category: Dessert
- Method: Baking
- Cuisine: American
- Diet: Vegetarian
Ingredients
- 4 cups fresh cherries, pitted
- 1 cup granulated sugar
- 3 tbsp cornstarch
- 1 tbsp lemon juice
- 1/2 tsp almond extract
- 1/4 tsp salt
- 2 pie crusts (homemade or store-bought)
- 1 tbsp unsalted butter, cubed
- 1 egg, beaten (for egg wash)
- 1 tbsp coarse sugar (for sprinkling)
Instructions
- Preheat oven to 375°F (190°C).
- In a bowl, mix cherries, sugar, cornstarch, lemon juice, almond extract, and salt.
- Roll out one pie crust and place it in a 9-inch pie dish.
- Pour cherry filling into the crust and dot with butter.
- Cut the second crust into strips and weave a lattice pattern over the filling.
- Brush the lattice with egg wash and sprinkle with coarse sugar.
- Bake for 45-50 minutes until the crust is golden and filling is bubbly.
- Cool for at least 2 hours before slicing.
Notes
- For a firmer filling, let the pie cool completely before serving.
- Use a cherry pitter for easy prep.
- Make ahead: Freeze unbaked pie for up to 3 months. Bake frozen, adding 15-20 minutes to the cooking time.
Nutrition
- Serving Size: 1 slice
- Calories: 320
- Sugar: 28g
- Sodium: 180mg
- Fat: 12g
- Saturated Fat: 5g
- Unsaturated Fat: 6g
- Trans Fat: 0g
- Carbohydrates: 52g
- Fiber: 2g
- Protein: 3g
- Cholesterol: 30mg