
Oh, you know those recipes that just feel like a warm hug on a chilly day? The ones that remind you of Grandma’s kitchen, even if you never met her? This classic apple pie is exactly that. It’s the kind of dessert that makes you want to curl up on the couch and just soak in all that cozy goodness. We’re talking about a truly foolproof, easy-to-make apple pie with the flakiest crust you can imagine. My Grandma Eleanor used to make it for every special occasion, and honestly, just the smell of it baking takes me right back. It’s more than just a dessert; it’s a memory, a tradition passed down, and I’m so excited to share it with you. Come on over and see what makes this pie so special! You can even see more of what we’re up to on our Facebook page!
- Why You'll Love This Classic Apple Pie
- The Best Apples for Your Apple Pie
- Ingredients for an Easy Homemade Apple Pie
- Step-by-Step Guide to Making Apple Pie
- Tips for a Perfect Apple Pie Every Time
- Serving and Storing Your Apple Pie
- Frequently Asked Questions About Apple Pie
- Apple Pie Calories Per Slice
Why You’ll Love This Classic Apple Pie
Seriously, what’s not to love about a perfect apple pie? This recipe is a total winner because:
- It’s surprisingly easy to whip up, even if you’re new to baking pies.
- The flavor combo is just divine – sweet, tart apples with warm spices in every bite.
- That crust? Oh my goodness, it’s unbelievably flaky and buttery.
- It’s the ultimate comfort food, perfect for cozy fall evenings or any celebration year-round. Trust me, this one’s a keeper!
The Best Apples for Your Apple Pie
Okay, so picking the right apples for your pie is *huge*. It’s honestly one of the most important steps for getting that perfect balance of sweet and tart with just the right texture. You don’t want mushy apples, and you definitely don’t want apples that are too hard to bite into after baking. Grandma Eleanor was super picky about this!
My go-to, and what I think works best, is a mix. You’ve probably heard about using something like Granny Smith apples, and they’re fantastic for pies because they hold their shape so well and have a wonderful tartness that really cuts through the sweetness. But if you *only* use Granny Smiths, it can sometimes be a little too sharp for some people. That’s why I love pairing them with something a little sweeter and softer, like Honeycrisp or Pink Lady apples. That combo gives you a dreamy sweet-tart flavor and a great mix of textures – the firmer apples provide body, and the softer ones sort of melt into the filling.
So, look for apples that are firm and have a good amount of natural tartness. This way, your apple pie filling won’t be too bland or too sugary; it’ll have that wonderful complexity that makes you want another slice. Trust me on this!
Ingredients for an Easy Homemade Apple Pie
Alright, let’s get down to business with what you’ll need for this amazing apple pie. It’s really not complicated, and having everything ready makes the whole process so much smoother. Grandma always said to get all your ducks in a row before you start!
First up, for that heavenly flaky crust, you’ll need:
- Two and a half cups of all-purpose flour
- A teaspoon of salt
- One cup of really cold, unsalted butter – chopped into half-inch pieces. Seriously, keep it cold!
- And about half a cup of ice water.
Now for the star of the show, the apple filling:
- Six medium apples, around 3 pounds total. I love using a mix of Granny Smith and Honeycrisp, but use what you can find! Make sure they’re peeled, cored, and sliced about a quarter-inch thick.
- Three-quarters of a cup of granulated sugar.
- Two tablespoons more of all-purpose flour – this helps thicken things up.
- A teaspoon of cinnamon and a quarter teaspoon of nutmeg for those warm spices.
- And a tablespoon of lemon juice. It just brightens everything up!
For the finishing touch:
- One large egg, beaten, for that beautiful golden wash.
- And another tablespoon of granulated sugar to sprinkle on top.
Step-by-Step Guide to Making Apple Pie
Alright, let’s get down to business and actually make this glorious apple pie! It’s really not as scary as it sounds, I promise. Think of it as a fun little baking project. Grandma always made it look so effortless, and now I’m going to show you how she did it, step by step. For more baking adventures, check out our blog!
Making the Flaky Pie Crust
This crust is everything! The secret is keeping everything super cold. So, when you mix up your flour and salt in a big bowl, I like to toss in my cubed cold butter. Then, using a pastry blender or even just your fingertips (clean ones, of course!), you want to cut that butter into the flour until it looks like coarse crumbs with a few little bits of butter still around, maybe like peas. Those bits of butter are what make it flaky! Then, you slowly add ice water, just a tablespoon at a time, mixing until the dough starts to come together. Don’t overmix it now! Get it into two flat disks, wrap ’em up tight, and let them chill in the fridge for at least 30 minutes. This is crucial for that flaky texture.
Preparing the Apple Filling
While your dough is chilling, let’s get those apples ready! Peel, core, and slice your apples about a quarter-inch thick. I like them sliced, not diced, so you get those lovely pie-shaped bites. Toss them all into a big bowl with your granulated sugar, the extra flour (this helps thicken it up so you don’t get a soggy bottom!), and that gorgeous cinnamon and nutmeg. Give it all a gentle mix so every apple slice is coated. Oh, and don’t forget that tablespoon of lemon juice – it’s a little trick that really wakes up the apple flavor and keeps them from browning too much.
Assembling and Decorating Your Apple Pie
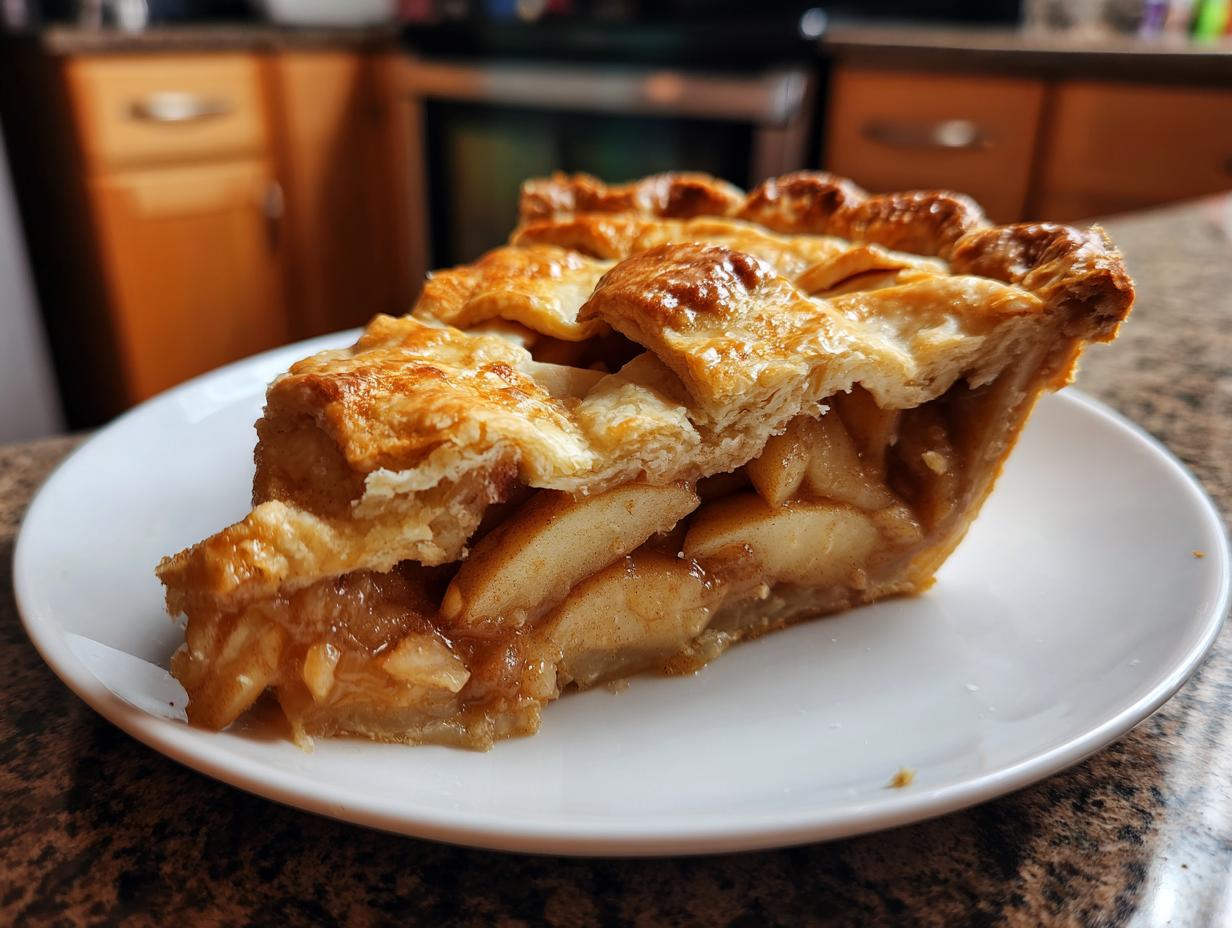
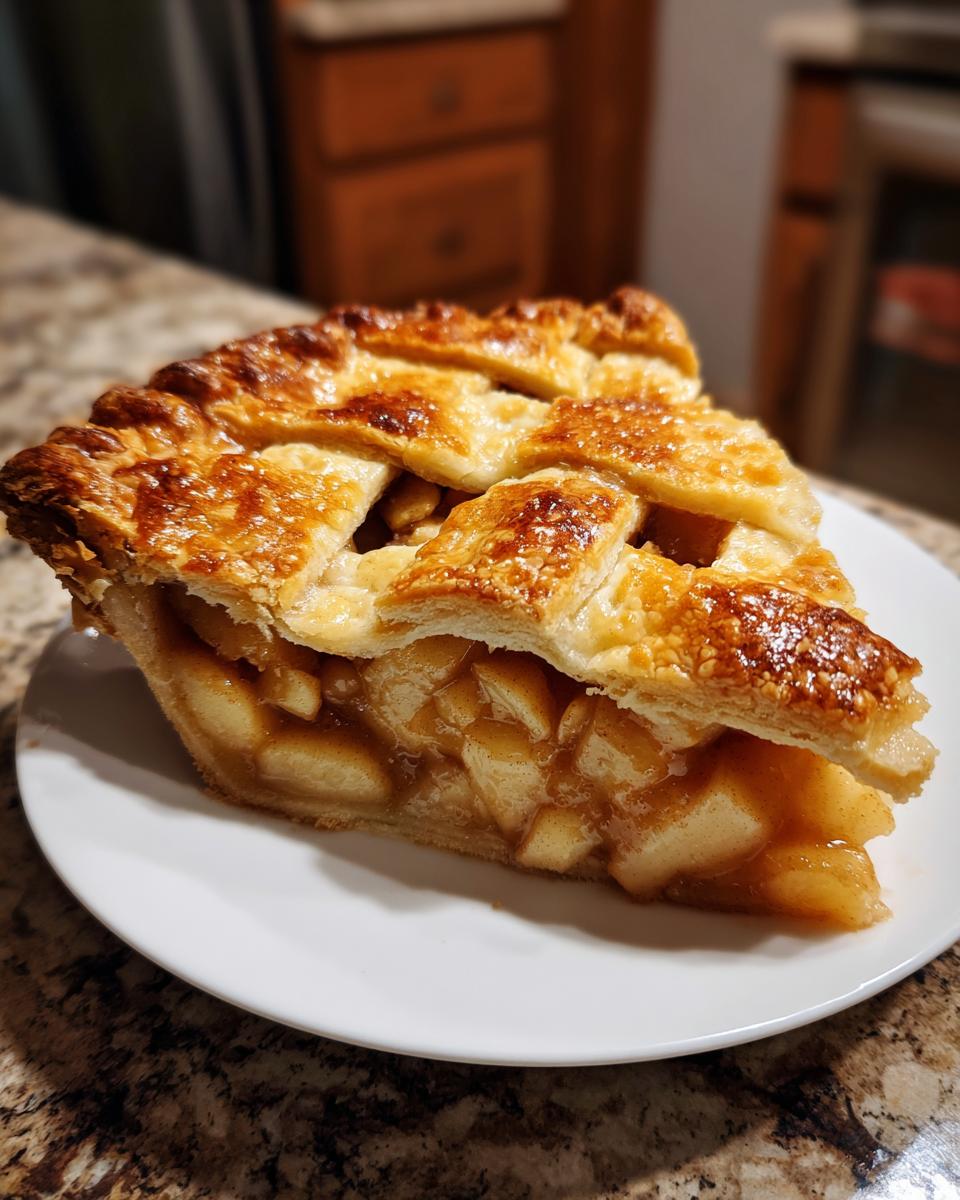
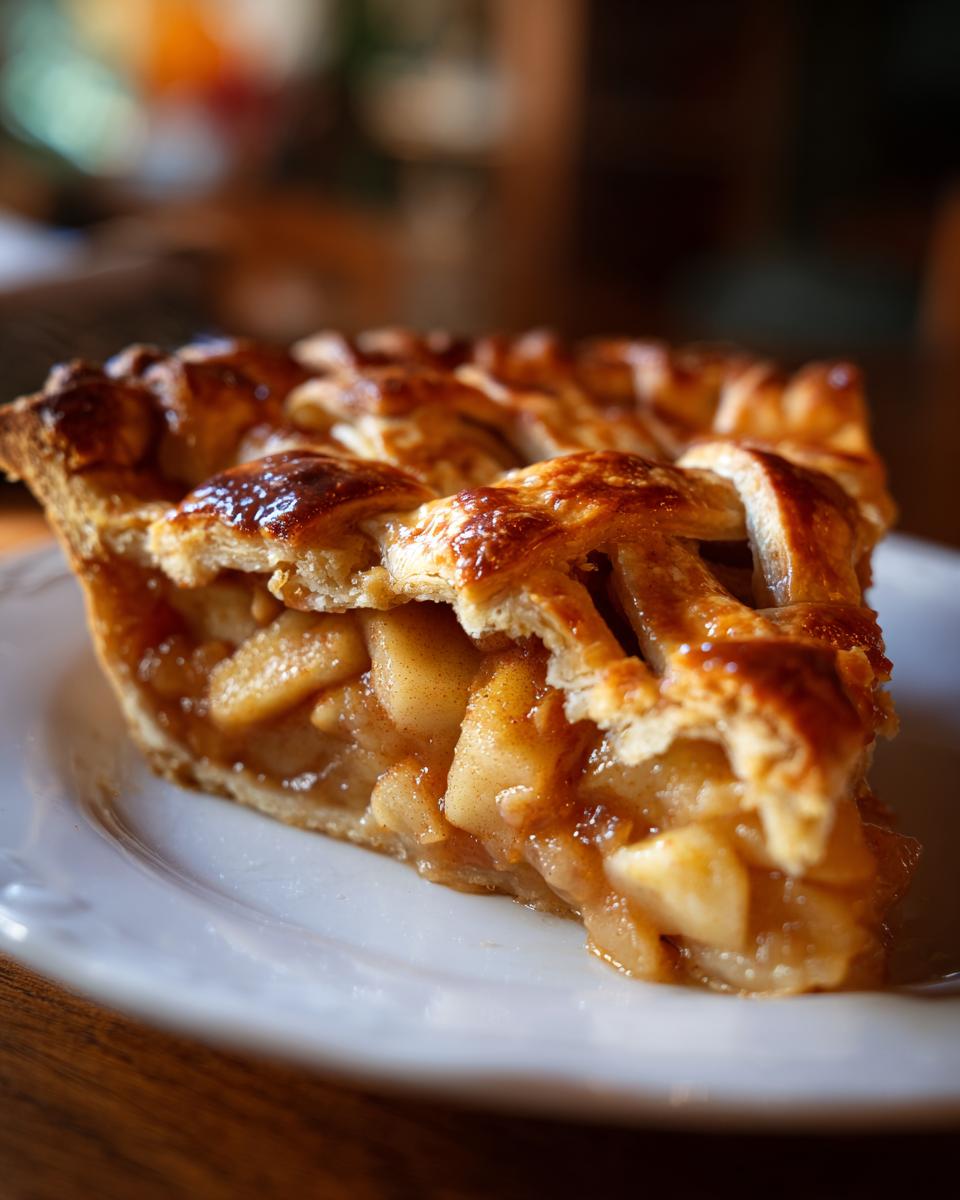
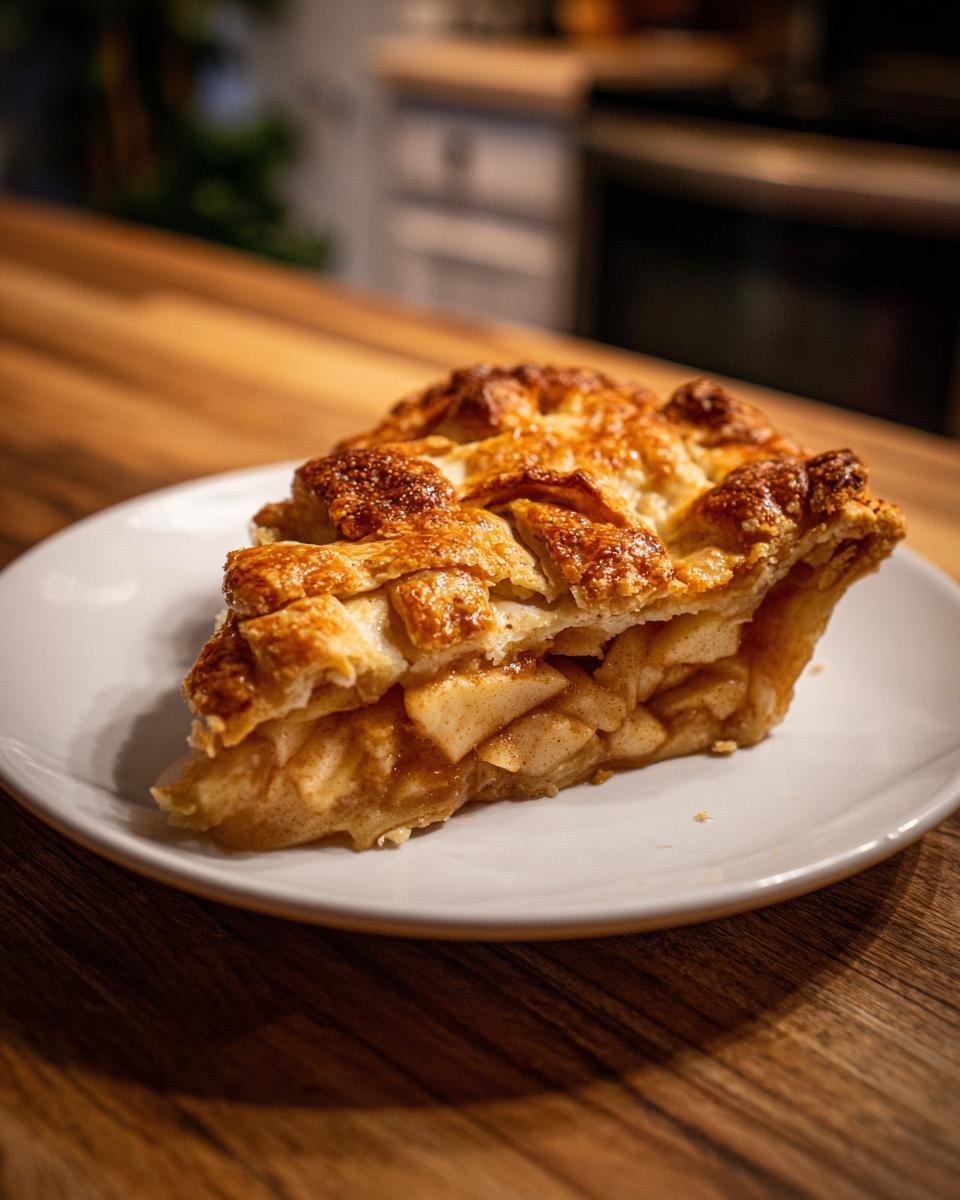
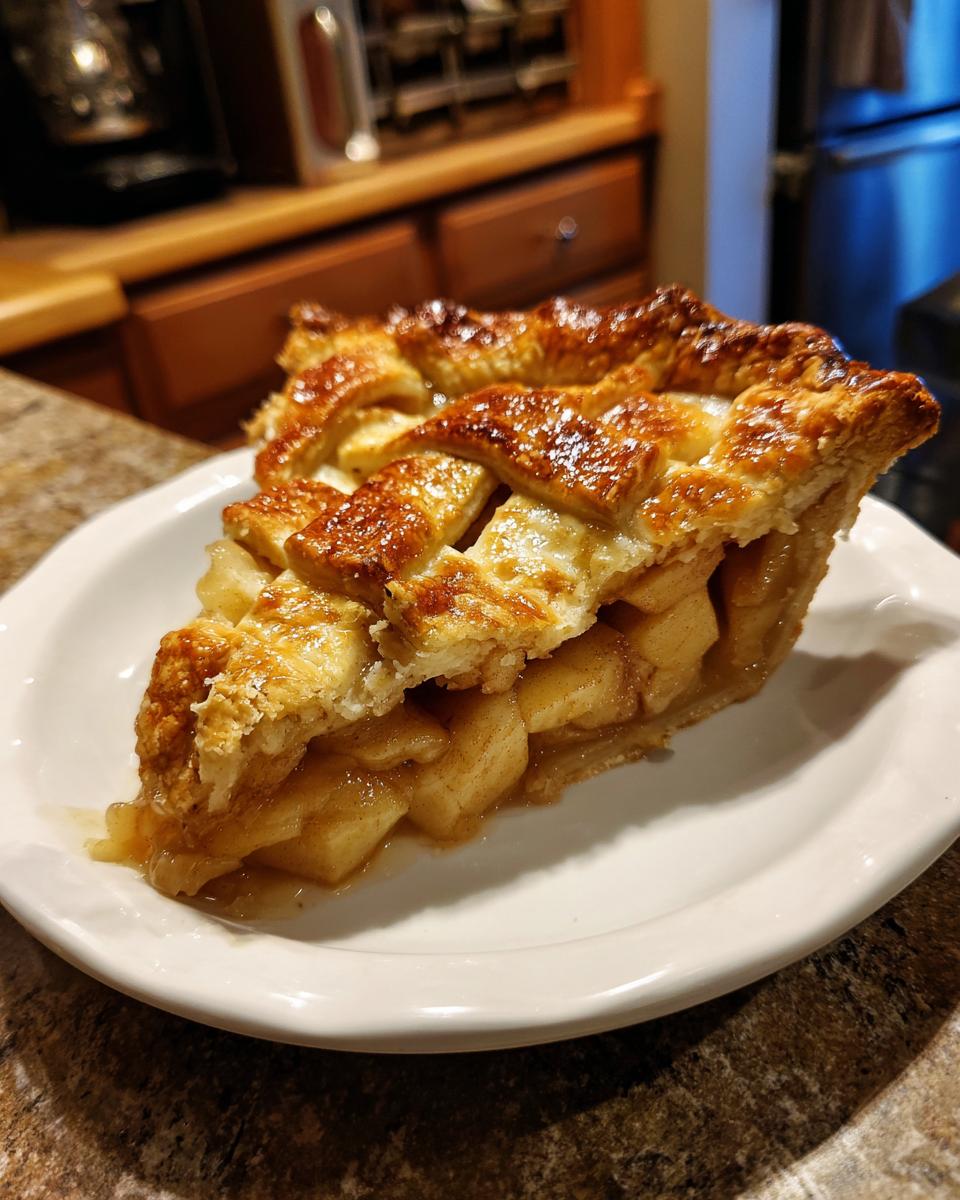
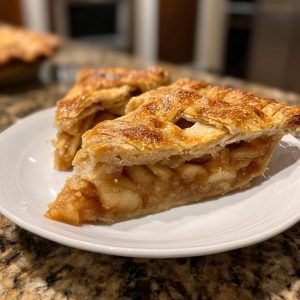
Now for the fun part – putting it all together! Take one disk of that chilled dough and roll it out on a lightly floured surface. You want it about 12 inches wide, so it fits nicely into your 9-inch pie plate with a little overhang. Gently ease the dough into the plate, pressing it into the edges. Fill it up with all those delicious spiced apples. Now, for that beautiful top! You can just lay the second piece of dough over the top and cut some vents, or you can get fancy with a lattice. To make a lattice, cut the dough into half-inch strips. Then, just lay half the strips evenly across the filling, parallel to each other. Then, you fold back every other strip and lay a perpendicular strip across. Fold those strips back over, and keep going, weaving them back and forth. It sounds tricky, but honestly, even if it’s a little wonky, it looks perfectly rustic and charming! Trim the lattice edges and crimp them all around with your fingers or a fork to seal everything up beautifully.
Baking and Cooling Your Apple Pie
Okay, almost there! Preheat your oven to 400°F (200°C). Brush the top crust or lattice with your beaten egg wash – this makes it nice and golden. Then, sprinkle that extra tablespoon of sugar over the top for a little sparkle and crunch. Pop it in the hot oven for 20 minutes. Then, lower the heat to 375°F (190°C) and bake for another 30-40 minutes. You’ll know it’s ready when the crust is a beautiful golden brown and you see the filling bubbling through those vents or lattice strips. If the edges start looking too dark, just loosely tent some foil around them. This is super important: let the pie cool on a wire rack for at least 2-3 hours before you slice into it. I know, the wait is torture! But this lets the filling set up properly and really helps prevent a soggy bottom. It’s worth it, trust me!
Tips for a Perfect Apple Pie Every Time
You know, even with the best recipe, sometimes things can go a little sideways in the kitchen. But don’t you worry! I’ve learned a few tricks over the years that really help make sure your apple pie turns out just right, every single time. It’s all about those little details. For more dessert ideas, definitely check out our dessert section!
One big thing is those pie edges. They can sometimes burn before the filling is bubbly, right? A super simple trick is to just loosely tent some aluminum foil around the edges of the pie about halfway through baking. It’s like giving them a little cozy blanket so they don’t get too dark. Also, make sure your oven rack is in the middle of the oven. I learned that the hard way – too low and the bottom crust can get sad and pale, too high and who knows what can happen!
Serving and Storing Your Apple Pie
Okay, the moment of truth! Your beautiful apple pie is cooled and ready to be devoured. The absolute best way to serve this classic, in my humble opinion, is warm with a big scoop of vanilla ice cream. That melty ice cream cascading over the spiced apples and flaky crust? Pure heaven! Some people also love a dollop of cool whipped cream. For more topping ideas, you can check out our apple pie with ice cream post.
Now, what about leftovers? If, by some miracle, you have any, it’s best to store the pie loosely covered at room temperature for up to two days. If it’s really warm out, or you have more than two days, pop it in the fridge. To reheat, just pop a slice in a warm oven for a few minutes until it’s cozy again. Enjoy every last crumb!
Frequently Asked Questions About Apple Pie
Got questions about making the perfect apple pie? I totally get it! It seems simple, but there are always those little things that can trip you up. Let’s dive into some common ones and get you sorted!
Can I use pre-made pie crust?
Oh sure, you totally can! If you’re short on time or just not feeling like making your own dough, a good quality store-bought crust works in a pinch. Just make sure you let it thaw properly according to the package directions. It won’t be *quite* as flaky as the homemade stuff, but it’ll still be delicious! It’s a great way to get a homemade apple pie on the table without all the fuss of making the dough from scratch.
How do I prevent my apple pie from being too sweet?
That’s a great question, and it’s all about the apples you choose and how much sugar you use. If you find your pie is too sweet, try using a higher ratio of tart apples, like Granny Smith, and maybe a little less sugar than the recipe calls for, especially if your other apples are really sweet. You can also add a bit more lemon juice – that brightness really balances out the sweetness!
What are the best apples for pie?
Like I mentioned before, a mix is usually best! Granny Smith are fantastic for that tartness and firmness that holds up in the oven. For a bit more sweetness and a softer texture, Honeycrisp, Pink Lady, or even Golden Delicious are wonderful choices. Avoid softer apples like McIntosh or Red Delicious because they tend to get mushy and won’t give your pie that lovely texture we’re going for either. You want apples that will bake up tender but still hold their shape!
How do I stop the bottom crust from getting soggy?
Ah, the dreaded soggy bottom! It’s a common pie problem. A few things help: make sure your dough is nice and cold before you assemble the pie. Also, don’t overfill it with apples, and make sure you toss them with enough flour or cornstarch to absorb the juices. Baking the pie on a preheated baking sheet also helps the bottom crust get nice and crisp. And of course, letting it cool completely is key for the filling to set!
Apple Pie Calories Per Slice
So, we’ve made this gorgeous apple pie, and now you’re probably wondering about the nitty-gritty, like those apple pie calories per slice. I wanted to give you a general idea, but keep in mind this can totally vary depending on the apples you use, how buttery your crust is, and even how big you cut your slices! Generally, you’re looking at around 350 to 400 calories per slice. It’s got about 18 grams of fat, with 11 grams being saturated fat, and around 45 grams of carbs, mostly from the crust and the sugar. It’s definitely a treat, but oh-so-worth-it!
PrintClassic Homemade Apple Pie
A timeless, easy-to-make apple pie recipe with a flaky crust, perfect for any occasion. Learn how to create a beautiful lattice top and achieve a golden-brown finish.
- Prep Time: 30 min
- Cook Time: 50 min
- Total Time: 80 min
- Yield: 8 servings 1x
- Category: Dessert
- Method: Baking
- Cuisine: American
- Diet: Vegetarian
Ingredients
- 2 ½ cups all-purpose flour
- 1 teaspoon salt
- 1 cup (2 sticks) cold unsalted butter, cut into ½-inch pieces
- ½ cup ice water
- 6 medium apples (about 3 pounds), such as Granny Smith or Honeycrisp, peeled, cored, and sliced ¼-inch thick
- ¾ cup granulated sugar
- 2 tablespoons all-purpose flour
- 1 teaspoon ground cinnamon
- ¼ teaspoon ground nutmeg
- 1 tablespoon lemon juice
- 1 large egg, beaten (for egg wash)
- 1 tablespoon granulated sugar (for sprinkling)
Instructions
- In a large bowl, whisk together 2 ½ cups flour and 1 teaspoon salt. Cut in the cold butter using a pastry blender or your fingertips until the mixture resembles coarse crumbs with some pea-sized pieces of butter.
- Gradually add the ice water, 1 tablespoon at a time, mixing until the dough just comes together. Divide the dough in half, flatten each half into a disk, wrap in plastic wrap, and refrigerate for at least 30 minutes.
- In a separate large bowl, combine the sliced apples, ¾ cup sugar, 2 tablespoons flour, cinnamon, nutmeg, and lemon juice. Toss gently to coat the apples evenly.
- On a lightly floured surface, roll out one disk of dough into a 12-inch circle. Carefully transfer the dough to a 9-inch pie plate. Trim the edges, leaving about a ½-inch overhang.
- Pour the apple filling into the pie crust.
- Roll out the second disk of dough. You can either place it as a solid top crust, cutting vents, or cut it into strips for a lattice top. To create a lattice, cut the dough into ½-inch wide strips and weave them over the apple filling. Trim and crimp the edges to seal.
- Brush the top crust or lattice with the beaten egg wash and sprinkle with 1 tablespoon of sugar.
- Bake in a preheated oven at 400°F (200°C) for 20 minutes. Reduce the oven temperature to 375°F (190°C) and continue baking for another 30-40 minutes, or until the crust is golden brown and the filling is bubbly. If the crust starts to brown too quickly, loosely tent the pie with aluminum foil.
- Let the pie cool on a wire rack for at least 2-3 hours before slicing and serving. This allows the filling to set properly and prevents a soggy bottom.
Notes
- For a crispier bottom crust, you can bake the pie on a preheated baking sheet.
- Consider using a mix of apple varieties for a more complex flavor.
- Serve warm with vanilla ice cream or whipped cream for a classic pairing.
- Store leftover pie loosely covered at room temperature for up to 2 days, or refrigerate for up to 4 days.
Nutrition
- Serving Size: 1 slice
- Calories: 350
- Sugar: 25g
- Sodium: 200mg
- Fat: 18g
- Saturated Fat: 11g
- Unsaturated Fat: 7g
- Trans Fat: 0g
- Carbohydrates: 45g
- Fiber: 3g
- Protein: 4g
- Cholesterol: 45mg