
You know those nights when you need dinner fast, but you also want something that actually tastes good? That’s when my grandma’s tuna patties swoop in to save the day like a crispy, golden superhero. I can’t count how many rushed weeknights these patties have saved me – they’re the ultimate budget-friendly meal that feels anything but cheap.
This recipe came straight from my grandmother’s well-worn recipe box (the same one I unpacked before anything else when moving into my first apartment). She’d make these on busy days when my cousins and I would show up unannounced after school. The smell of sizzling tuna patties meant home to us – and now, when I make them for my own kids, I swear I see her smiling when they ask for seconds.
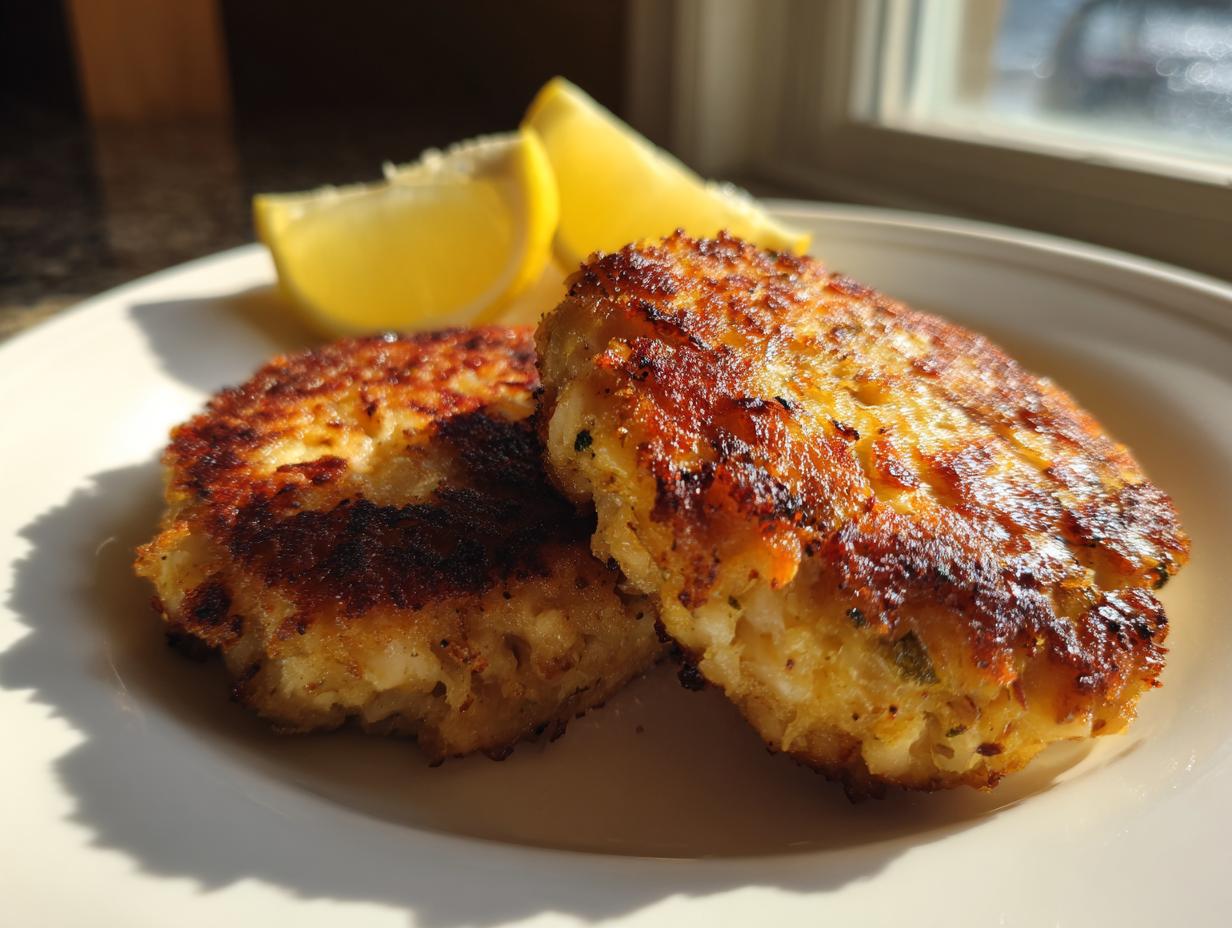
The best part? In about 20 minutes, you can transform a couple cans of tuna, some pantry staples, and that half-forgotten onion in your fridge into the most satisfying little patties. They’re crisp outside, tender inside, and perfectly happy on a bun, over greens, or straight from the skillet with a squeeze of lemon.
Why You’ll Love These Tuna Patties
These tuna patties are my go-to for so many reasons – let me count the ways:
- Quick as lightning: You’ll have dinner ready before your kids can ask “What’s for dinner?” for the tenth time.
- Gentle on your wallet: Made with pantry staples, they’re the definition of budget-friendly without tasting like it.
- That perfect crisp: When done right, they’ve got that golden, crunchy crust that makes you close your eyes and go “mmm.”
- Dress them up or down: Fancy them up with tartar sauce on a brioche bun, or keep it simple with a squeeze of lemon over greens.
- Leftover magic: They reheat beautifully – if you manage to have any left over, that is!
Honestly, I’d marry these patties if I could – they’re that good and reliable.
Ingredients for Tuna Patties
Here’s exactly what you’ll need to make these crispy, golden tuna patties – I’ve made them so many times I could probably recite this list in my sleep!
- 2 cans (5 oz each) tuna, drained – I prefer solid white albacore, but chunk light works great too
- 1/2 cup breadcrumbs – The plain kind work best, but I’ve used panko in a pinch
- 1 egg – This is our binder to hold everything together
- 1/4 cup finely chopped onion – I like yellow or sweet onions here, chopped super fine
- 1 tbsp mayonnaise – Adds that perfect moist texture
- 1 tsp mustard – Dijon is my favorite, but classic yellow works too
- 1/2 tsp garlic powder – No fresh garlic here – it can burn during cooking
- 1/4 tsp black pepper – Freshly cracked is best if you have it
- 2 tbsp vegetable oil – For that perfect golden fry
Ingredient Substitutions
Need to switch things up? No problem! For gluten-free tuna patties, use almond flour or gluten-free panko. Out of mayo? A spoonful of Greek yogurt works surprisingly well. If you’re egg-free, mix in 1 tbsp ground flaxseed with 3 tbsp water as a binder. My cousin swears by adding shredded zucchini or carrots for extra veggies—just squeeze out excess moisture first!
How to Make Tuna Patties
Alright, let’s turn those ingredients into the crispiest, most delicious tuna patties you’ve ever made. I’ve made these so many times I could probably do it blindfolded (but please don’t try that – hot oil and closed eyes don’t mix well!). Follow these simple steps, and you’ll be golden – literally!
- Mix it up: In a big bowl, combine the drained tuna, breadcrumbs, egg, onion, mayonnaise, mustard, garlic powder, and black pepper. Here’s my trick – use a fork to gently mix everything together. You want it combined, not mashed to death. The mixture should hold together when pressed, but still have some texture from the tuna.
- Form the patties: Divide your mixture into 4 equal portions (I use an ice cream scoop for perfect sizing). With damp hands, shape each portion into a patty about 1/2-inch thick – any thicker and they won’t cook through, any thinner and they might fall apart. Pro tip: Make a slight indent in the center of each patty with your thumb – this helps them cook evenly and stay flat.
- Heat the pan: Add your oil to a good non-stick or cast iron skillet (more on that in the tips below) and heat over medium. You know it’s ready when a breadcrumb sizzles immediately when dropped in. Don’t rush this – too cold and your patties will soak up oil; too hot and they’ll burn before cooking through.
- Cook to perfection: Carefully add your tuna patties to the pan – don’t crowd them! Cook for 3-4 minutes on the first side until golden brown and crispy. Resist the urge to peek too soon – letting them cook undisturbed is key to that perfect crust. Flip gently with a spatula and cook another 3 minutes on the other side.
- Drain and serve: Transfer your golden beauties to a paper towel-lined plate for just a minute to drain (though I won’t judge if you eat one straight from the pan – we’ve all been there!). Serve warm with your favorite sides.
Tips for Crispy Tuna Patties
Want restaurant-quality crispiness every time? Here are my tried-and-true secrets: First, chill your mixture for 15 minutes before shaping – this helps the patties hold together better. Always use a well-seasoned cast iron or a good non-stick pan – this ensures even browning without sticking. Don’t overcrowd your skillet! Giving each patty space means better crispiness all around. And if your patties seem delicate when flipping, wait another 30 seconds – they’ll firm up as they cook. Trust me, these little tricks make all the difference!
Serving Suggestions for Tuna Patties
Now comes the fun part – how to enjoy these golden patties! Honestly, I’ve served them every which way over the years. My personal favorite? Toasted brioche buns with a swipe of zesty tartar sauce (recipe coming soon!), crisp lettuce, and a thick tomato slice. Perfect for those nights when you want burger vibes without all the beef.
But that’s just the beginning! Try them over a bed of mixed greens with lemon wedges for a lighter meal – fantastic for meal planning healthy lunches. Or go fancy-pants with a dollop of garlic aioli and fresh dill for appetizer portions. Needs something heartier? Pair them with roasted sweet potatoes and sautéed green beans to round out your plate.
See what I mean about versatility? Whether you’re serving them with gluten-free meal delivery sides or whipping up something quick from your pantry, these tuna patties play nice with whatever you’ve got.
Storage and Reheating Tips
If by some miracle you have leftovers (we usually don’t in my house!), these tuna patties store beautifully. Just pop them in an airtight container in the fridge – they’ll stay fresh for about 3 days. Now, reheating is where things get interesting. The microwave is quick but turns them soggy – trust me, it’s worth taking an extra minute to use your toaster oven or regular oven at 375°F for 5-7 minutes. That brings back that perfect crispiness we love.
Freezing? Absolutely! Just layer cooked and cooled patties between parchment paper in a freezer bag. They’ll keep for about 2 months. When that craving hits, don’t even thaw – go straight from freezer to a 400°F oven for 10-12 minutes. Comes out almost as good as fresh, which is perfect for those nights when cooking feels impossible.
Nutritional Information for Tuna Patties
Just so you know, these nutritional values are estimates – your actual numbers might vary slightly depending on your exact ingredients (like how much mayo you use or what brand of tuna you grab). But here’s the scoop per patty, because knowledge is power when you’re meal planning:
- Calories: 180
- Protein: 15g (Tuna for the win!)
- Carbs: 10g
- Sugar: Just 1g
- Fat: 8g (Mostly healthy fats from the tuna and oil)
Not too shabby for something that tastes this good, right? These numbers make me feel better about eating two patties… for research purposes, of course.
Frequently Asked Questions
Over the years, I’ve gotten so many questions about these tuna patties – here are the ones that pop up most often with my tried-and-true answers!
Can I bake the tuna patties instead of frying?
Absolutely! Baking is perfect when you want a lighter option. Just pop them on a parchment-lined baking sheet at 375°F for about 15-20 minutes, flipping halfway. They won’t get quite as crispy as pan-fried, but spraying them lightly with oil first helps. My husband actually prefers them this way now!
Help! My tuna cakes keep falling apart – what am I doing wrong?
Don’t worry – this happens to everyone at first! The key is making sure your mixture isn’t too wet. If it feels sticky, add an extra tablespoon of breadcrumbs. Chilling the mixture for 15 minutes before shaping helps too. And when flipping, use a wide spatula and be gentle – wait until you see golden edges before you try to move them (I learned this the hard way!).
Can I use fresh tuna instead of canned for this recipe?
While these tuna patties were designed for canned tuna (it’s more budget-friendly and convenient), you can totally use fresh! Just cook and flake about 10 oz of fresh tuna first. Fair warning though – you might need to adjust the breadcrumbs since fresh tuna has more moisture. Start with 1/4 cup and add more until the mixture holds together when pressed.
What’s the best way to reheat leftover tuna patties?
For that just-made crispiness, skip the microwave! I use my toaster oven at 375°F for about 5 minutes per side. If you’re reheating from frozen, no need to thaw – just add a few extra minutes. They come out almost as good as fresh, which makes them perfect for meal prep Sundays!
Are these tuna patties good for meal planning?
You bet they are! These might just be the stars of my meal planning routine. They hold up beautifully in the fridge for 3 days, and they’re one of those rare foods that actually reheat well. I often double the batch to have quick protein ready for lunches – they’re fantastic on salads, in wraps, or just eaten cold straight from the container (no judgment here!).
Share Your Tuna Patties Experience
Nothing makes me happier than hearing how these tuna patties turn out in your kitchen! Did you add a special twist? Maybe your kids actually ate fish without complaining (a modern miracle!)? Snap a photo and tag me @RecipesToKeep – I’ll probably repost my favorites with all the credit to you. Or leave a star rating below if you loved them as much as my family does. Your cooking stories fuel my recipe testing adventures!
PrintEasy Tuna Patties

A simple, budget-friendly recipe for crispy tuna patties that make a quick and delicious meal.
- Prep Time: 10 min
- Cook Time: 8 min
- Total Time: 18 min
- Yield: 4 patties 1x
- Category: Dinner
- Method: Pan-frying
- Cuisine: American
- Diet: Low Calorie
Ingredients
- 2 cans (5 oz each) tuna, drained
- 1/2 cup breadcrumbs
- 1 egg
- 1/4 cup finely chopped onion
- 1 tbsp mayonnaise
- 1 tsp mustard
- 1/2 tsp garlic powder
- 1/4 tsp black pepper
- 2 tbsp vegetable oil
Instructions
- In a bowl, mix tuna, breadcrumbs, egg, onion, mayonnaise, mustard, garlic powder, and black pepper.
- Shape the mixture into 4 patties.
- Heat oil in a skillet over medium heat.
- Cook patties for 3-4 minutes per side until golden brown.
- Serve warm with your favorite sauce or on a bun.
Notes
- For a healthier option, bake patties at 375°F for 15-20 minutes.
- Add a squeeze of lemon juice for extra flavor.
Nutrition
- Serving Size: 1 patty
- Calories: 180
- Sugar: 1g
- Sodium: 300mg
- Fat: 8g
- Saturated Fat: 1.5g
- Unsaturated Fat: 5g
- Trans Fat: 0g
- Carbohydrates: 10g
- Fiber: 1g
- Protein: 15g
- Cholesterol: 60mg