
Oh, you know how I feel about those perfect, little bites of heaven! There’s just something so delightful about pulling out a tray of mini cheesecake bites at a party. They’re like little edible jewels that just disappear! Honestly, they’re my go-to when I want something special without a whole lot of fuss. This recipe is one of those treasures from my kitchen that I just know you’re going to love. It gives you that super creamy, dreamy cheesecake filling nestled in a perfectly crumbly graham cracker crust, all packed into one or two perfect bites. It reminds me so much of my grandma, Eleanor, and how she always made everything feel a little more magical. I’ve tweaked and tested these over the years to make sure they’re just right for you, keeping that classic taste and making them totally foolproof. We love sharing our kitchen adventures over on Facebook, so come join us! You can trust that these are truly keepers!
- Why You'll Love These Mini Cheesecake Bites
- Ingredients for Perfect Mini Cheesecake Bites
- Crafting Your Mini Cheesecake Bites: Step-by-Step
- Tips for No-Crack Mini Cheesecake Bites
- Topping Ideas for Your Mini Cheesecake Bites
- Making Mini Cheesecake Bites Ahead: Freezer-Friendly Desserts
- Frequently Asked Questions about Mini Cheesecake Bites
- Estimated Nutritional Information
- Share Your Mini Cheesecake Bites Creations!
Why You’ll Love These Mini Cheesecake Bites
Honestly, why wouldn’t you love these little wonders? They’re just perfectly portioned and so darn creamy!
- Super Easy: Seriously, they come together so fast—no fancy tricks needed!
- Party Perfect: These are ideal party desserts; they look elegant but are a breeze to serve.
- Crowd-Pleasers: Everyone loves cheesecake, and in a bite-size version? Pure happiness!
- Versatile: Whether it’s a casual get-together or festive holiday dessert bites, they always fit right in.
- Taste Amazing: That classic cheesecake flavor with a buttery graham cracker crust? Unbeatable!
Ingredients for Perfect Mini Cheesecake Bites
Alright, let’s talk about what makes these little gems so amazing. It all starts with the right players, and trust me, these are simple but mighty!
- Graham Cracker Crumbs: You’ll need about 1 1/2 cups. I usually crush up about 10-12 full graham crackers; that works out perfectly!
- Granulated Sugar: We’ll use 1/4 cup here for the crust and another 2/3 cup for the yummy filling.
- Unsalted Butter, Melted: Just 6 tablespoons of good old butter, melted and ready to mix with the crumbs.
- Cream Cheese: Two (8 ounce) packages of cream cheese is key for that creamy texture. Make sure it’s softened—this makes a HUGE difference when you’re mixing!
- Large Eggs: Two large eggs are all you need to bind everything together beautifully.
- Vanilla Extract: A good teaspoon of vanilla extract to add that classic cheesecake flavor.
- Optional Toppings: This is where you get to play! Think caramel sauce, a quick berry compote, or some chocolate shavings. Yum!
Crafting Your Mini Cheesecake Bites: Step-by-Step
Okay, let’s get down to the fun part – making these adorable little cheesecakes! It’s really straightforward, and before you know it, you’ll have a whole batch ready to impress. Remember, patience is key, especially with the cooling part, and that’s where we really lock in that perfect texture and prevent any dreaded cracks. It’s like building a tiny, delicious house, one step at a time!
Preparing the Graham Cracker Crust for Mini Cheesecake Bites
First things first, we need to build a sturdy little home for our creamy filling. Grab your graham cracker crumbs, that quarter cup of sugar, and your melted butter. Give it all a good mix – I usually just use a fork because I don’t want to overdo it. You want it to look like wet sand, honestly. Then, take about a tablespoon of this mixture and press it right into the bottom of each paper liner in your mini muffin tin. I like to use the flat end of a measuring spoon or even my thumb to get it nice and compact. This little tamp-down step is crucial for a good crust that won’t crumble apart!
Mixing the Creamy Cheesecake Filling
Now for the star of the show – that dreamy cheesecake filling! Make sure your cream cheese is nice and soft; seriously, don’t skip this, or you’ll end up with lumps, and we don’t want that. Beat it with your mixer until it’s super smooth, then slowly add the 2/3 cup of sugar and mix until it’s all combined and looks lovely. The big secret to keeping cheesecakes from cracking? Don’t overmix the batter once the eggs go in! Add them one at a time, just until they’re incorporated. Too much air whipped into the batter can cause it to puff up and then collapse, leading to those cracks. Finally, stir in your vanilla. Easy peasy!
Baking and Cooling Your Mini Cheesecake Bites
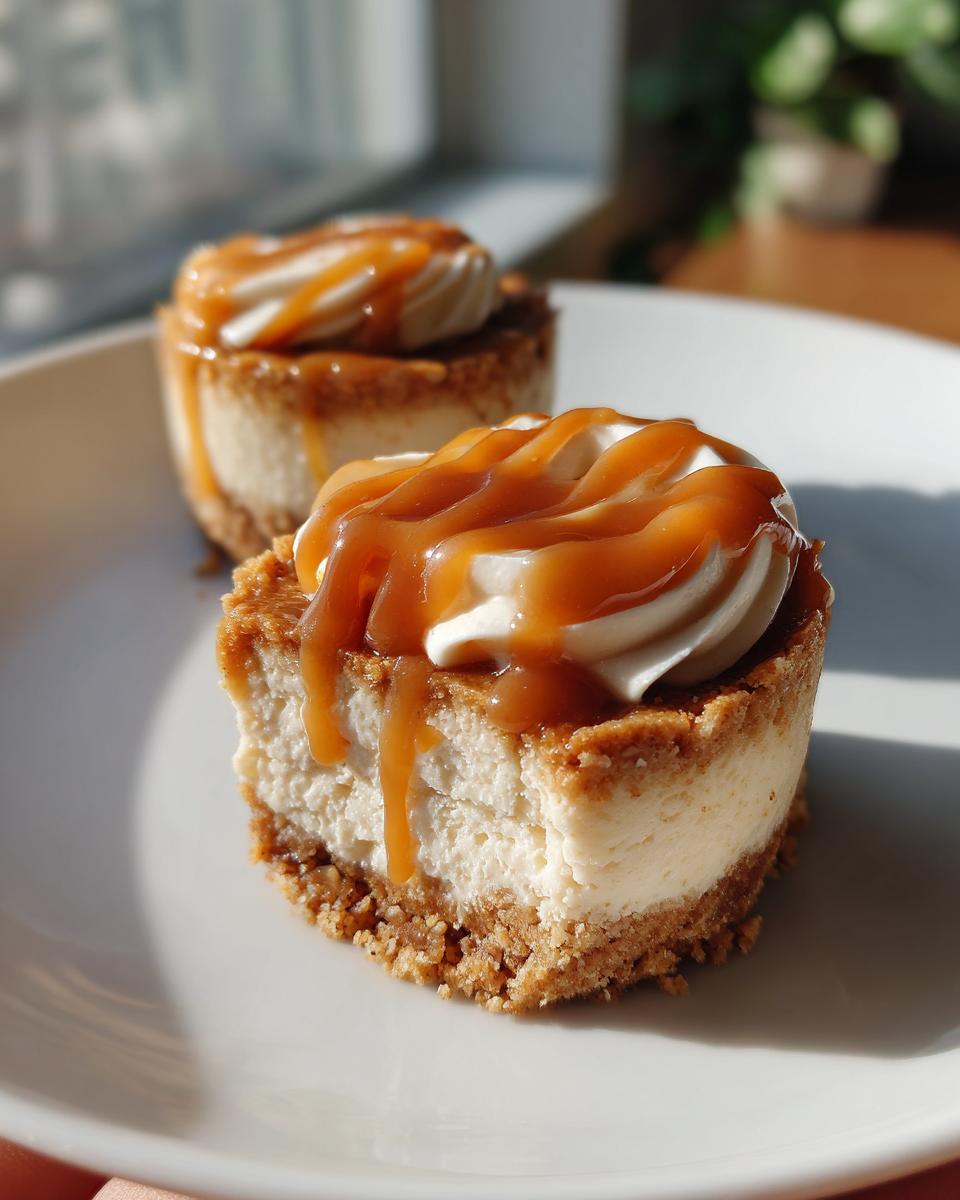
Time to bake these babies! Spoon that gorgeous filling over your crusts, filling each liner about two-thirds of the way full. They’ll puff up a bit, but they shouldn’t overflow. Pop them into your preheated 325°F (160°C) oven for about 15 to 18 minutes. You’re looking for the edges to be set, but the center should still be just a little bit jiggly. That’s exactly what you want! Let them cool in the muffin tin for about 10 minutes – this slow cooling is another trick to help prevent cracks. Then, carefully transfer them to a wire rack to cool completely. It also means these are *almost* as good as my cheesecake-stuffed strawberries in terms of portability!
Tips for No-Crack Mini Cheesecake Bites
Oh, the dreaded cheesecake crack! It’s enough to make anyone a little nervous, but I promise, these mini cheesecake bites are pretty forgiving. The number one rule? Don’t overmix that batter once the eggs are in! Seriously, treat those eggs gently – just mix them in until they’re barely combined. Overmixing adds too much air, and that’s what causes them to puff up and then fall with a crack. Also, don’t overbake them! You want those centers to be just barely set, a little wobbly. They’ll firm up the rest of the way as they cool. Another great tip from my kitchen is to let them cool down gradually. Let them hang out in the muffin tin for a bit after taking them out of the oven before you move them to the cooling rack. It’s all about giving them a nice, gentle transition. It’s the same principle I follow when I make my Keto Cheesecake; a gentle bake and cool mean success!
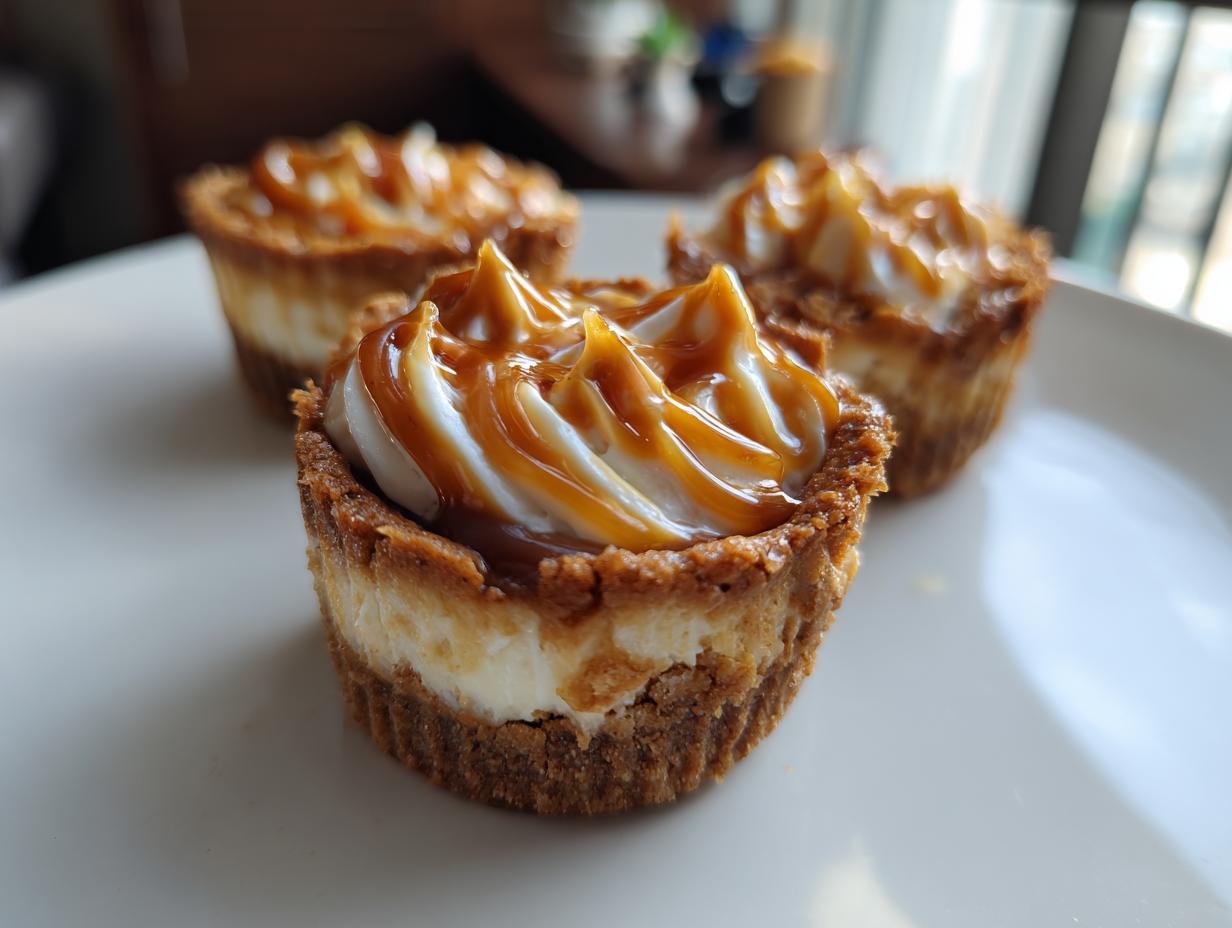
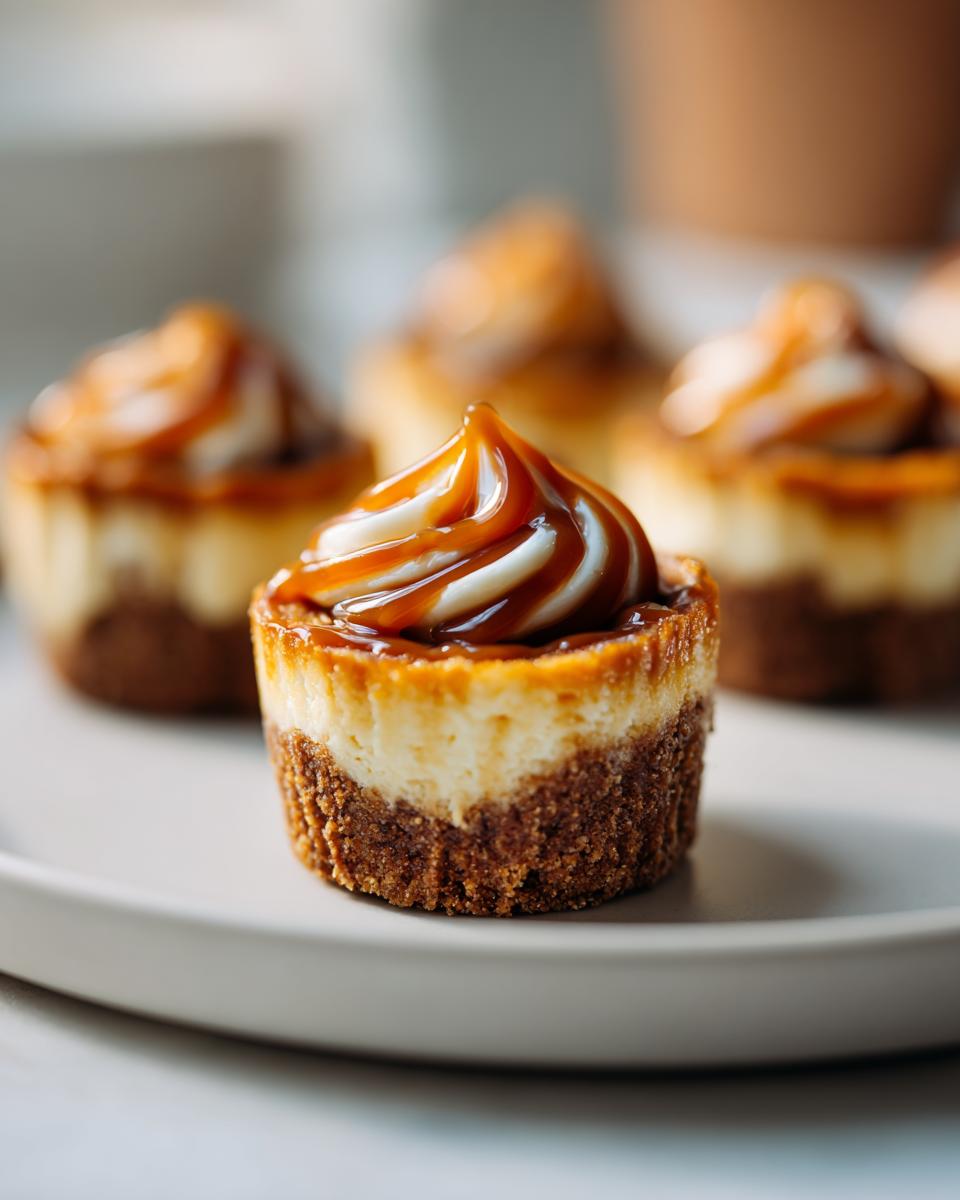
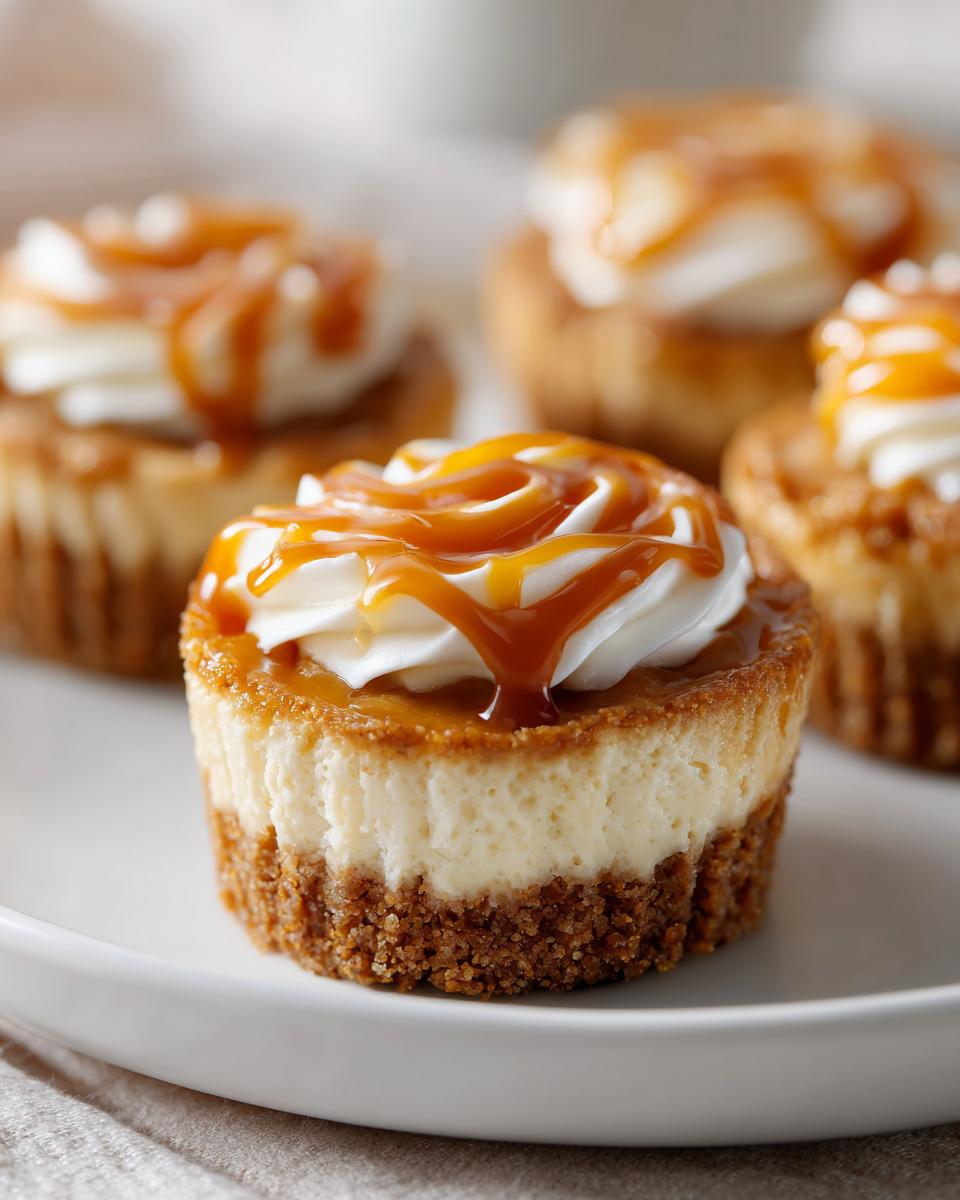
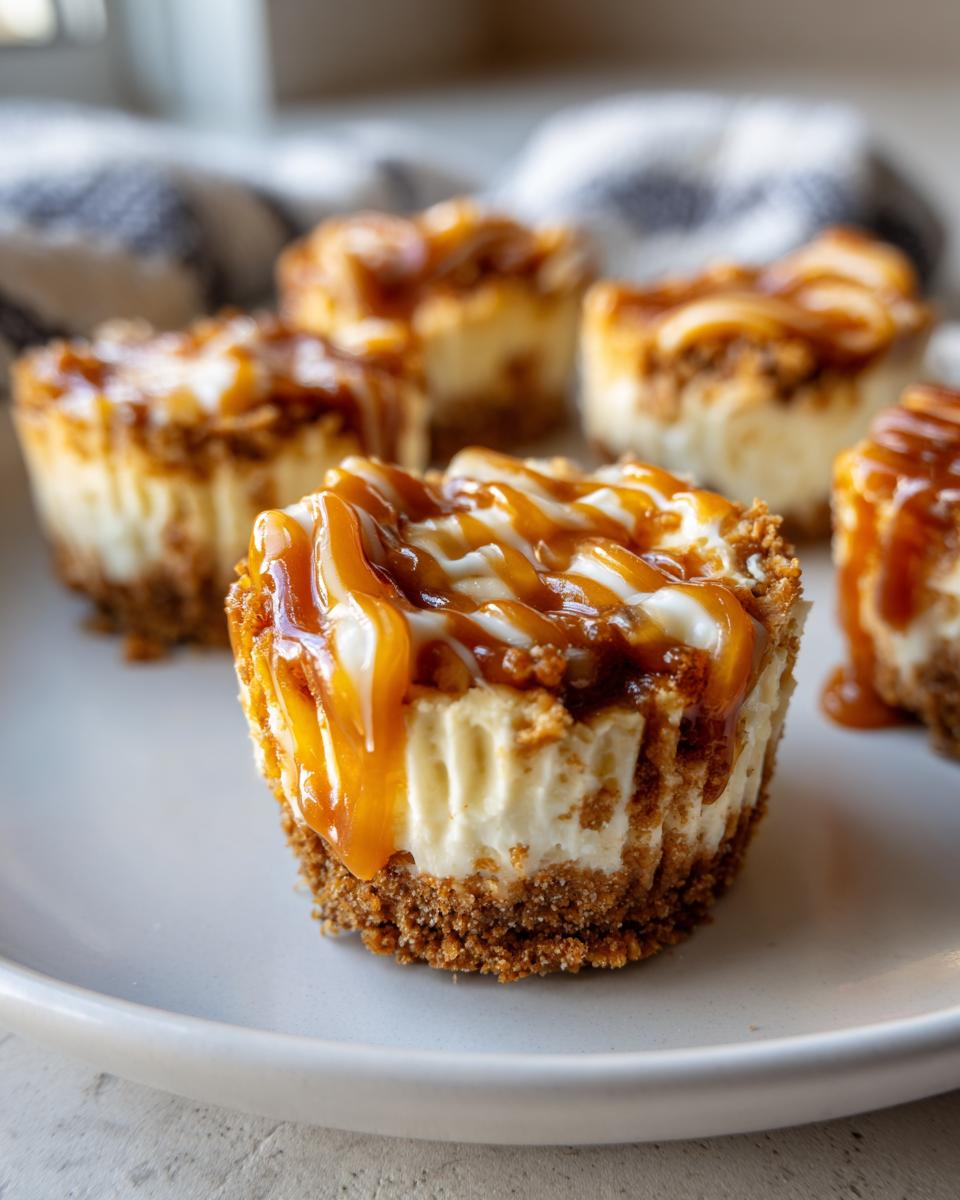
Topping Ideas for Your Mini Cheesecake Bites
Okay, so you’ve got these perfect little bite size cheesecake wonders, and now it’s time to dress them up! This is my favorite part because you can totally personalize them. Forget a boring topping bar; let’s make it a party! You can go classic with a drizzle of warm caramel sauce or a dollop of fresh berry compote. I’m also a huge fan of a simple sprinkle of chocolate shavings or even some crushed cookies. For a little something different, spoon on a bit of homemade jam, like a lovely peach jam, or even a touch of whipped cream and a mint leaf. The possibilities are really endless, and adding toppings just makes them even more irresistible!
Making Mini Cheesecake Bites Ahead: Freezer-Friendly Desserts
You know, one of the best things about these mini cheesecake bites is how perfectly they hold up when you make them ahead of time. They’re truly fantastic freezer friendly desserts! Since they’re already portioned out, they’re super easy to store for later. Just make sure they are completely cool first – that’s super important. Then, line a baking sheet with parchment paper and place your cooled cheesecake bites on it in a single layer. Pop that baking sheet into the freezer for about an hour, or until they’re firm. This stops them from sticking together. Once they’re solid, you can transfer them to a freezer bag or an airtight container. They’ll keep for about a month like this! To thaw, just pop them in the fridge overnight or on the counter for a couple of hours. They are amazing for unexpected guests, just like my Oreo Cheesecake Bars!
Frequently Asked Questions about Mini Cheesecake Bites
Got questions? I’ve got answers! Making these little bites of joy is pretty straightforward, but sometimes a few things pop into your head. Let’s clear those up so you can bake with confidence!
Can I make these mini cheesecake bites without a muffin tin?
Oh, that’s a great question! While the muffin tin is what makes them perfectly uniform bite size cheesecake portions, you absolutely *can* make these in other ways! If you have small ramekins or even a mini tart pan, you can press the crust into those. Just adjust the baking time accordingly – they might need a few extra minutes. You could even try a larger, regular-sized cheesecake pan and cut them into squares or wedges after baking and chilling, but the mini muffin tin really is the easiest way to get that perfect individual serving.
How long do these mini cheesecake bites last in the fridge?
These little darlings are pretty happy in the fridge! Once they’re completely cooled (and any toppings are added), you can store them in an airtight container. They’ll keep nicely for about 3 to 4 days. Just make sure they’re covered well, especially if you’ve got any strong-smelling foods in there, so your delicious party desserts don’t pick up any funny flavors. They’re perfect for making ahead for events!
What’s the best way to get the mini cheesecakes out of the liners?
That’s a common concern, and thankfully, it’s usually pretty simple! Since we’re using paper liners, they should peel away quite easily once the cheesecakes are fully cool. If you find one is sticking a little too much, you can very gently use a small offset spatula or even a butter knife to loosen the edge just a tiny bit before peeling. The chilling step also helps them firm up, making them less likely to break when you’re removing the liner. They’re so cute when they pop out clean!
Estimated Nutritional Information
Now, while these are little treats, it’s always good to have a general idea of what you’re enjoying! Keep in mind these numbers are estimates, and they can change a bit depending on your specific ingredients and any toppings you add. But for one of these delightful mini cheesecake bites, you’re generally looking at around 120 calories, with about 8 grams of fat and 12 grams of carbohydrates. We’ve got about 2 grams of protein and around 10 grams of sugar, plus a little bit of sodium. So, pretty balanced for a delicious dessert!
Share Your Mini Cheesecake Bites Creations!
I just *love* seeing what you all make in your own kitchens! Seeing your photos and reading about your experiences with these mini cheesecake bites makes my day. Did you try a special topping? Did the kids help make them? Please drop a comment below and let me know how they turned out! And if you’re sharing on social media, tag us – we love to see your creations! You can always read more about my kitchen adventures over at my about page. Happy baking!
PrintMini Cheesecake Bites

Creamy, one- or two-bite cheesecakes with a graham cracker crust, perfect for parties or desserts.
- Prep Time: 20 min
- Cook Time: 18 min
- Total Time: 38 min
- Yield: 24 bites 1x
- Category: Dessert
- Method: Baking
- Cuisine: American
- Diet: Vegetarian
Ingredients
- 1 1/2 cups graham cracker crumbs
- 1/4 cup granulated sugar
- 6 tablespoons unsalted butter, melted
- 2 (8 ounce) packages cream cheese, softened
- 2/3 cup granulated sugar
- 2 large eggs
- 1 teaspoon vanilla extract
- Optional toppings: caramel sauce, berry compote, chocolate shavings
Instructions
- Preheat your oven to 325°F (160°C). Line a 24-cup mini muffin tin with paper liners.
- In a small bowl, combine graham cracker crumbs and 1/4 cup sugar. Pour in melted butter and stir until crumbs are moistened. Press about 1 tablespoon of the mixture into the bottom of each muffin liner.
- In a medium bowl, beat the softened cream cheese with an electric mixer until smooth. Gradually add 2/3 cup sugar and beat until well combined.
- Beat in the eggs one at a time, mixing until just incorporated after each addition. Stir in the vanilla extract.
- Spoon the cream cheese mixture evenly over the graham cracker crusts in the muffin liners, filling them about two-thirds full.
- Bake for 15-18 minutes, or until the edges are set and the centers are still slightly soft.
- Let the cheesecakes cool in the muffin tin for 10 minutes before transferring them to a wire rack to cool completely.
- Once cooled, you can add your favorite toppings. These mini cheesecakes can be refrigerated or frozen for later enjoyment.
Notes
- For a no-crack cheesecake, avoid overmixing the batter and do not overbake.
- These bites are freezer-friendly. Freeze them in a single layer on a baking sheet before transferring to a freezer bag or container.
- Serve with a variety of toppings like caramel sauce, fresh berries, or chocolate shavings.
Nutrition
- Serving Size: 1 bite
- Calories: 120
- Sugar: 10g
- Sodium: 60mg
- Fat: 8g
- Saturated Fat: 4g
- Unsaturated Fat: 4g
- Trans Fat: 0g
- Carbohydrates: 12g
- Fiber: 1g
- Protein: 2g
- Cholesterol: 30mg