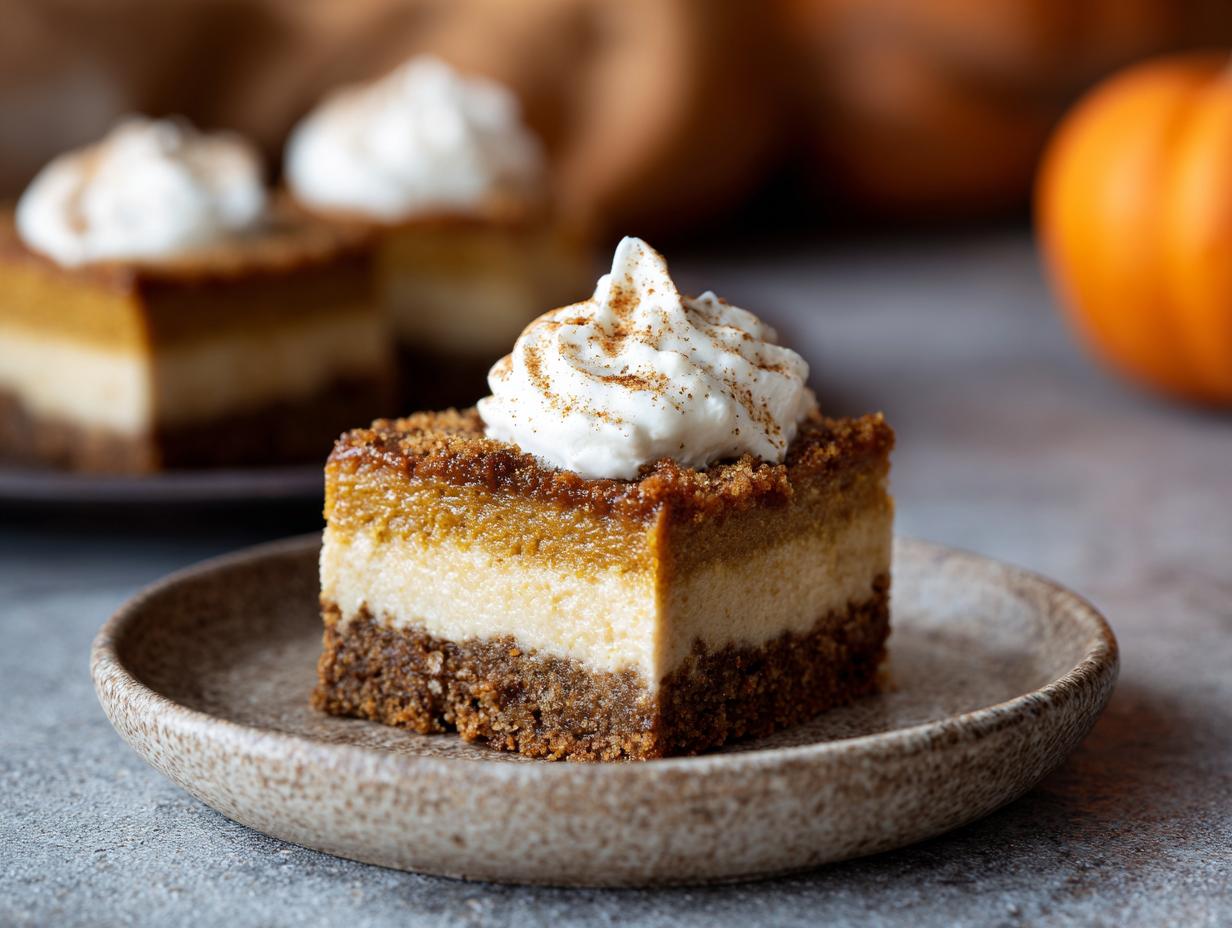

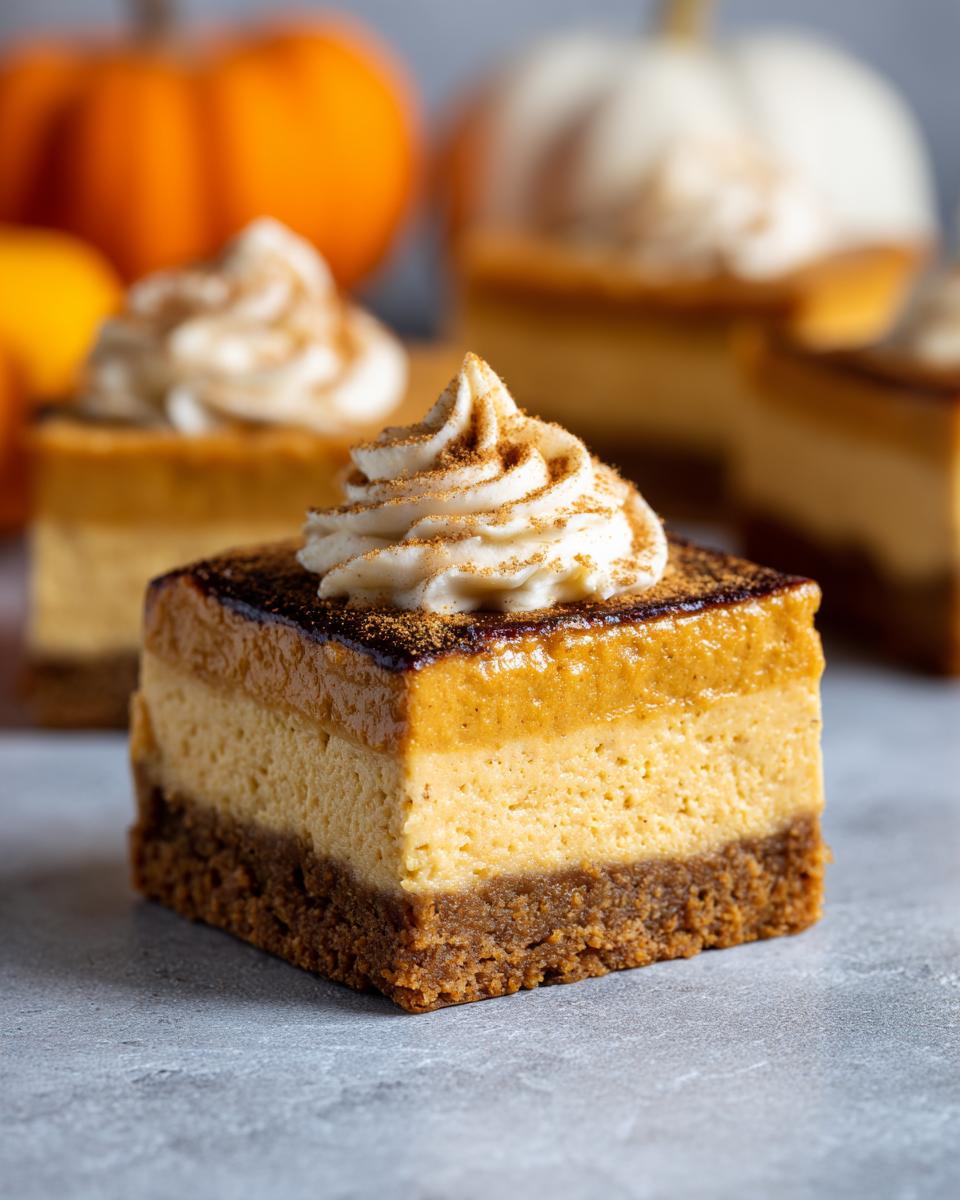
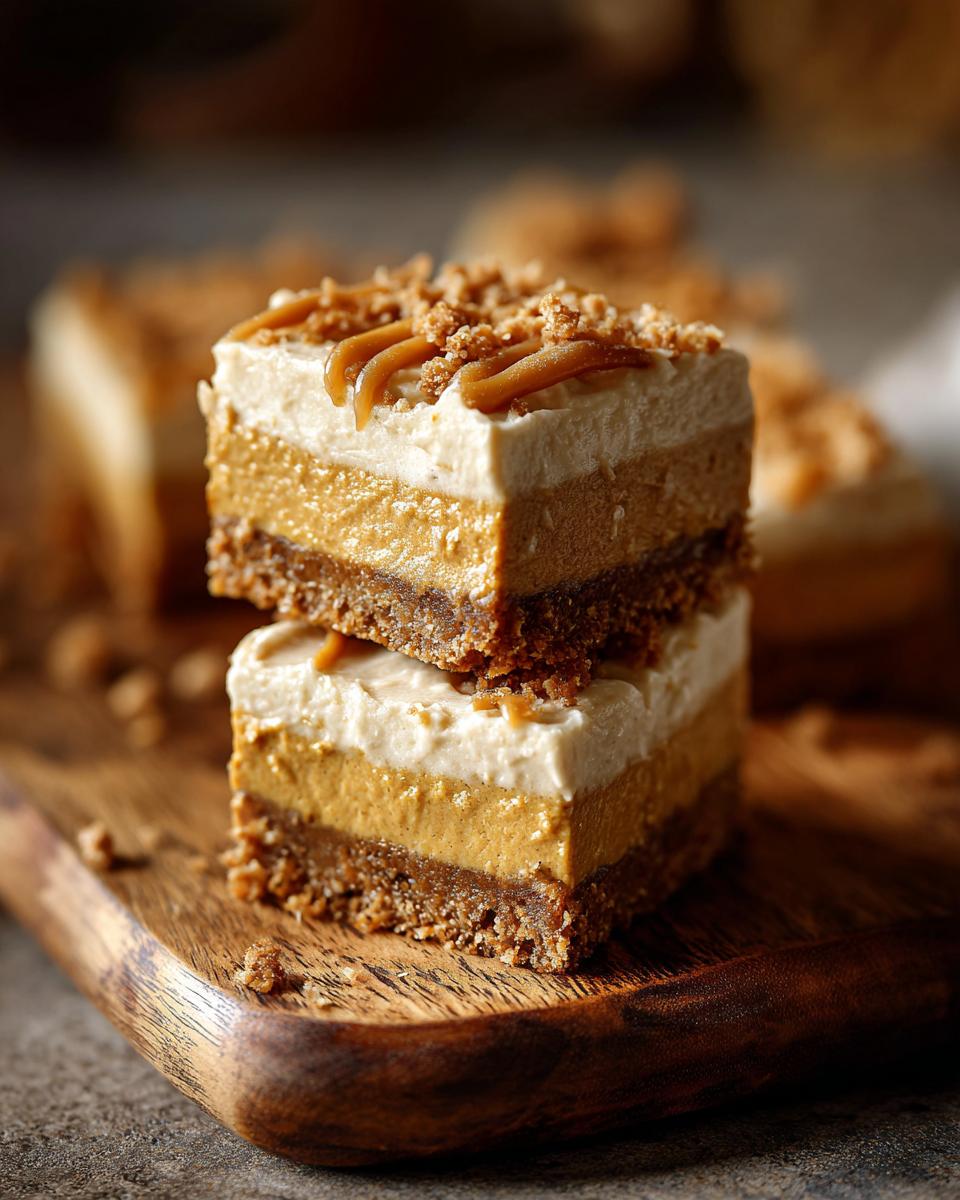
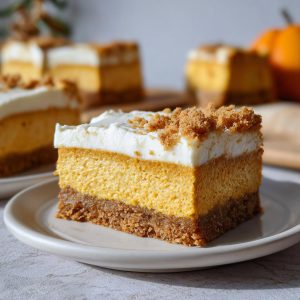
Oh, fall! Is there anything better than those cozy flavors and the sheer joy of whipping up something delicious without even turning on the oven? Seriously, when those crisp autumn days hit, my kitchen practically *demands* pumpkin everything. And let me tell you, these no-bake pumpkin cheesecake bars are my absolute go-to. They taste like a creamy, spiced hug, and the best part? You can completely make them ahead of time, which is a lifesaver when you’re hosting. I remember making a batch for a casual get-together last year, and people were raving! It’s just this perfect, smooth pumpkin cheesecake filling nestled on a buttery gingersnap crust, all without a single minute of oven time. Pure fall magic!
- Why You'll Love These No Bake Pumpkin Cheesecake Bars
- Ingredients for No Bake Pumpkin Cheesecake Bars
- Crafting the Perfect Gingersnap Crust for Your No Bake Pumpkin Cheesecake Bars
- How to Stabilize No Bake Cheesecake for No Bake Pumpkin Cheesecake Bars
- Creating the Creamy Pumpkin Cheesecake Filling
- Assembly and Chilling Time for Clean Slices
- No Bake Pumpkin Cheesecake Bars Without Cool Whip
- Serving and Storing Your No Bake Pumpkin Cheesecake Bars
- Understanding the Pumpkin Cheesecake Bar Calories
- Frequently Asked Questions about No Bake Pumpkin Cheesecake Bars
- Share Your No Bake Pumpkin Cheesecake Bar Creations!
Why You’ll Love These No Bake Pumpkin Cheesecake Bars
Seriously simple to make – no oven required!
That perfect fall flavor combo of pumpkin and spice.
They’re a total lifesaver for make-ahead parties.
Everyone raves about how creamy they are.
Ingredients for No Bake Pumpkin Cheesecake Bars
Okay, let’s talk ingredients! These bars are pretty straightforward, but using the right stuff makes all the difference. For the crust itself, you’ll want about 1 ½ cups of (and trust me on this!) gingersnap cookie crumbs. That’s usually around 30 cookies, crushed up nice and fine. Then, just mix that with 6 tablespoons of unsalted butter, melted until it’s all liquid gold, and 1 teaspoon of granulated sugar to help it hold together.
For the filling, grab an 8-ounce package of cream cheese and make sure it’s softened – like, leave it on the counter for about an hour. You don’t want any lumps, right? Mix that with ½ cup of granulated sugar until it’s super smooth. Then comes the pumpkin goodness: 1 cup of pumpkin puree (make sure it’s just pumpkin puree, not pumpkin pie filling!), and 1 teaspoon of pumpkin pie spice for that delicious fall warmth. A splash of ½ teaspoon vanilla extract is essential, too!
Now, for the creamy magic, you’ve got choices. You can whip up 1 cup of heavy cream until it forms stiff peaks – tastes so fresh! Or, if you’re in a pinch, 1 cup of Cool Whip, thawed, works too. Oh, and if you want that extra stability, especially if you’re bringing these to a party, you can blooom 1 teaspoon of unflavored gelatin in 2 tablespoons of cold water, then just gently heat it until it dissolves. Super optional, but a nice little trick!
Crafting the Perfect Gingersnap Crust for Your No Bake Pumpkin Cheesecake Bars
Alright, let’s get this crust party started! It’s super simple, honestly. You just take those yummy gingersnap crumbs – make sure they’re pretty fine, like sand – and mix ’em up with the melted butter and that little bit of sugar. Give it a good stir until everything is just combined. Then, the magic happens when you press it into the bottom of your pan. I like to use the bottom of a measuring cup or even just my hands to get it nice and even. A good, firm press helps it hold together so it doesn’t crumble when you slice it later. Pop that into the fridge for at least 15 minutes while you whip up the filling. Trust me, this chilling step is key for a solid base!
If you’re not a huge gingersnap fan, or maybe you just ran out, don’t sweat it! You can totally use graham cracker crumbs instead. Just use the same amount – that 1 ½ cups – and you might want to add an extra tablespoon of sugar to the graham cracker mix to get it to that perfect sweet spot. It gives the bars a slightly different vibe, a bit more classic, but still totally delicious! You could even try something fun like caramel apple nachos as inspiration for other crust ideas if you’re feeling wild!
Gingersnap vs. Graham Crust for Bars
So, the gingersnap crust? It brings this warm, spicy note that just sings with the pumpkin. It’s got a little more character, you know? The graham cracker crust is a classic for a reason, though. It’s a bit more neutral, letting the pumpkin cheesecake really shine, and it’s a touch more buttery. Both are fantastic, it really just depends on what kind of flavor profile you’re digging that day!
How to Stabilize No Bake Cheesecake for No Bake Pumpkin Cheesecake Bars
Okay, so if you want those perfectly neat slices that look amazing on a dessert platter, you might want to add a little something to help our cheesecake filling hold its shape. That’s where gelatin comes in! It’s like a little magic ingredient for no-bake desserts. You just need about 1 teaspoon of unflavored gelatin. The trick is to ‘bloom’ it first: sprinkle it over 2 tablespoons of cold water in a small bowl and let it sit for about 5 minutes. It’ll get all thick and jelly-like. Then, you can pop that bowl in the microwave for just 10-15 seconds, or gently heat it over low heat on the stove, until it’s liquid again and completely dissolved. Make sure it’s mixed into the pumpkin filling really well so there are no sneaky lumps!
Now, if you’re not into gelatin, or you just want a slightly softer, more fudgier bar, you can totally skip it! They’ll still be delicious, I promise. They just won’t hold their shape quite as firmly, especially if they sit out for a bit. You’ll definitely want to make sure they’re super chilled if you go that route. My keto cheesecake uses a similar trick to stay firm without baking, so it’s a good concept to keep in mind!
Creating the Creamy Pumpkin Cheesecake Filling
Alright, now for the best part – the filling itself! Grab your softened cream cheese and that ½ cup of sugar. Beat them together until they’re super smooth and creamy. Honestly, you want to get rid of any little lumps so the texture is just perfect. Then, we’ll beat in the pumpkin puree, that fragrant pumpkin pie spice, and the vanilla extract. Give it all a good mix until it’s one beautiful, orange color. If you’re using that gelatin trick we talked about, now’s the time to stir it in until it’s totally blended. The last step is to gently fold in your whipped cream. Be super gentle here, you don’t want to deflate all those lovely air bubbles you worked so hard to create! Just fold until there are no white streaks left, and you’ve got this incredibly smooth, pillowy pumpkin filling. It’s almost too pretty to put on the crust! Check out my pumpkin bread with cream cheese swirl for another yummy fall bake that uses similar flavors!
Assembly and Chilling Time for Clean Slices
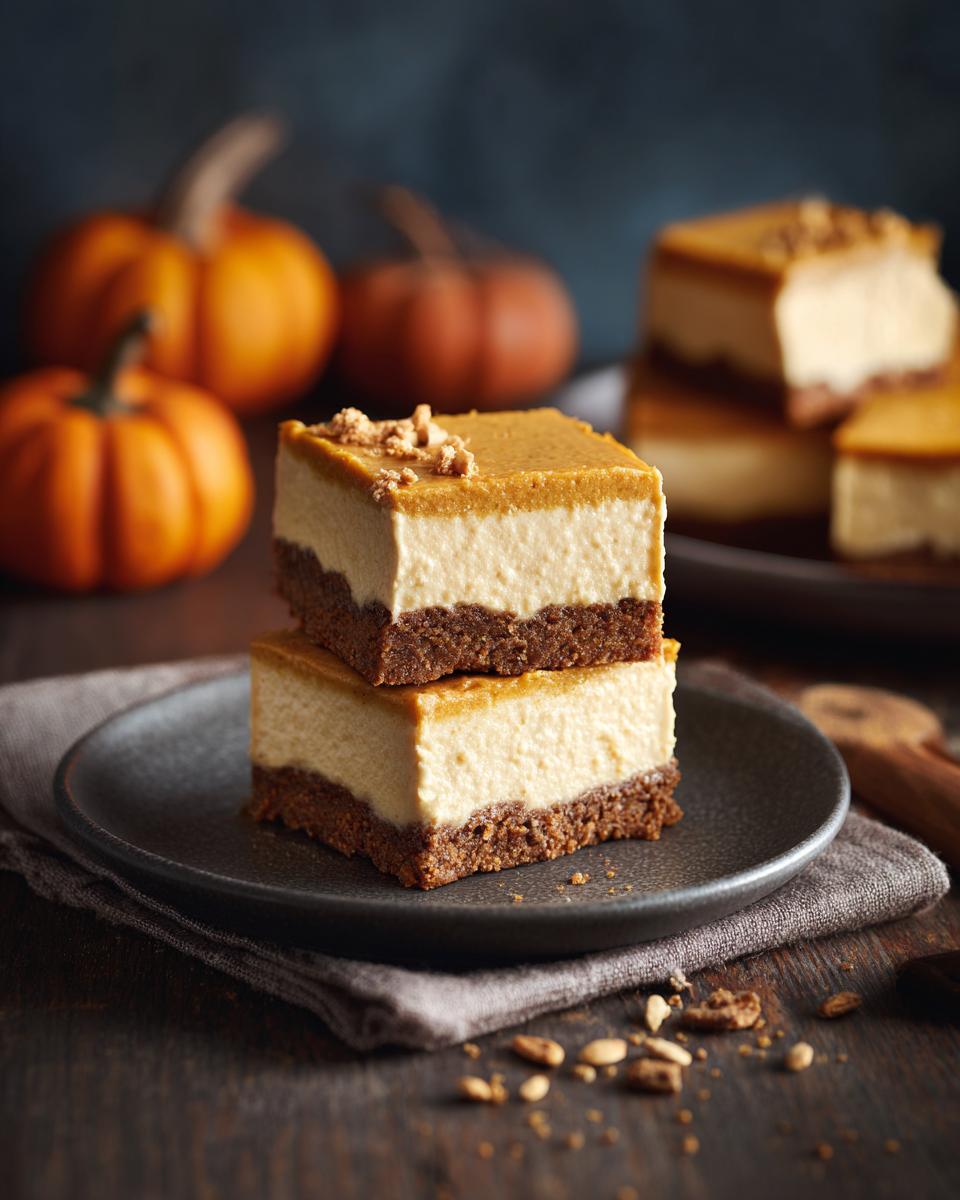
Okay, the moment of truth! Gently pour all that gorgeous, creamy pumpkin filling over your chilled gingersnap crust. Then, just smooth it out with a spatula so it’s nice and even across the whole pan. Now comes the hard part – waiting! You’ve got to let these bars chill in the fridge for at least 4 to 6 hours, but honestly, overnight is best. It’s during this time that everything really firms up and sets beautifully, making it so much easier to get those super clean slices we love. I know, the anticipation is torture, but trust me, it’s SO worth it when you see those perfect bars!
Tips for Achieving Clean Slices
Want those Instagram-worthy clean cuts? I’ve got you! The biggest trick is using a really sharp knife. Before you make your first cut, dip the knife in hot water and then wipe it completely dry. This helps it glide through the cheesecake so much easier. You’ll want to repeat this – dip and wipe – between every single cut. It might sound like a lot of work, but it makes ALL the difference in getting beautiful, neat bars instead of a messy pile!
No Bake Pumpkin Cheesecake Bars Without Cool Whip
So, you want that super creamy texture without the Cool Whip? I totally get it! Using freshly whipped heavy cream is my absolute favorite way to go for these bars. Honestly, it just tastes so much fresher and makes the filling incredibly light and airy. Plus, you know exactly what’s in it – just pure, rich cream!
Before you start, make sure your heavy cream is really cold; that’s the secret to getting those beautiful stiff peaks. Just whip it up until you don’t see any liquid, and then you’ll gently fold it into the pumpkin cream cheese mixture. Remember to be gentle so you don’t knock out all that lovely air! If you ever want to try another cheesecake that’s just as decadent, my Oreo cheesecake bars are another fantastic (and Cool Whip-free!) option.
Serving and Storing Your No Bake Pumpkin Cheesecake Bars
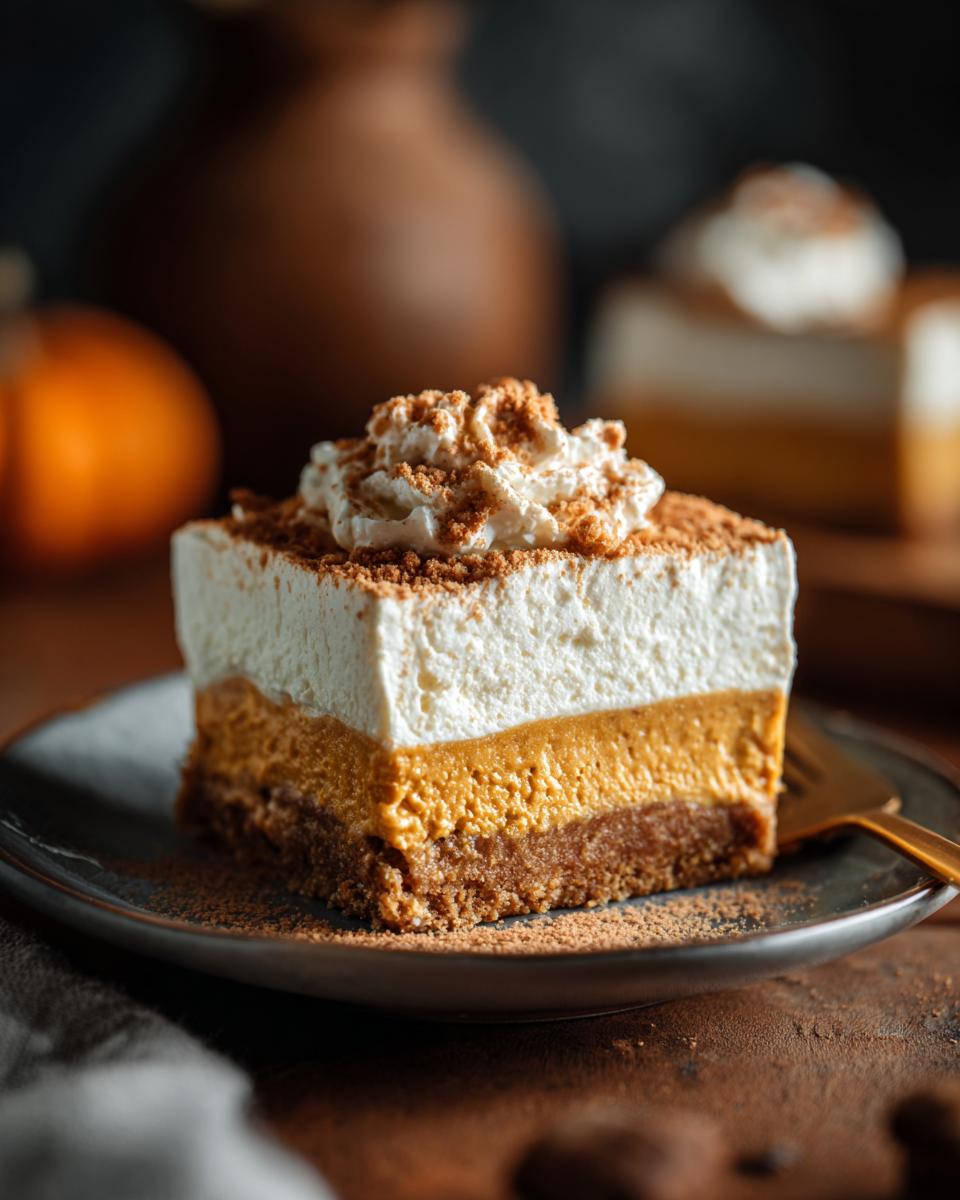
These bars are gorgeous just as they are, but you can totally jazz them up before serving! A little dusting of cinnamon or pumpkin pie spice right on top looks so pretty, or you could add a small dollop of extra whipped cream. For storing, it’s super important to keep them in the fridge. They’ll stay fresh and perfectly creamy for about 3-4 days if you cover them tightly. They are SO good straight from the cold, it almost tastes like ice cream! If you’re a big pumpkin spice lover, you might also want to check out my pumpkin spice latte copycat recipe for another dose of fall flavor!
Understanding the Pumpkin Cheesecake Bar Calories
So, you’re planning a party and need to know the deets? Totally get it! While the exact number can bounce around a bit depending on how you slice ’em and what ingredients you use, you can generally expect these delightful no-bake pumpkin cheesecake bars to clock in around 250 to 300 calories per bar. That’s a pretty good estimate for a rich, creamy dessert. Just remember, a bigger slice means more yumminess, of course!
Frequently Asked Questions about No Bake Pumpkin Cheesecake Bars
Got questions? I’ve got answers! It’s always good to get a little extra info before you dive in, right? Here are some things people often ask me about these bars:
Can I use canned pumpkin pie filling instead of pumpkin puree?
Oh, great question! You really want to stick to just plain pumpkin puree for this recipe. Canned pumpkin pie filling already has sugar and spices mixed in, which would throw off the flavor and texture we’re going for here. It might make them way too sweet or just taste a little…off. Stick to the puree for the best results!
How do I prevent the cheesecake filling from cracking?
This is a good one, even though ours is no-bake! For baked cheesecakes, cracking often happens from over-mixing or baking too quickly. But for our no-bake version, the key is really that chilling time! Make sure you’ve let them set up properly in the fridge. If you’re using gelatin, that helps a ton too! If you ever want to dive deeper into cheesecake perfection, my blog has lots of info on baking them right!
Can I make these bars coconut-milk-free?
These bars are naturally coconut-milk-free! The creaminess comes from the cream cheese and the whipped cream (or Cool Whip). So, no worries there if you’re not a fan of coconut or need to avoid it.
Can I use a different type of cookie for the crust?
Absolutely! While gingersnaps give it that amazing spiced kick, graham crackers are a classic backup. You could even try shortbread cookies for a buttery twist, or maybe even crushed vanilla wafers if that’s what you have on hand. Just make sure you’ve got about 1 ½ cups of crumbs and mix them well with the butter and sugar!
How long do these bars really need to chill?
This is super important for clean slices! While 4-6 hours will get them firm enough to eat, I honestly find that chilling them overnight is the magic number. It really lets everything meld together and get perfectly set. Don’t rush it – the wait means perfection!
Share Your No Bake Pumpkin Cheesecake Bar Creations!
Oh, I’d just LOVE to hear what you think! Did you make these little squares of fall heaven? Did you try the gingersnap crust or go for graham crackers? Drop a comment below and tell me all about it! And hey, if you snapped a picture of your amazing creation, you know I want to see it! Tag me on social media or share it on Facebook – I can’t wait to see your beautiful bars. And if you loved them, please consider giving them a rating! You can always reach out via my contact page if you have any questions, and you can find me on Facebook too!
PrintNo-Bake Pumpkin Cheesecake Bars
Easy no-bake pumpkin cheesecake bars with a gingersnap crust. These make-ahead bars are perfect for fall gatherings and holidays.
- Prep Time: 20 min
- Cook Time: 0 min
- Total Time: 4 hr 20 min
- Yield: 12-16 bars 1x
- Category: Dessert
- Method: No-Bake
- Cuisine: American
- Diet: Vegetarian
Ingredients
- 1 ½ cups gingersnap cookie crumbs (about 30 cookies)
- 6 tablespoons unsalted butter, melted
- 1 teaspoon granulated sugar
- 1 (8 ounce) package cream cheese, softened
- ½ cup granulated sugar
- 1 cup pumpkin puree
- 1 teaspoon pumpkin pie spice
- ½ teaspoon vanilla extract
- 1 cup heavy cream, whipped to stiff peaks (or 1 cup Cool Whip, thawed)
- Optional: 1 teaspoon unflavored gelatin, bloomed in 2 tablespoons cold water and gently heated until dissolved
Instructions
- In a medium bowl, combine the gingersnap cookie crumbs, melted butter, and 1 teaspoon sugar. Press the mixture evenly into the bottom of an 8×8 inch baking pan lined with parchment paper. Chill the crust for at least 15 minutes while you prepare the filling.
- In a large bowl, beat the softened cream cheese and ½ cup sugar until smooth and creamy.
- Beat in the pumpkin puree, pumpkin pie spice, and vanilla extract until well combined.
- If using gelatin, stir the dissolved gelatin into the pumpkin mixture until fully incorporated.
- Gently fold in the whipped cream until no streaks remain.
- Pour the pumpkin cheesecake filling over the chilled crust and spread evenly.
- Cover the pan and refrigerate for at least 4-6 hours, or preferably overnight, until firm.
- Once firm, lift the bars out of the pan using the parchment paper. Cut into desired bar sizes. For clean slices, use a sharp knife dipped in hot water and wiped dry between cuts.
Notes
- For a graham cracker crust, use 1 ½ cups graham cracker crumbs, 6 tablespoons melted butter, and 1 tablespoon sugar.
- If you prefer not to use gelatin, the bars will be softer but still delicious. Ensure adequate chilling time.
- You can substitute gingersnap cookies with graham crackers or shortbread cookies for a different flavor profile.
- Chill time is crucial for the bars to set properly for clean slicing.
- Calories per bar will vary based on the size of your cut. Approximately 250-300 calories per bar.
Nutrition
- Serving Size: 1 bar
- Calories: 275
- Sugar: 22g
- Sodium: 150mg
- Fat: 17g
- Saturated Fat: 10g
- Unsaturated Fat: 7g
- Trans Fat: 0g
- Carbohydrates: 28g
- Fiber: 1g
- Protein: 4g
- Cholesterol: 45mg