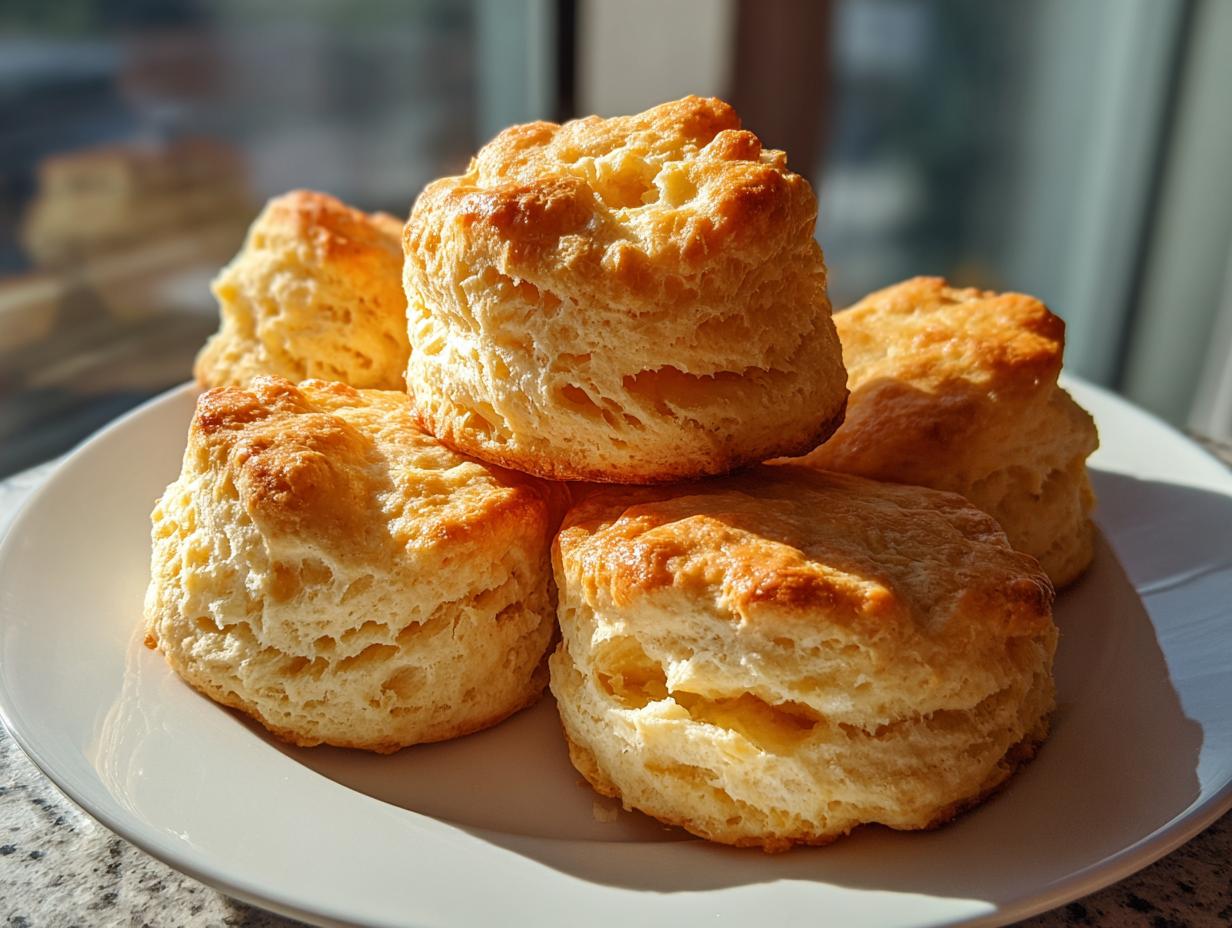

Oh, have you ever taken a bite of a biscuit so tender, so flaky, it just melts in your mouth? That’s the magic I’m talking about! For me, nothing beats a warm, homemade buttermilk biscuit, especially those tall, gorgeous Southern-style ones that practically whisper comfort. This recipe is a keeper, passed down and perfected because, honestly, we all deserve a little slice of that pure joy on our plate. It’s one of those recipes that feels like a hug from the inside, and bringing that feeling into your kitchen is exactly why I started this whole Recipes To Keep journey. Trust me, these are the biscuits you’ll be dreaming about.
- Why You'll Love These Buttermilk Biscuits
- Ingredients for Perfect Buttermilk Biscuits
- Essential Equipment for Making Buttermilk Biscuits
- How to Make Flaky Homemade Biscuits: Step-by-Step
- Tips for Success with Easy Biscuits Using Cold Butter
- Serving Suggestions for Your Buttermilk Biscuits
- Storage and Reheating Buttermilk Biscuits
- Frequently Asked Questions About Buttermilk Biscuits
- Estimated Nutritional Information
- Share Your Buttermilk Biscuit Creations!
Why You’ll Love These Buttermilk Biscuits
Seriously, these biscuits are a game-changer! Get ready for:
- Sky-high and wonderfully flaky layers that practically float!
- A super tender crumb that is just heavenly.
- Just the right amount of slightly crisp edges for the perfect bite.
- An incredibly easy recipe that anyone can master.
- A truly foolproof method – guaranteed deliciousness!
- That amazing, authentic Southern comfort in every bite.

Ingredients for Perfect Buttermilk Biscuits
Okay, let’s talk about what you’ll need to make these beauties! It’s all about keeping things cold and simple.
- 2 cups of self-rising flour (plus a little extra for dusting your hands and the counter – trust me, you’ll need it!)
- 1/2 cup (that’s one stick, folks!) of cold, unsalted butter, cut into little cubes. Chilled, like from the Arctic!
- 3/4 cup of cold buttermilk. Again, super cold is key here. You might need a tiny splash more if your dough is feeling a bit dry.
Essential Equipment for Making Buttermilk Biscuits
You don’t need fancy stuff to make amazing biscuits! Just a few things you probably already have in your kitchen: a big mixing bowl, a pastry blender or even just two forks (your hands work too!), a baking sheet, and a biscuit cutter. I love a 2-inch round one, but really, any biscuit cutter works great. Just make sure it’s sharp!
How to Make Flaky Homemade Biscuits: Step-by-Step
Alright, let’s get down to business and make some amazing flaky homemade biscuits! Don’t be intimidated, it’s really all about handling the dough gently. Think of it like this: we want to coax those layers out, not bully them into submission! It all starts with happy, cold ingredients. For more amazing baking tips, check out our blog!
Preparing the Dough for Buttermilk Biscuits
First things first, toss those cubed butter pieces into your bowl of self-rising flour. Now, get your hands in there (or use your pastry blender, no judgment!) and work that butter into the flour. You’re looking for a texture that’s like coarse crumbs, with a few little pea-sized bits of butter still hanging out. Those little butter pockets are pure gold for creating flaky layers later on!
Achieving Layers in Your Buttermilk Biscuits
Now, make a little well in the middle of your flour and butter mixture. Pour in that ice-cold buttermilk. Grab your fork and just stir gently, like you’re coaxing it together. You want a shaggy dough that’s just starting to come together; it will look a little sticky, and that’s totally okay! Resist the urge to overmix or knead this dough – seriously, don’t do it! Turn the dough out onto a lightly floured surface and give it a few gentle folds, just 3 or 4 times. Pat it down lightly so it’s about ¾-inch thick all over. This little folding trick is what builds those gorgeous layers.

Cutting and Baking Southern Buttermilk Biscuits
Time for the fun part! If you’re using a round cutter, press it straight down into the dough – but here’s the secret: DON’T twist it! Twisting seals the edges and stops your beautiful Southern buttermilk biscuits from rising up tall. Just push straight down and lift straight up. If you’re cutting squares, just use a knife and go straight down. Work quickly with any dough scraps; just gently pat them together and cut again. Place your biscuits on a baking sheet lined with parchment paper, giving them a little space to puff up. Pop them into your preheated 425°F (220°C) oven and bake for about 12 to 15 minutes. You’ll know they’re ready when they’re puffed up and beautifully golden brown on top! Happy baking! You can find more breakfast favorites here.

Tips for Success with Easy Biscuits Using Cold Butter
Making fantastic easy biscuits with cold butter is totally doable, and a few little tricks will make all the difference. Don’t worry, I’ve made enough batches to know what works and what doesn’t! For more handy tips, hop over to our blog!
The Importance of Cold Ingredients
Seriously, this is not a suggestion, it’s a MUST! Cold butter creates steam pockets when it hits the hot oven, and that steam is what LIFTS those biscuit layers apart. If your butter is even a little melty, you’ll end up with flatter, denser biscuits. Cold buttermilk does the same job. Keep ’em chilled!
Avoiding Tough Biscuits
Here’s the deal: flour has gluten, and when you mix and knead it too much, that gluten gets tough. We want tender biscuits, not chew toys! So, just mix until everything *just* comes together. Think gentle folds, a light touch, and resist the urge to really dig in and knead. It’s the gentlest touch that yields the most tender, melt-in-your-mouth results.

Serving Suggestions for Your Buttermilk Biscuits
These biscuits are so versatile, they’re practically perfect for any meal! Of course, a classic smear of butter is always divine. But don’t stop there! They are AMAZING with a dollop of your favorite jam, a drizzle of honey, or, if you’re feeling traditional, absolutely smothered in creamy gravy. They make breakfast feel special, brunch even better, and are the perfect side dish to any dinner. For more ideas on what to serve alongside, check out our side dish collection!
Storage and Reheating Buttermilk Biscuits
Got leftover biscuits? Lucky you! Store them in an airtight container or a zip-top bag at room temperature for a day or two. If you want them to last a bit longer, pop them in the fridge. To get that lovely fresh-from-the-oven texture back, pop them in a warm oven (around 350°F or 175°C) for a few minutes until they’re heated through and just starting to crisp up again. You can also warm them gently in a skillet with a little butter. For more baking tips, be sure to visit our blog!
Frequently Asked Questions About Buttermilk Biscuits
Got a question about these delightful biscuits? I’ve got you covered!
Can I use regular milk instead of buttermilk?
You *can*, but it won’t be quite the same, sweetie! Buttermilk’s acidity reacts with the flour to make the biscuits extra tender and helps them rise beautifully. If you’re really in a pinch, you can make a quick buttermilk substitute by adding a tablespoon of lemon juice or white vinegar to regular milk and letting it sit for 5 minutes. It’s not *exactly* the same, but it’ll get you close!
What if I don’t have self-rising flour?
No worries! You can totally make your own self-rising flour blend. For every cup of self-rising flour the recipe calls for, just use 1 cup of all-purpose flour, then whisk in 1 ½ teaspoons of baking powder and ¼ teaspoon of salt. Easy peasy!
How do I get my biscuits taller?
Oh, getting those sky-high biscuits is all about a few things! First, make sure your butter and buttermilk are super cold. Second, don’t overwork that dough – just gentle folds! And last, when you cut them, press straight down without twisting. That seal-off is what prevents them from really puffing up in the oven. Also, give them a little space on the baking sheet so they can grow upwards!
My biscuits turned out tough. What did I do wrong?
This is the most common biscuit boo-boo! It almost always comes down to overworking the dough. Remember, we’re just mixing until everything *barely* comes together. Too much mixing develops the gluten too much, making them tough. So, gentle hands and a light touch are your best friends here!
Estimated Nutritional Information
Just a heads-up, these numbers are estimates and can wiggle around a bit depending on the exact brands of ingredients you use and how big your biscuits turn out. But generally, one of these yummy biscuits has about 200 calories, 10g of fat, 4g of protein, and 25g of carbohydrates. Enjoy!
Share Your Buttermilk Biscuit Creations!
Now it’s your turn! I’d absolutely LOVE to hear how your buttermilk biscuits turned out. Did they reach for the sky? Did you smother them in gravy? Leave a comment below and tell me all about it, or even better, share your gorgeous biscuit photos with me on Facebook at Recipes To Keep! Your baking makes my day!
PrintSouthern Buttermilk Biscuits

Learn to make tall, flaky Southern-style buttermilk biscuits with a tender crumb and slightly crisp edges. This foolproof recipe uses cold butter and simple techniques for perfect results every time.
- Prep Time: 15 min
- Cook Time: 15 min
- Total Time: 30 min
- Yield: 8-10 biscuits 1x
- Category: Baking
- Method: Baking
- Cuisine: American
- Diet: Vegetarian
Ingredients
- 2 cups self-rising flour, plus more for dusting
- 1/2 cup (1 stick) cold unsalted butter, cut into small cubes
- 3/4 cup cold buttermilk, plus more if needed
Instructions
- Preheat your oven to 425°F (220°C). Line a baking sheet with parchment paper.
- In a large bowl, whisk together the self-rising flour.
- Cut in the cold butter using a pastry blender, your fingertips, or two forks until the mixture resembles coarse crumbs with some pea-sized pieces of butter remaining.
- Make a well in the center of the flour mixture and pour in the cold buttermilk.
- Gently stir with a fork until just combined. The dough should be shaggy and slightly sticky. Do not overmix. If the dough seems too dry, add a tablespoon more buttermilk at a time.
- Turn the dough out onto a lightly floured surface. Gently pat or fold the dough over on itself 3-4 times to create layers. Avoid kneading.
- Pat the dough into a rectangle about 3/4-inch thick.
- Use a 2-inch round biscuit cutter (do not twist the cutter) or cut the dough into squares with a knife. Rework scraps as little as possible.
- Place the biscuits onto the prepared baking sheet, about 1 inch apart.
- Bake for 12-15 minutes, or until the biscuits are golden brown on top and cooked through.
- Serve warm with butter, jam, or gravy.
Notes
- For extra flaky biscuits, ensure your butter and buttermilk are very cold.
- Do not twist the biscuit cutter when cutting; this seals the edges and prevents a good rise.
- Overworking the dough will result in tough biscuits. Mix just until combined.
Nutrition
- Serving Size: 1 biscuit
- Calories: 200
- Sugar: 2g
- Sodium: 400mg
- Fat: 10g
- Saturated Fat: 6g
- Unsaturated Fat: 4g
- Trans Fat: 0g
- Carbohydrates: 25g
- Fiber: 1g
- Protein: 4g
- Cholesterol: 25mg