
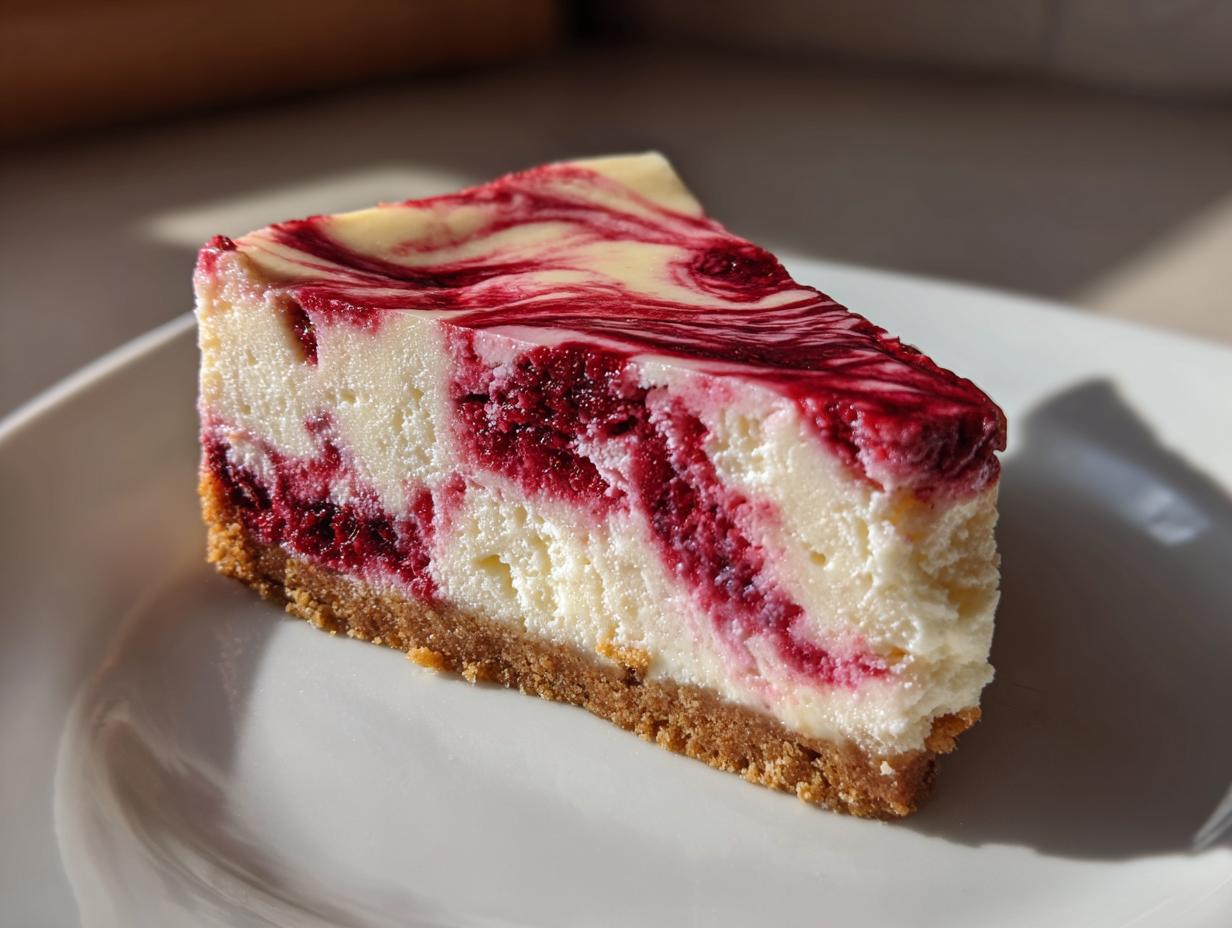

If you’ve ever sworn off making baked cheesecake because of that dreaded surface crack, then I have wonderful news for you! Getting that unbelievably silky, smooth texture—the kind that belongs on a fancy dessert menu—is all about a few non-negotiable steps. My goal here at Recipes To Keep is turning those tricky classics into reliable family favorites, and this **white chocolate raspberry cheesecake** is the star of the show. We aren’t messing around with airy, dry textures here; we are going deep and rich. Trust me, once you master the water bath technique I’m sharing, you’ll never look back. This recipe is foolproof, promises a gorgeous swirl, and delivers that decadent, restaurant-style finish every single time.
- Why This White Chocolate Raspberry Cheesecake Recipe is a Keeper
- Gathering Ingredients for Your White Chocolate Raspberry Cheesecake
- Step-by-Step Baked Cheesecake Guide: Making the White Chocolate Raspberry Cheesecake
- Tips for a Restaurant Style Dessert: Perfecting Your White Chocolate Raspberry Cheesecake
- Serving Suggestions for Your Decadent Sweet Treat
- Storage and Reheating Instructions for White Chocolate Raspberry Cheesecake
- Frequently Asked Questions About Making White Chocolate Raspberry Cheesecake
- Sharing Your Keeper Dessert
- Estimated Nutritional Data for White Chocolate Raspberry Cheesecake
Why This White Chocolate Raspberry Cheesecake Recipe is a Keeper
I know you’ve been burned by cheesecake before. It’s heartbreaking when you pull something gorgeous out of the oven only to find a cracked wasteland the next morning! But this recipe, this beautiful **white chocolate raspberry cheesecake**, it changes everything. It’s one of those recipes that I keep coming back to because it just works, year after year.
If you are looking for a showstopper dessert that travels well and tastes luxurious, this is it. Here’s why this recipe earns its permanent spot in your collection:
- Guaranteed Silky Smooth Texture: We are achieving that luxurious, melt-in-your-mouth mouthfeel by using top-shelf white chocolate and making sure our ingredients are perfectly tempered. No lumps allowed!
- The No Crack Cheesecake Secret: The water bath method isn’t optional here, folks—it’s essential! I walk you through wrapping your pan perfectly so a little steam surrounds your cheesecake, keeping it happy and crack-free during the bake.
- Restaurant-Quality Results: Honestly, pulling this out after a long chill makes me feel like I should be charging $15 a slice. If you want a truly gourmet cheesecake recipe, this is the blueprint.
- Stunning Presentation: That vibrant raspberry swirl against the creamy white chocolate backdrop makes this the ultimate holiday cheesecake ideas centerpiece. It looks way harder than it actually is to make!
- Reliability You Can Count On: Just like all the best American traditions, this recipe has been tested rigorously. I want you to save it, share it, and know it won’t let you down when you’re hosting guests. If you want more baking tips like these, check out my general baking tips archive!
Gathering Ingredients for Your White Chocolate Raspberry Cheesecake
Okay, time for the fun part—getting all our beautiful components ready! Remember what I always say: cheesecake is all about the starting line. If you don’t treat your ingredients right before they hit the bowl, things get chunky fast. Getting everything to the right temperature is seriously the key to that silky smooth cheesecake filling we are aiming for. Don’t cheat this step!
We need three main groups of items here: the base, the luxurious filling, and that vibrant swirl that makes this showstopper sparkle.
For the Graham Cracker Crust
This crust needs to be firm enough to hold up to all that creamy goodness, so be sure to press down really hard when you pack it in the pan. Don’t be shy!
- 1 1/2 cups graham cracker crumbs (I prefer fine crumbs!)
- 1/4 cup granulated sugar (This little bit helps it crisp up nicely.)
- 6 tablespoons unsalted butter, melted
For the Silky White Chocolate Filling
This is where we build the flavor! Make sure you use good quality white chocolate here—it really makes a difference in depth of flavor for this white chocolate raspberry cheesecake. Also, your cream cheese and eggs absolutely must be at true room temperature. I can’t stress that enough, or your filling won’t be beautiful.
- 3 (8 ounce) packages cream cheese, softened (Leave it out for a good few hours!)
- 1 1/2 cups granulated sugar (Yes, it needs this much sugar for that perfect balance!)
- 1 teaspoon vanilla extract
- 1/4 cup all-purpose flour (This acts as a little insurance policy to prevent cracks!)
- 1 cup heavy cream
- 12 ounces white chocolate, melted and cooled slightly (Crucial: let it cool down a bit so it doesn’t scramble the eggs!)
- 4 large eggs, room temperature (The room temperature factor stops lumps!)
For the Raspberry Swirl Topping
This part is going to look so lovely against the creamy white backdrop. You certainly could make a complicated homemade raspberry topping recipe, but for this version, we are keeping it simple so the cheesecake base shines.
- 1 cup raspberry sauce or puree (Use a good, thick one!)
Step-by-Step Baked Cheesecake Guide: Making the White Chocolate Raspberry Cheesecake
Alright, buckle up, because we are officially turning those gorgeous ingredients into an unstoppable white chocolate raspberry cheesecake! This part requires a little focus, but I promise, if you follow these steps precisely, you will conquer the baked cheesecake mountain. Forget stress—we are making a simple, foolproof dessert that every home baker can nail. Remember, we’re aiming for that baking tips for cheesecake perfection here!
Preparing the Crust and Pan for the White Chocolate Raspberry Cheesecake
First things first: that crust needs to sit still and firm up. Mix your graham cracker crumbs and that little bit of sugar, then pour in the melted butter. Mix until it looks like wet sand—it should hold together if you squeeze a bit.
Press that mixture *really* firmly into the bottom of your 9-inch springform pan. I use the bottom of a measuring cup to get it super packed down. Then, pop it into the fridge for a solid 30 minutes. While that chills, wrap the outside of your pan. You need heavy-duty foil—wrap it completely around the bottom and sides, multiple layers! This is non-negotiable because we are using water, and nobody wants a soggy crust or a leak that ruins your masterpiece. This step is critical for success, people!
Mixing the Silky Smooth Cheesecake Filling
Now for the main event! Get that softened cream cheese going in your mixing bowl until it’s fluffy—no lumps allowed. Slowly stream in the sugar, then the vanilla and flour. Mix on low until it’s just combined. We are keeping the air out!
Next, add the heavy cream and that beautifully cooled, melted white chocolate. Mix low again, just until smooth. The crucial moment comes last: the eggs. Add them one by one, mixing super briefly after each addition, just until you see the yellow disappear. Seriously, stop mixing the *second* the egg is gone. We want that silky smooth cheesecake filling, not one that’s overly airy and destined to crack!
Assembling and Creating the Raspberry Swirl Dessert
Once the crust is firm, pour that creamy white chocolate mixture right over the top. Smooth it out nicely.
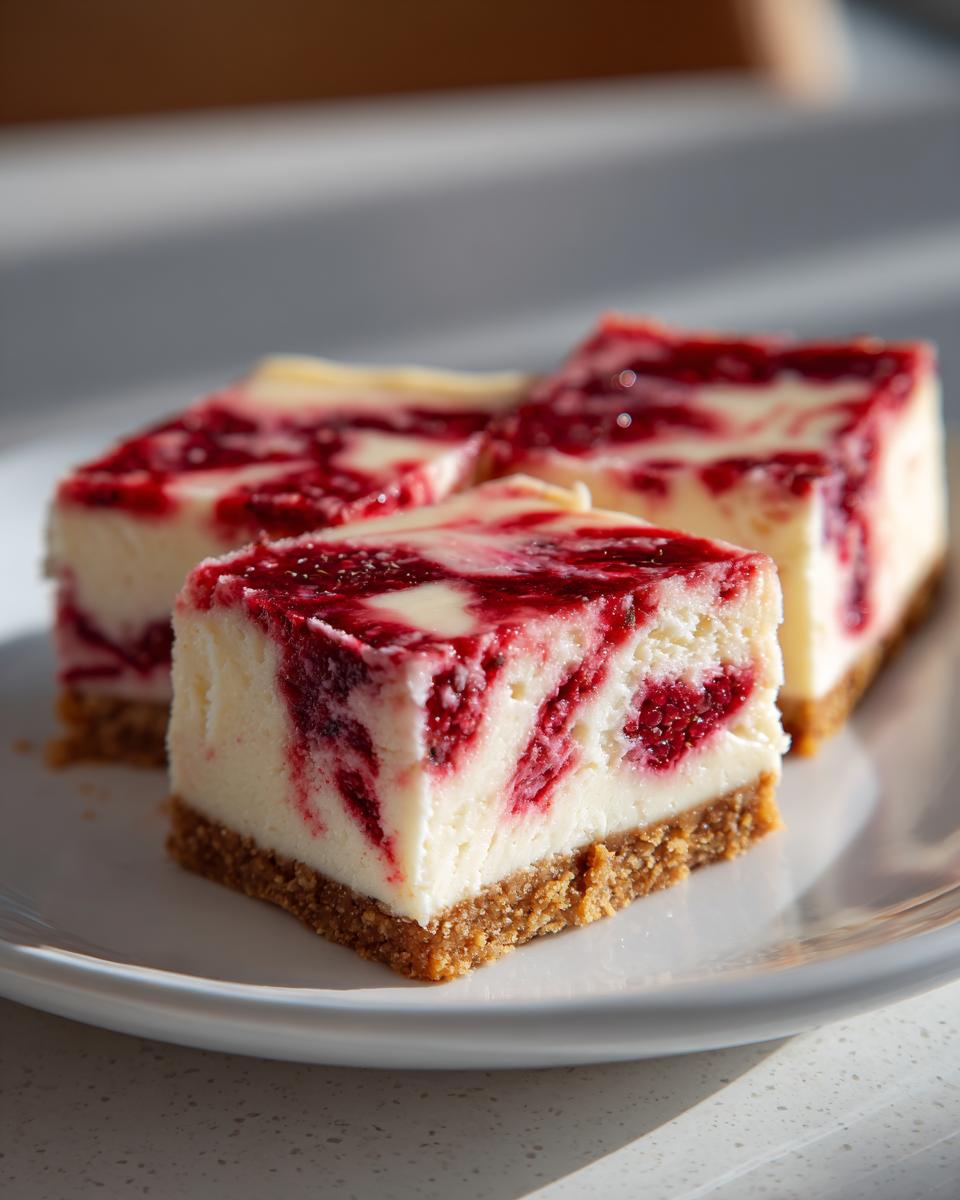
Take your raspberry sauce and just start plopping spoonfuls all over the batter. Don’t try to cover the entire surface—you just need dollops spaced out. Now, grab a thin knife or even a wooden skewer and gently drag it through the batter to create those gorgeous swirls. Don’t over-swirl, or you’ll just end up with pink cheesecake! We want definition. Go see more amazing recipes over on our Facebook page!
The Water Bath Bake and Foolproof Cooling Method
Take that foil-wrapped pan and carefully place it inside a larger roasting pan. Now, here comes the gentle part: pour super hot water into the roasting pan until it comes about halfway up the sides of your cheesecake springform. That’s your water bath!
Bake at 325°F for about 60 to 75 minutes. Listen, you want the edges firm, but the very center should still have a little wiggle, like Jell-O. Once that timer goes off, turn the oven OFF. Don’t touch the temperature dial, just turn the heat off. Crack the oven door slightly—use a wooden spoon to prop it open if you need to stay put for an hour. This slow, gentle cooling prevents drastic temperature changes, which is the #1 secret to a no crack cheesecake masterpiece. After an hour, you can take it out to finish cooling on the counter before chilling it overnight.
Tips for a Restaurant Style Dessert: Perfecting Your White Chocolate Raspberry Cheesecake
Look, if you were aiming for an average dessert, you probably wouldn’t be reading a recipe this detailed, right? You want that incredible, decadent, restaurant style dessert quality, and I get that! Achieving something that rivals even some of the famous chain versions—that copycat cheesecake recipe feeling—comes down to tiny details in technique. We’ve covered the water bath, which is huge, but let’s talk about what happens *before* the oven even turns on, and how to make sure you’re getting that guaranteed creamy result.
Don’t skip these nuances; they are what separate a good cheesecake from the one everyone fights over on the holiday table. If you want more insights into getting baked goods right, my general advice section is full of great info, like these general baking tips for cheesecake!
Ingredient Temperature Matters for Creamy Cheesecake Tutorial
I’m going to hammer this home one more time because it’s the single biggest reason people end up with lumps! Your cream cheese needs to be truly soft. I mean, you should be able to press your finger easily into it without resistance. But even more critical are those four eggs!
If your eggs are cold when they hit that beautiful, creamy white chocolate base, they will seize up the batter. It ruins the whole smooth texture we worked so hard to create. This is the core lesson in any proper creamy cheesecake tutorial: cold ingredients = lumpy cheesecake. Let your eggs sit on the counter right next to the cream cheese for at least an hour before you start mixing. That simple patience makes a massive difference in the end result!
Cheesecake Crust Variations
While the graham cracker crust is absolutely traditional—it gives that classic salty-sweet balance that pairs perfectly with the white chocolate—I know some of you might want to try something different! Maybe you have a favorite cookie on hand, or maybe you’re just feeling adventurous, which is totally fine by me.
If you want to explore some different borders for your centerpiece, the structure of this recipe easily allows for cheesecake crust variations. You can swap out the graham crackers for crushed Oreos if you want a dark, chocolatey base that really pops against the white filling. Or, if you prefer a slightly finer texture, digestive biscuits work wonderfully well! Just treat the replacement crumbs exactly like you would the graham crackers: mixed with sugar and bound with melted butter, then pressed firmly into the base. Easy enough!
Serving Suggestions for Your Decadent Sweet Treat
Whew! You did it! The patience pays off now because this white chocolate raspberry cheesecake needs time to fully set up. If you try to slice this beauty while it’s still warm or merely cool, you’re going to regret it when your slice collapses into a puddle. It’s just not worth rushing the final, critical step!
For this cheesecake to truly earn the title of a gourmet cheesecake recipe, it needs a long, cold nap. The minimum chilling time I insist on is six hours, but honestly, if you can hold out until the next day—overnight is always best! This allows the white chocolate to fully firm up the filling and lets all those gorgeous flavors really meld together. When it’s perfectly chilled, that silky texture becomes flawless, and it slices like a dream.
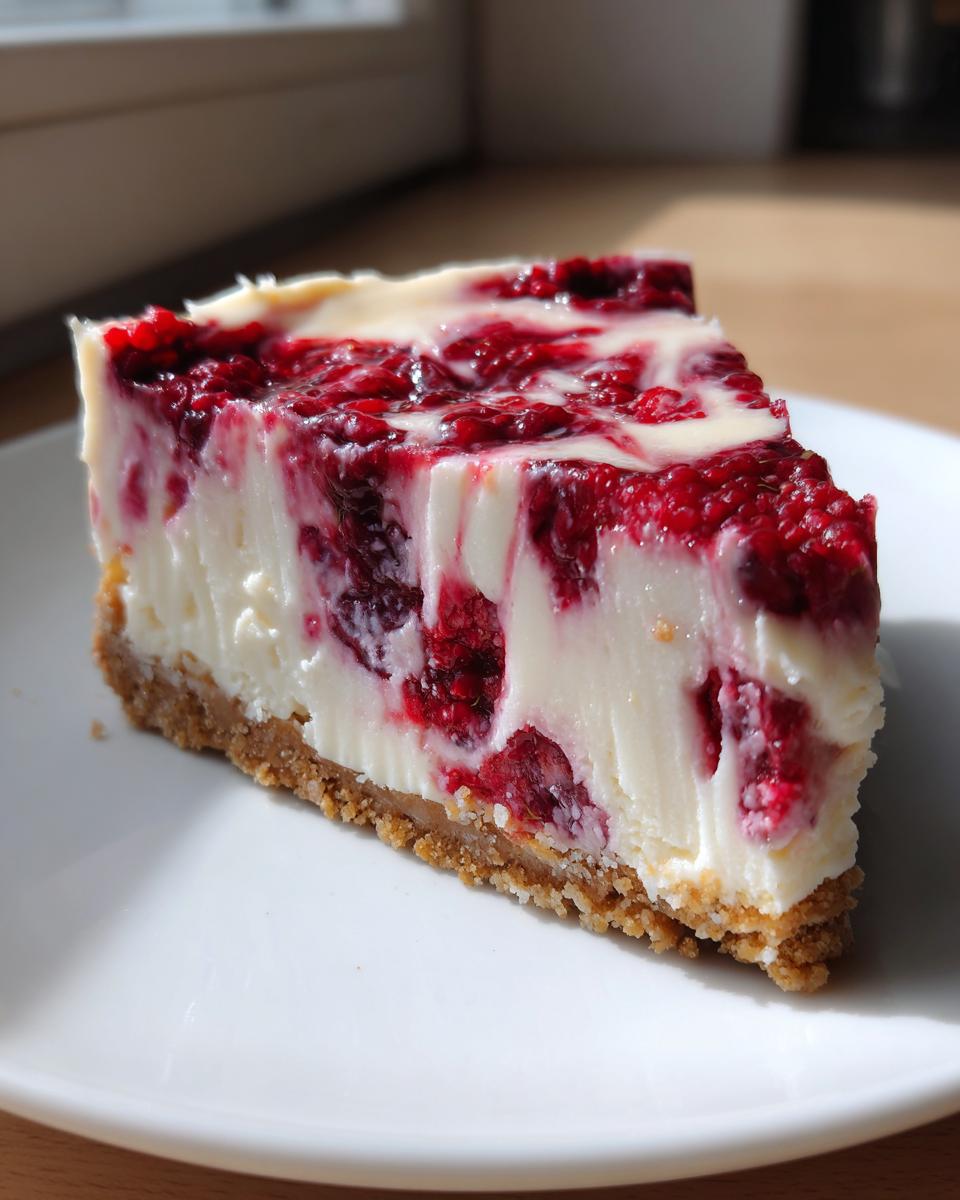
When it comes time to serve this decadent beauty, trust me, it truly needs very little dressing up. It’s a showstopper all on its own!
- Chilled and Plain: The best way, hands down, is serving it straight from the fridge. The clean flavor of the white chocolate and the tartness of the raspberry swirl shine brightest when it’s cold.
- A Light Sprinkle: If you feel like you absolutely must add something extra, a tiny dusting of powdered sugar around the edge of the plate looks incredibly elegant.
- Fresh Fruit Garnish: Grab a few fresh raspberries or even slices of white chocolate shavings to pile right on top of the slice just before serving. It adds something lovely for textural contrast.
- Coffee Pairing: Since this is such a rich treat, I always serve it with a strong cup of coffee—maybe even a leftover caramel apple cheesecake coffee pairing if I happen to have some leftover!
Don’t overthink the serving part. This white chocolate raspberry cheesecake is your star; just be prepared for everyone to beg for the recipe!
Storage and Reheating Instructions for White Chocolate Raspberry Cheesecake
This rich, decadent sweet treat is honestly even better the next day once it’s had a full night to chill out and let those white chocolate and raspberry flavors really settle in. I always love pulling a slice out for breakfast—don’t judge! But since this is such a special occasion dessert, we want to make sure any leftovers stay in tip-top shape.
The good news is that cheesecake stores like a dream, provided you take a couple of simple precautions. Since we went through all that effort to get that perfect, crack-free top, we definitely don’t want it drying out in the fridge!
Here’s my rule for keeping your white chocolate raspberry cheesecake perfect:
- Cover It Well! When you’re storing leftovers, make sure you cover the cut edges immediately. You can use plastic wrap pressed gently against the exposed filling, or if the entire cheesecake remains, keep the lid on your springform pan, or cover it loosely with foil. Cheesecake absorbs fridge smells, so keeping it tightly covered is key.
- Refrigerator Life: Stored properly in the fridge, this cheesecake will stay absolutely wonderful for 4 to 5 full days. Seriously, if you’re aiming for a holiday showstopper, you can safely make it a few days ahead of time.
- Freezing is Possible, But Be Careful: If you need to keep it longer, you can freeze it. I recommend slicing it first, then freezing the slices on a baking sheet until solid before transferring them to a freezer bag. When thawing, let it come back to life slowly in the refrigerator overnight.
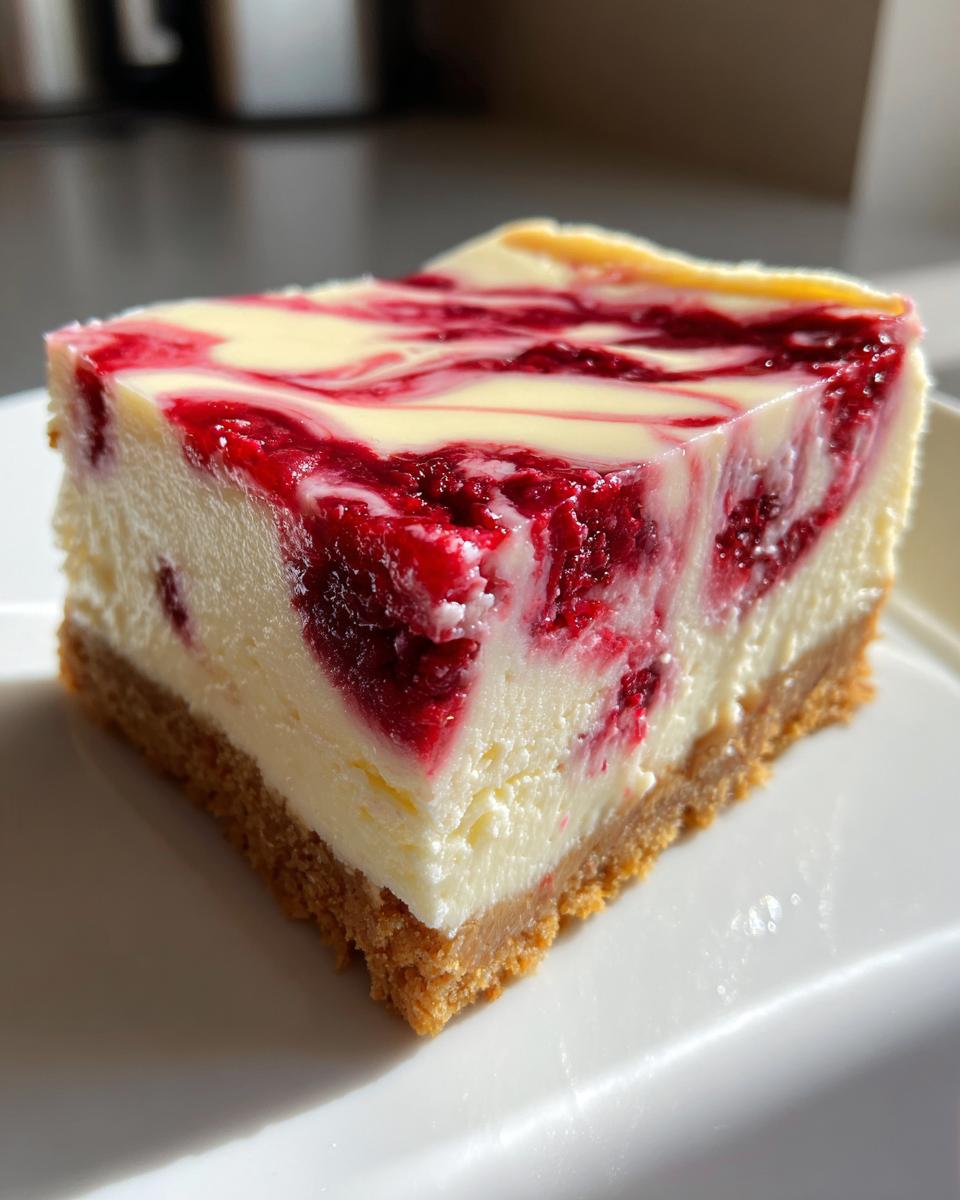
Now, let’s talk about reheating. I know, I know, who would reheat cheesecake? Cheesecake is meant to be enjoyed cold or room temperature! If, for some strange reason, you absolutely must have a warm portion (maybe you just want the crust a little toasty?), you need to be super careful. Reheating cheesecake directly can turn that beautiful silky texture back into an oily mess really fast.
If you *must* warm it, only warm the crust side gently on a microwave-safe plate for about 10 seconds on 30% power. Do not heat the filling part at all! For the best flavor, always let this decadent sweet treat temper out on the counter for about 30 minutes before slicing if it’s been chilled overnight. That little bit of warmth takes the chill off without ruining the structure underneath.
Frequently Asked Questions About Making White Chocolate Raspberry Cheesecake
It’s totally normal to have questions when you are tackling a showstopper like this! Baking a perfect cheesecake takes a little finesse, and I want you to feel completely confident before you even soften the cream cheese. That’s why I wanted to tackle some of the common worries right here. Answering these questions is part of my commitment to being your most reliable source for these kinds of classic meals!
Jump in below to see if I answered what you were worried about, and remember, if you have a question about one of my other favorite recipes, like my pumpkin martini recipe, feel free to drop it in the comments!
Can I make this white chocolate raspberry cheesecake without a water bath?
Oh, honey, you *can* try, but why would you want to risk it? That water bath is your lifeline to achieving that perfect, crack-free surface. Cheesecake is mostly eggs and fat, and eggs cook very fast when exposed to direct, dry heat. Skimping on the bath means you are asking for dryness around the edges and guaranteed cracks right in the center when it cools because the temperature drops too fast.
If you want that guaranteed no crack cheesecake result—the kind that looks incredible for a holiday dessert—you must use the water bath, even if it feels fussy to wrap that pan! It’s the secret sauce for even baking and moisture retention.
What is the best way to achieve a ‘silky smooth cheesecake filling’?
This goes straight back to temperature and mixing speed! The absolute best way to get that unbelievable silky smooth cheesecake filling is threefold. First, your cream cheese and eggs must be at true room temperature—soft, pliable, and ready to mix easily. Cold ingredients force you to over-mix to smooth them out, which whips in too much air.
Second, slow mixing speed is your friend. You are combining ingredients, not making meringue! Keep the mixer on low, especially once those eggs go in, and stop mixing the second you don’t see streaks of yellow or white. Anything more just encourages bubbles that turn into cracks later on. Patience here equals silkiness, I promise.
I want to use fresh raspberries instead of sauce—can I?
Yes, you absolutely can! Fresh raspberries are beautiful, especially if you want to sprinkle a few on top when serving. If you are using them in the swirl, I always recommend simmering them briefly on the stove with just a tablespoon of sugar and maybe a tiny splash of water until they break down into a thick, spoonable sauce. If you just plop raw berries in, they don’t swirl well, and they might release too much water during the bake. We want that thick, vibrant raspberry swirl dessert effect, not a watery mess!
Sharing Your Keeper Dessert
You’ve done the hard part! You respected the water bath, you tempered your eggs, you waited the agonizing hours for it to chill, and now you have this absolutely stunning, luxurious **white chocolate raspberry cheesecake** sitting on your counter. Seriously, take a moment to admire that gorgeous swirl before you cut into it!
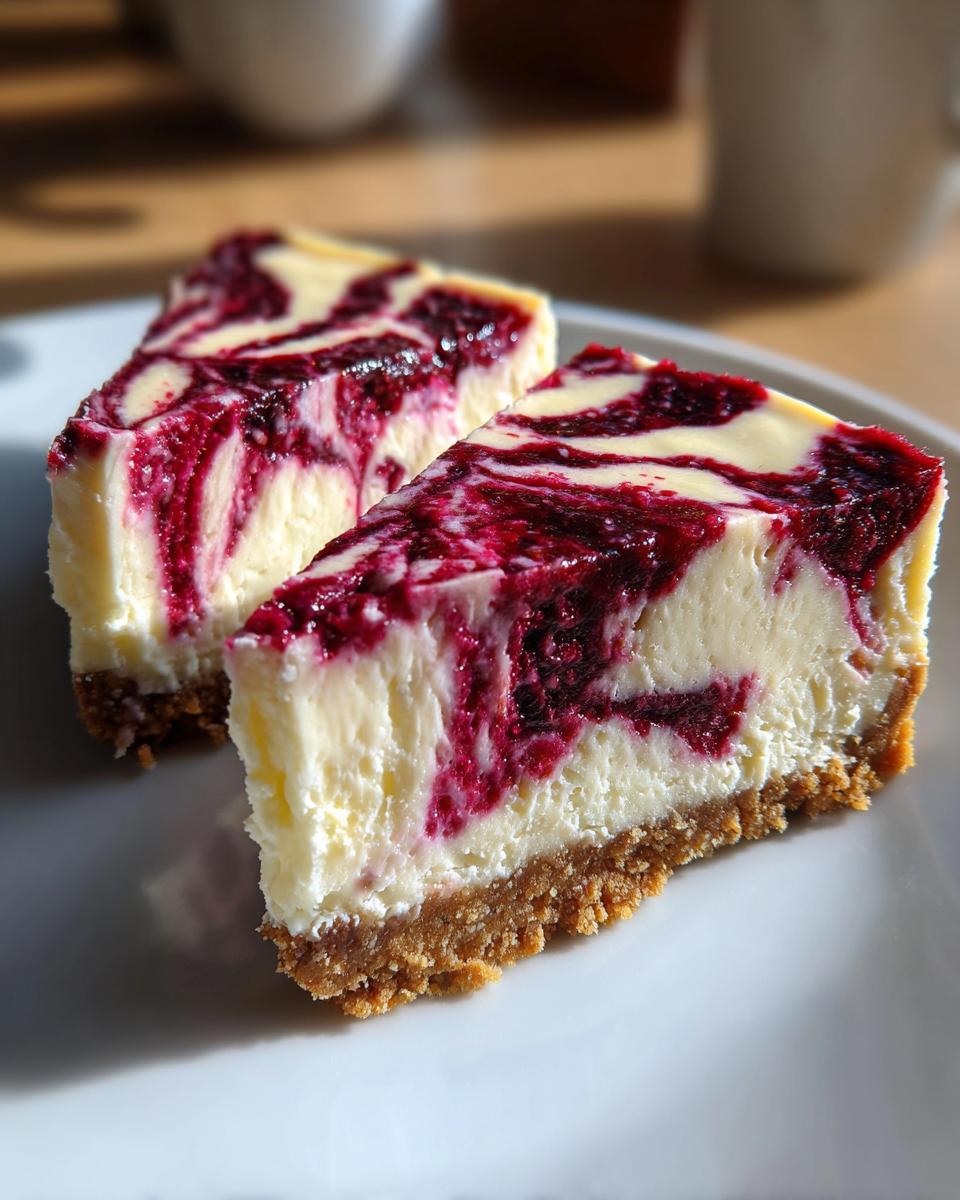
This is one of those recipes meant to be shared, right? Food is the thread that connects us, and I truly hope this cheesecake brings some wonderful smiles to your table, whether it’s for a cozy family night or a big holiday gathering. If you followed my guidance and that top stayed crack-free, I practically demand you give this recipe a 5-star rating!
Your feedback means the world to me because it lets me know which recipes are truly keepers for my readers. When you have a moment, jump down to the comments below and tell me what you loved best about this slice. Was it the way the white chocolate melted into the filling? Was it the tart punch from the raspberry swirl? Or maybe you just loved the stability of that buttery graham cracker crust? I read every single comment!
And hey, if you took a photo of your perfectly baked masterpiece—send it my way! Getting those social shares or seeing your gorgeous creations makes all the testing and measuring worth it. If you need to get in touch about a recipe question, you can always use the contact form. Happy serving, and enjoy every single rich bite of this spectacular dessert!
Estimated Nutritional Data for White Chocolate Raspberry Cheesecake
Now, listen, I have to give you the standard baker’s caveat here. I am Caroline, not a registered dietitian, so these numbers are based on my precise measurements and the ingredients listed above. They are solid estimates, but you know how it goes—if you swap out the sugar for a blend or use a different brand of white chocolate, things shift!
But for a slice of this incredibly decadent sweet treat based on the recipe above, expecting about 12 servings, here is what my calculations come out to. This helps you when you’re planning the menu for your special occasions!
- Serving Size: 1 slice
- Calories: 450
- Sugar: 35g (That includes the natural sugars from the fruit and white chocolate, of course!)
- Sodium: 250mg
- Fat: 30g
- Saturated Fat: 18g
- Carbohydrates: 40g
- Protein: 8g
This information is perfect if you’re doing any meal planning for guests who have specific needs, though I always suggest checking labels if that’s crucial for your family. This recipe is definitely richer than some of those lighter weight loss programs out there, which is exactly why we make it—for celebration!
Just remember, this cheesecake is rich. One slice is usually plenty to satisfy that craving for something truly spectacular. It’s meant to be an indulgence, a true showstopper dessert!
PrintSilky White Chocolate Raspberry Cheesecake (No-Crack Water Bath Method)
Make a showstopper dessert with this creamy, restaurant-style white chocolate raspberry cheesecake. This recipe uses a graham cracker crust and a water bath technique to guarantee a silky smooth, crack-free top.
- Prep Time: 30 min
- Cook Time: 75 min
- Total Time: 9 hours 45 min
- Yield: 12 servings 1x
- Category: Dessert
- Method: Baking
- Cuisine: American
- Diet: Vegetarian
Ingredients
- 1 1/2 cups graham cracker crumbs
- 1/4 cup granulated sugar (for crust)
- 6 tablespoons unsalted butter, melted
- 3 (8 ounce) packages cream cheese, softened
- 1 1/2 cups granulated sugar (for filling)
- 1 teaspoon vanilla extract
- 1/4 cup all-purpose flour
- 1 cup heavy cream
- 12 ounces white chocolate, melted and cooled slightly
- 4 large eggs, room temperature
- 1 cup raspberry sauce or puree (for swirl)
Instructions
- Prepare the crust: Mix graham cracker crumbs and 1/4 cup sugar. Pour melted butter over the crumbs and mix until combined. Press mixture firmly into the bottom of a 9-inch springform pan. Chill for 30 minutes.
- Prepare the water bath: Wrap the outside of the springform pan tightly with heavy-duty aluminum foil, covering the bottom and sides completely to prevent water seepage.
- Make the filling: Beat the softened cream cheese in a large bowl until smooth. Gradually add 1 1/2 cups sugar, vanilla extract, and flour, mixing until just combined.
- Pour in the heavy cream and the cooled, melted white chocolate. Mix on low speed until smooth. Do not overmix.
- Add eggs one at a time, mixing just until each egg is incorporated. Scrape down the sides of the bowl as needed.
- Pour the filling over the chilled crust.
- Create the swirl: Dollop spoonfuls of raspberry sauce over the top of the cheesecake batter. Use a knife or skewer to gently swirl the sauce into the batter.
- Bake using a water bath: Place the foil-wrapped springform pan into a larger roasting pan. Carefully pour hot water into the roasting pan until the water reaches halfway up the sides of the springform pan.
- Bake at 325°F (160°C) for 60 to 75 minutes, or until the edges are set but the center still jiggles slightly.
- Cool slowly: Turn off the oven, crack the oven door open slightly, and let the cheesecake cool inside the oven for 1 hour. This prevents cracking.
- Remove the cheesecake from the water bath and foil. Cool completely on a wire rack at room temperature.
- Chill: Cover and refrigerate the cheesecake for at least 6 hours, or preferably overnight, before serving. Serve chilled for the best texture.
Notes
- For a restaurant-style dessert that rivals The Cheesecake Factory, ensure your cream cheese and eggs are at true room temperature for a lump-free filling.
- If you prefer a different base, substitute the graham crackers with crushed Oreos or digestive biscuits for a crust variation.
- This recipe is excellent for special occasions and holidays when you need a showstopper dessert.
Nutrition
- Serving Size: 1 slice
- Calories: 450
- Sugar: 35g
- Sodium: 250mg
- Fat: 30g
- Saturated Fat: 18g
- Unsaturated Fat: 12g
- Trans Fat: 0.5g
- Carbohydrates: 40g
- Fiber: 1g
- Protein: 8g
- Cholesterol: 110mg