
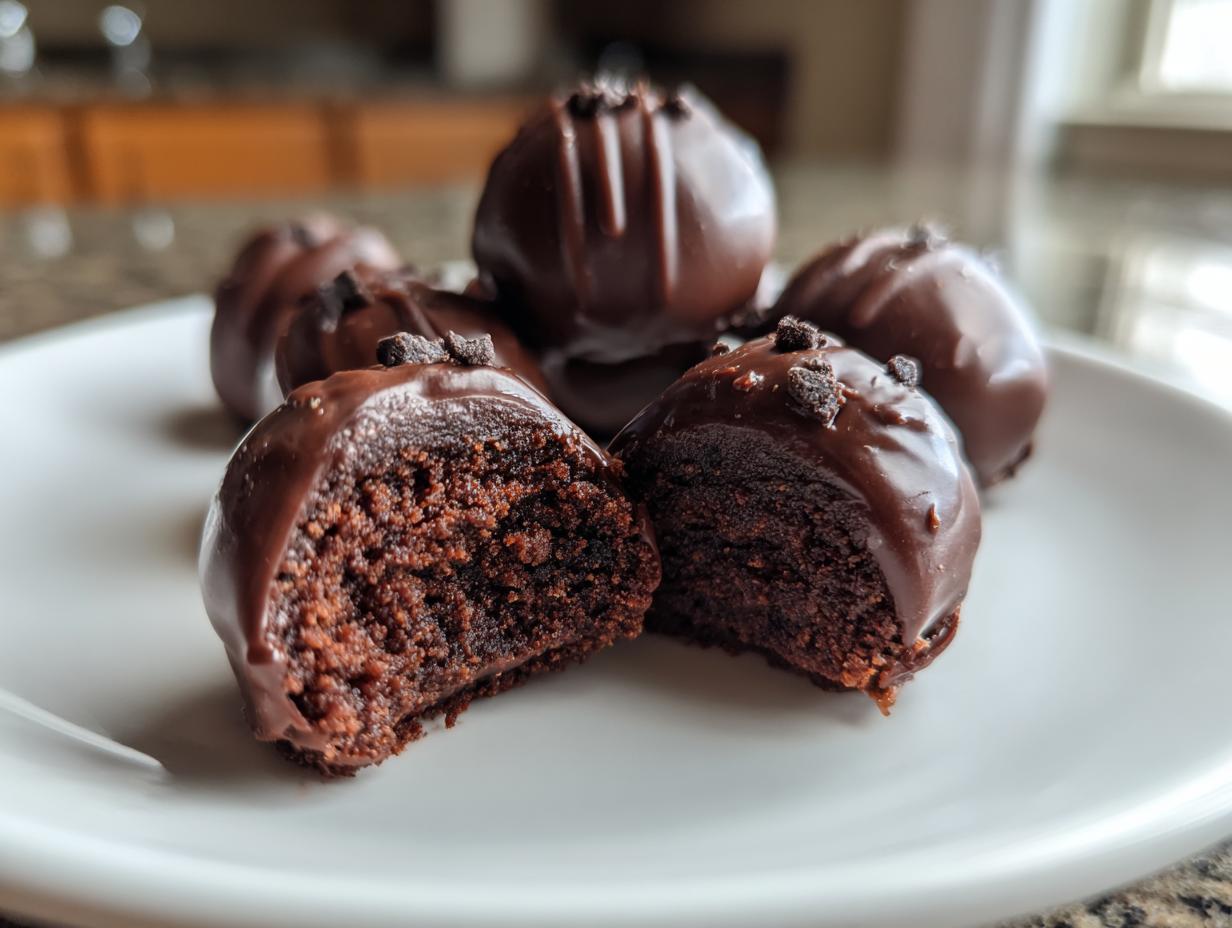

Oh, Oreos. Just the name makes me think of dunking them in milk as a kid, right? They’re pure magic on their own, but when you transform them into these little bites of heaven called Oreo balls? Forget about it! These little guys are my absolute go-to for literally *any* get-together. Need an easy holiday treat? Done. Potluck surprise? Nailed it. Just want a ridiculously delicious afternoon pick-me-up? You betcha. They’re these perfectly fudgy, sweet chocolate bites that taste way more complicated than they actually are. My grandma used to make them for us, and seeing them disappear bowl by bowl always made her so happy.
- Why You'll Love These Oreo Balls
- Gather Your Ingredients for Perfect Oreo Balls
- How to Make Delicious Oreo Balls: Step-by-Step
- Tips for Perfectly Formed Oreo Balls
- Ingredient Notes and Substitutions for Oreo Balls
- Storing and Reheating Your Oreo Balls
- Frequently Asked Questions About Oreo Balls
- Estimated Nutritional Information
- Share Your Oreo Ball Creations!
Why You’ll Love These Oreo Balls
Seriously, what’s not to love? These little treats are:
- Super Easy to Make: No oven required, so you can whip them up in no time!
- Always a Hit: Who can resist Oreos and chocolate? They disappear faster than you can say “more, please!”
- So Versatile: Perfect for holidays, parties, bake sales, or just a sweet craving.
- Nostalgic Fun: They bring back all those happy childhood memories of Oreos and milk.
Gather Your Ingredients for Perfect Oreo Balls
Absolutely! Grab your apron, because we’re about to get our hands on the best Oreo balls recipe ever. The beauty of these is how simple the ingredient list is, but trust me, these few things work pure magic together. Don’t worry about fancy stuff; we’re keeping it classic, folks!
You’ll Need:
- 1 package (14.3 oz) Oreo cookies: The star of the show! You can use regular Oreos, Golden Oreos, or even some fun seasonal ones. Just make sure you get the full package.
- 1 package (8 oz) cream cheese: This is key! Make sure it’s fully softened at room temperature. It should feel squishy when you poke it. This helps it mix in smoothly without any lumps.
- 2 cups semi-sweet chocolate chips: For that delicious coating. You can totally switch this up with milk chocolate or dark chocolate if that’s your jam.
- 1 tablespoon vegetable shortening (optional, but recommended!): Trust me on this one. A little bit of shortening makes the chocolate melt super smooth and gives it a nice sheen. It’s my secret weapon for a perfect dip every time.
- White chocolate or sprinkles for decoration (optional): If you’re feeling fancy or making these for a holiday, a little drizzle of white chocolate or some colorful sprinkles takes them over the top!
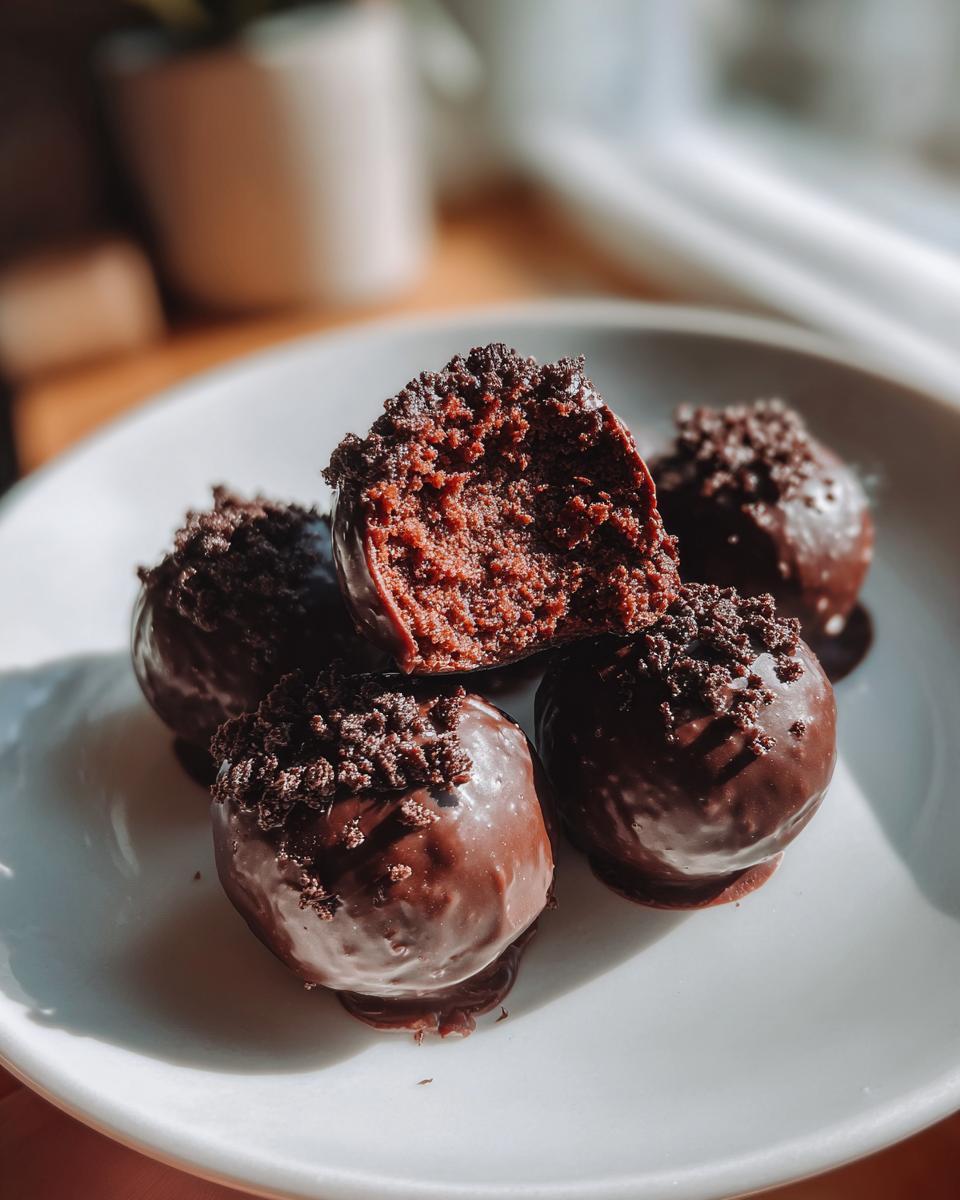
How to Make Delicious Oreo Balls: Step-by-Step
Alright, let’s get down to business and turn those simple ingredients into pure magic! Making these Oreo balls is honestly as fun as eating them, and with these steps, you’ll be a pro in no time. Just follow along, and we’ll have a tray full of chocolatey goodness ready before you know it. For a super simple version, you might want to check out this three-ingredient recipe too!
Preparing the Oreo Crumbs
First things first, we need crumbs! Pop your whole Oreos – yes, the entire cookie, cream and all – into a food processor. Blitz them until they’re super fine, like dark sand. If you don’t have a food processor, no worries! Just toss them in a sturdy zip-top bag, seal it tight, and bash them with a rolling pin until you get that fine crumb texture. Easy peasy!
Combining Crumbs and Cream Cheese
Now, grab a medium bowl. Dump in all those lovely Oreo crumbs and your softened cream cheese. Get in there with a sturdy spoon or spatula – or even your (clean!) hands – and mix it all up really, really well. You want it to be completely combined, sticky but firm, almost like Play-Doh. If it feels too crumbly, add a tad more cream cheese. Too sticky? A few more crumbs can help. We’re aiming for a dough that holds together.

Rolling and Chilling Your Oreo Balls
Time to get hands-on! Scoop out about a tablespoon of the mixture at a time and roll it between your palms into little balls, about an inch wide. Think slightly larger than a gumball. As you roll them, place them on a baking sheet lined with parchment paper. Don’t skip the parchment – it’s a lifesaver! Once they’re all rolled, pop that whole sheet into the fridge for at least 30 minutes. This chilling step is super important; it firms them up so they don’t fall apart when we dip them in chocolate.
Melting Chocolate for Dipping
While your Oreo balls are chilling, let’s get the chocolate ready. You can do this in the microwave or over a double boiler. If microwaving, use a microwave-safe bowl and heat the chocolate chips (and that optional tablespoon of shortening) in 30-second bursts, stirring really well after each one. Keep going until it’s all smooth and melty. Overheating will ruin it, so be patient! If using a double boiler, just melt it gently over simmering water. You want it pourable and luscious.
Dipping and Decorating Your Oreo Balls
Okay, moment of truth! Take your chilled Oreo balls out of the fridge. Use a fork or a candy-dipping tool to dip each ball into the melty chocolate. Just give it a little swirl to coat it completely, then lift it up and let any excess chocolate drip back into the bowl. Pop the perfectly coated ball back onto your parchment-lined baking sheet. If you’re adding sprinkles or drizzling white chocolate, now’s the time to do it while the coating is still wet!
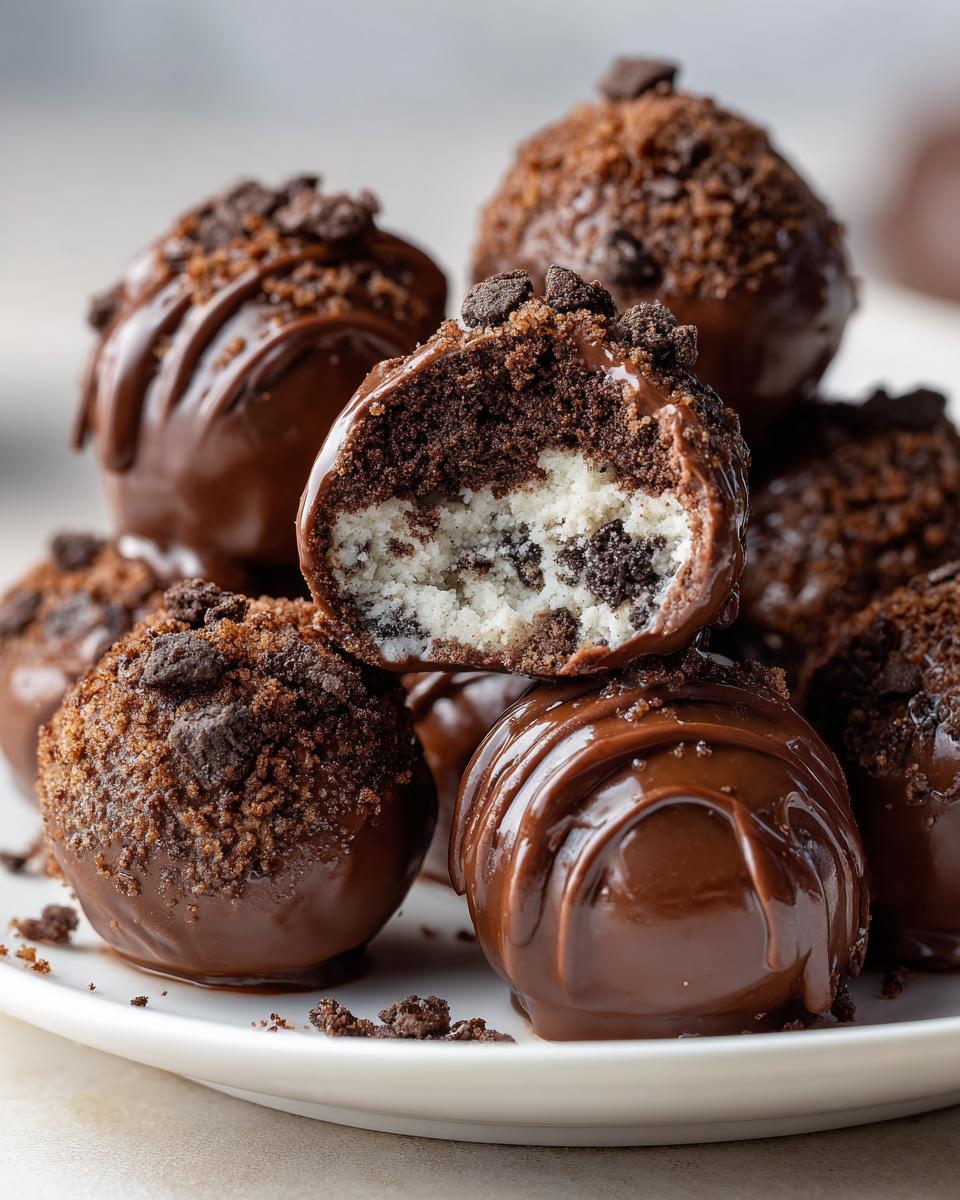
Setting the Chocolate Coating
Almost there! Once all your Oreo balls are dipped and decorated, put that baking sheet back into the refrigerator. Let them chill for at least 15-20 minutes, or until the chocolate coating is completely firm and set. This makes them look polished and ready to serve. Once they’re set, you can transfer them to an airtight container.
Tips for Perfectly Formed Oreo Balls
You know, I’ve made a *lot* of these Oreo balls, and sometimes things can get a little… well, sticky! Or maybe your balls aren’t holding their shape quite right. Don’t you worry one bit, because I’ve learned a few tricks along the way. First off, if your mixture feels too sticky to roll, it probably needs a little more chilling time. Pop the whole bowl back in the fridge for another 15-20 minutes. Sometimes, the warmth of your hands can make it tricky, too. So, if rolling is a mess, try using two spoons to scoop and shape, or even roll them quickly between two pieces of parchment paper. For the chocolate coating, make sure those balls are good and firm before dipping; that’s the secret to a smooth, beautiful finish. If your chocolate gets too thick while you’re working, just pop it back in the microwave for 10 seconds to loosen it up. For more baking wisdom and tips, you can always check out our blog! Happy baking!
Ingredient Notes and Substitutions for Oreo Balls
Okay, let’s talk ingredients for these amazing Oreo balls! The recipe is pretty straightforward, but a few little tweaks can make a big difference. For the Oreos, you can really use any flavor! Classic chocolate, Double Stuf (though you might need a touch more cream cheese!), Golden Oreos, even those fun seasonal ones if you can find them. They all work! When it comes to cream cheese, make sure it’s full-fat and truly softened. That’s key for getting a smooth texture without lumps that can make rolling tricky. If you’re out of vegetable shortening for the chocolate, you can sometimes get away with a tiny bit of coconut oil, but shortening really does give the smoothest, glossiest finish for dipping.
Storing and Reheating Your Oreo Balls
So, you’ve made these incredible Oreo balls and somehow, miraculously, you have leftovers! Good for you! The best way to keep these little delights tasting just as amazing is to store them properly. Just pop them into an airtight container and pop that into the refrigerator. They’ll stay nice and fresh for about a week, though honestly, they rarely last that long around here! Since they’re no-bake and dipped in chocolate, they’re best served chilled, so no reheating needed!
Frequently Asked Questions About Oreo Balls
Got questions about these little decadent bites? I totally get it! These Oreo balls are so popular, and everyone has their own little quirks when making them. Here are some of the most common things people ask:
Can I make Oreo balls without cream cheese?
You know, cream cheese is what really makes these Oreo truffles so wonderfully fudgy and helps them hold their shape. While you *could* try mixing crushed Oreos with something else, like melted butter or even condensed milk, it just won’t have that same signature creamy texture or richness. I really recommend sticking with the cream cheese for the best results! If you’re curious about other creamy Oreo goodness, you might want to check out our No-Bake Oreo Cheesecake!
How do I get a smooth chocolate coating on my balls?
Ah, the smooth coat! This is where that little bit of vegetable shortening comes in super handy. It helps the chocolate chips melt down to a silkier consistency. Make sure your Oreo balls are nice and firm from the fridge before you dip them – that’s the *other* big secret to a smooth coating that doesn’t smudge. Also, don’t use too much chocolate on your dipping fork, just let the excess drip off naturally.

Can I freeze these no-bake cookie balls?
Yes, you absolutely can! These no-bake cookie balls freeze beautifully. Just make sure the chocolate coating is completely set. Then, arrange them in a single layer on a baking sheet and freeze until solid, about an hour. Once frozen, transfer them to an airtight container with parchment paper between layers. They’ll keep well in the freezer for a couple of months. Just let them thaw on the counter for about 15-20 minutes before you want to enjoy them!
What if my Oreo mixture is too crumbly or too sticky?
This is a common one! If your mixture seems too crumbly and won’t stick together for rolling, it might need a bit more cream cheese, or maybe your cream cheese wasn’t soft enough. Try working it a little more with your hands. If it’s too sticky to handle, pop the whole bowl back into the fridge for another 20 minutes to firm up. Sometimes, the warmth of your hands can also make it sticky, so try rolling them quickly or using spoons to help shape them.
Can I use different kinds of Oreos?
Oh, absolutely! That’s part of the fun! While classic Oreos are amazing, feel free to experiment. Golden Oreos make a lighter, sweeter bite (and are great for spring or summer parties!). Red Velvet Oreos were a big hit around Valentine’s Day. Even the seasonal flavors can be super fun. Just remember that if you use Double Stuf Oreos, you might need a tiny bit more cream cheese because there’s more filling.
Estimated Nutritional Information
Just a heads-up, these numbers are approximate! The exact calories and whatnot can sneak around depending on the brands of Oreos and chocolate chips you grab, and how big you roll those balls. But for a general idea, one of these little blissful Oreo balls usually clocks in around 150 calories, give or take. You’re looking at about 9g of fat, with 5g of that being saturated, and roughly 17g of carbohydrates. Remember, these are estimates, but they give you a good idea of the rich, decadent treat you’re about to enjoy!
Share Your Oreo Ball Creations!
I just *love* seeing all your amazing creations! Once you’ve whipped up your batch of these yummy Oreo balls, take a picture and share it with me! Drop a comment below, tell me how they turned out, and maybe even give the recipe a star rating. You can also tag me on social media – I’d be thrilled to see all your beautiful chocolate-dipped goodies! Find me over on Facebook!
PrintEasy Oreo Balls Recipe

Learn how to make delicious no-bake Oreo balls, also known as Oreo truffles. These sweet chocolate bites are perfect for parties and holidays.
- Prep Time: 20 min
- Cook Time: 0 min
- Total Time: 50 min
- Yield: 24 balls 1x
- Category: Dessert
- Method: No-Bake
- Cuisine: American
- Diet: Vegetarian
Ingredients
- 1 package (14.3 oz) Oreo cookies
- 1 package (8 oz) cream cheese, softened
- 2 cups semi-sweet chocolate chips
- 1 tablespoon vegetable shortening (optional, for smoother melting)
- White chocolate or sprinkles for decoration (optional)
Instructions
- Place Oreo cookies in a food processor and pulse until they form fine crumbs.
- In a medium bowl, combine the Oreo crumbs and softened cream cheese. Mix well until thoroughly combined.
- Roll the mixture into small balls, about 1 inch in diameter. Place them on a baking sheet lined with parchment paper.
- Chill the Oreo balls in the refrigerator for at least 30 minutes, or until firm.
- Melt the semi-sweet chocolate chips (and shortening, if using) in a microwave-safe bowl in 30-second intervals, stirring between each, until smooth. Alternatively, use a double boiler.
- Dip each chilled Oreo ball into the melted chocolate, ensuring it is fully coated. Use a fork to lift the ball and let excess chocolate drip off.
- Place the coated Oreo balls back on the parchment-lined baking sheet.
- If desired, drizzle with melted white chocolate or add sprinkles while the chocolate coating is still wet.
- Refrigerate the Oreo balls for at least 15-20 minutes, or until the chocolate coating is set.
Notes
- For a smoother chocolate coating, add 1 tablespoon of vegetable shortening to the chocolate chips when melting.
- You can use any flavor of Oreo cookies for this recipe.
- Store leftover Oreo balls in an airtight container in the refrigerator.
Nutrition
- Serving Size: 1 ball
- Calories: 150
- Sugar: 15g
- Sodium: 50mg
- Fat: 9g
- Saturated Fat: 5g
- Unsaturated Fat: 4g
- Trans Fat: 0g
- Carbohydrates: 17g
- Fiber: 1g
- Protein: 2g
- Cholesterol: 10mg